
Introduction: Embracing the Compact Lifestyle
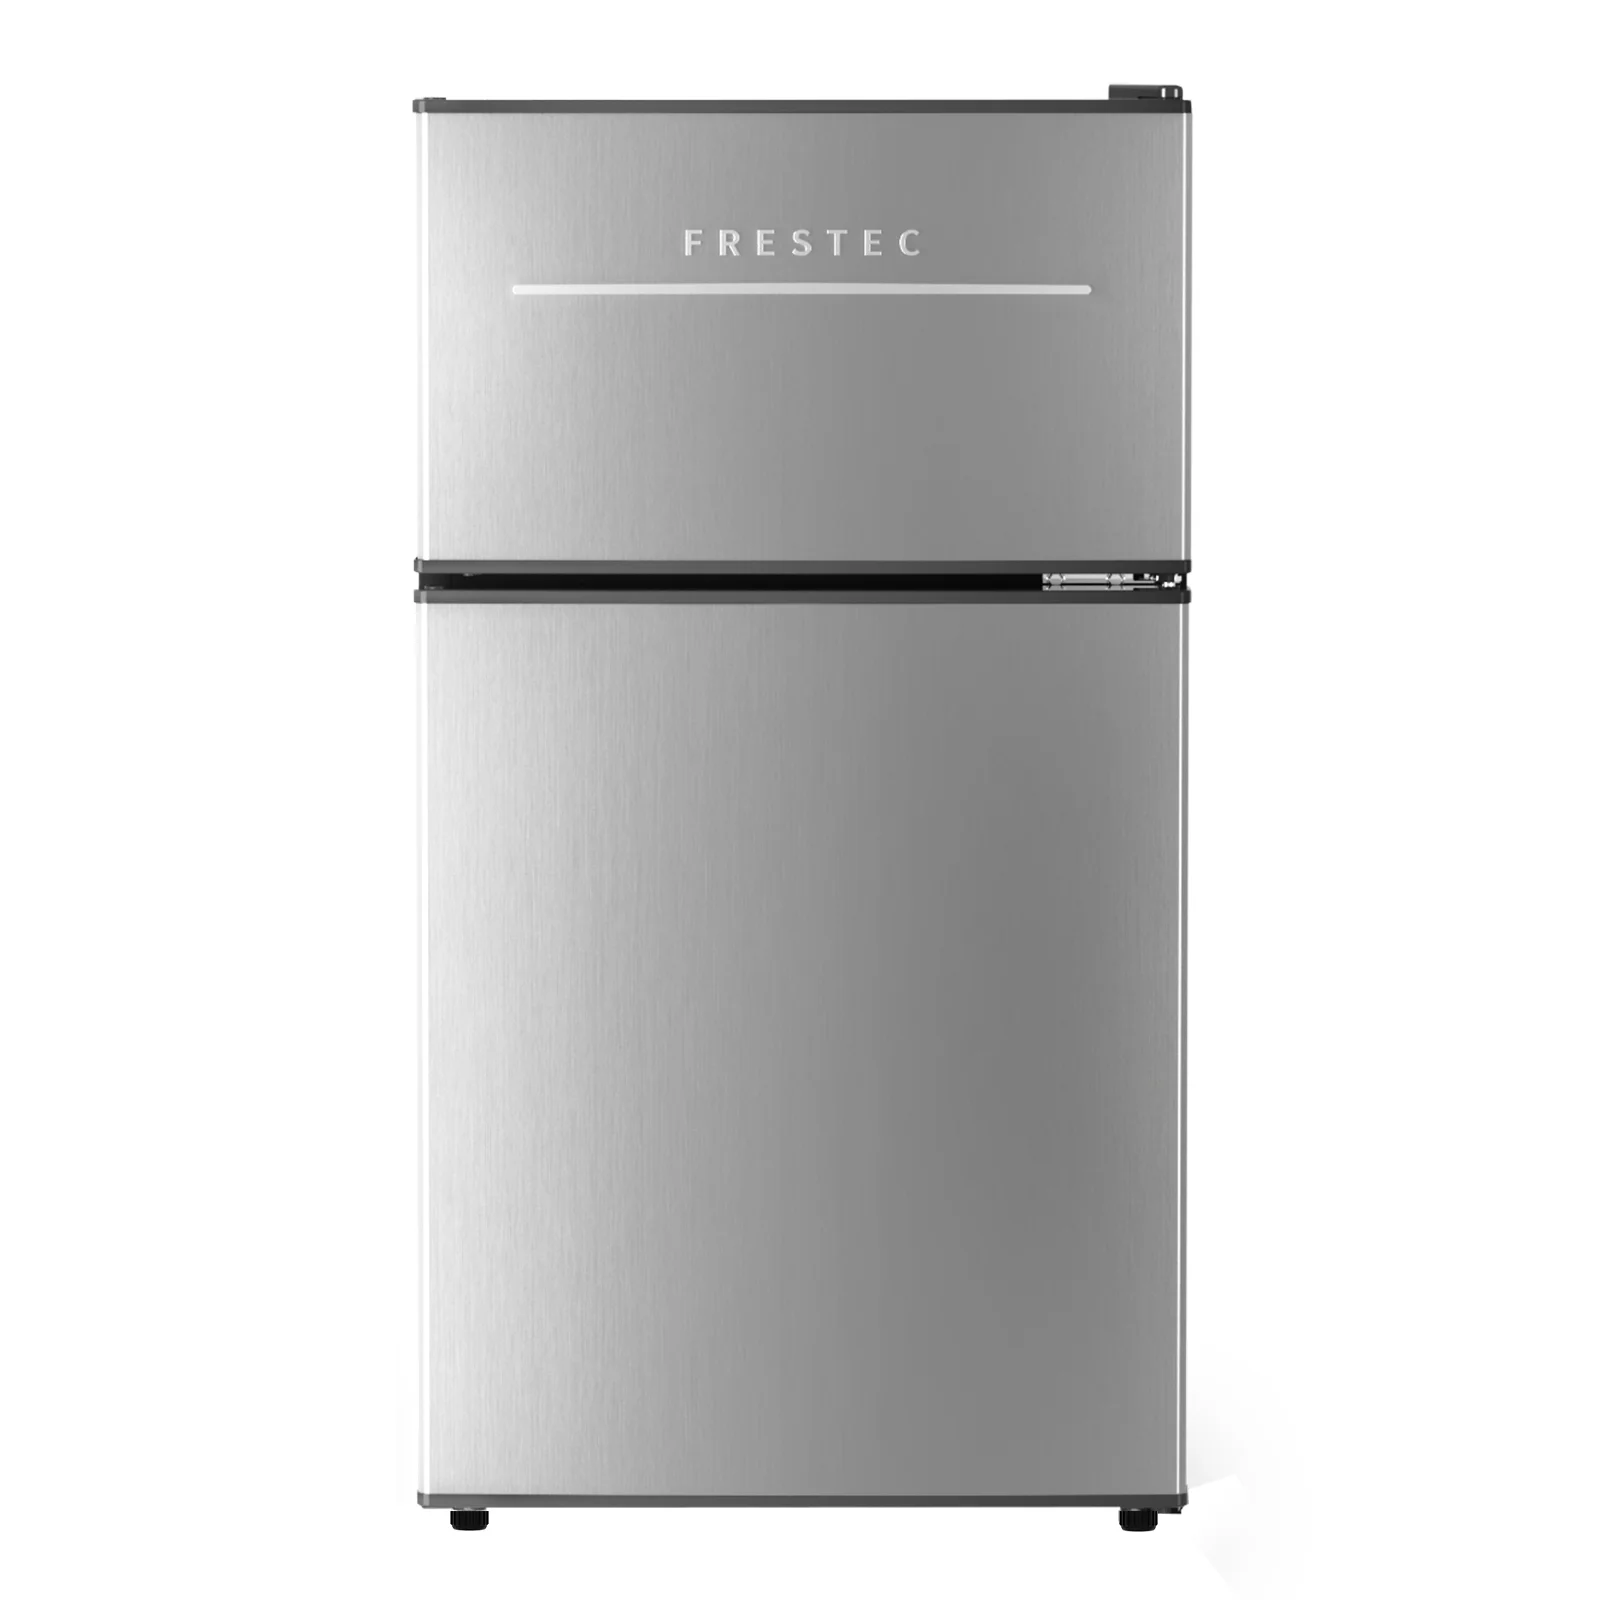
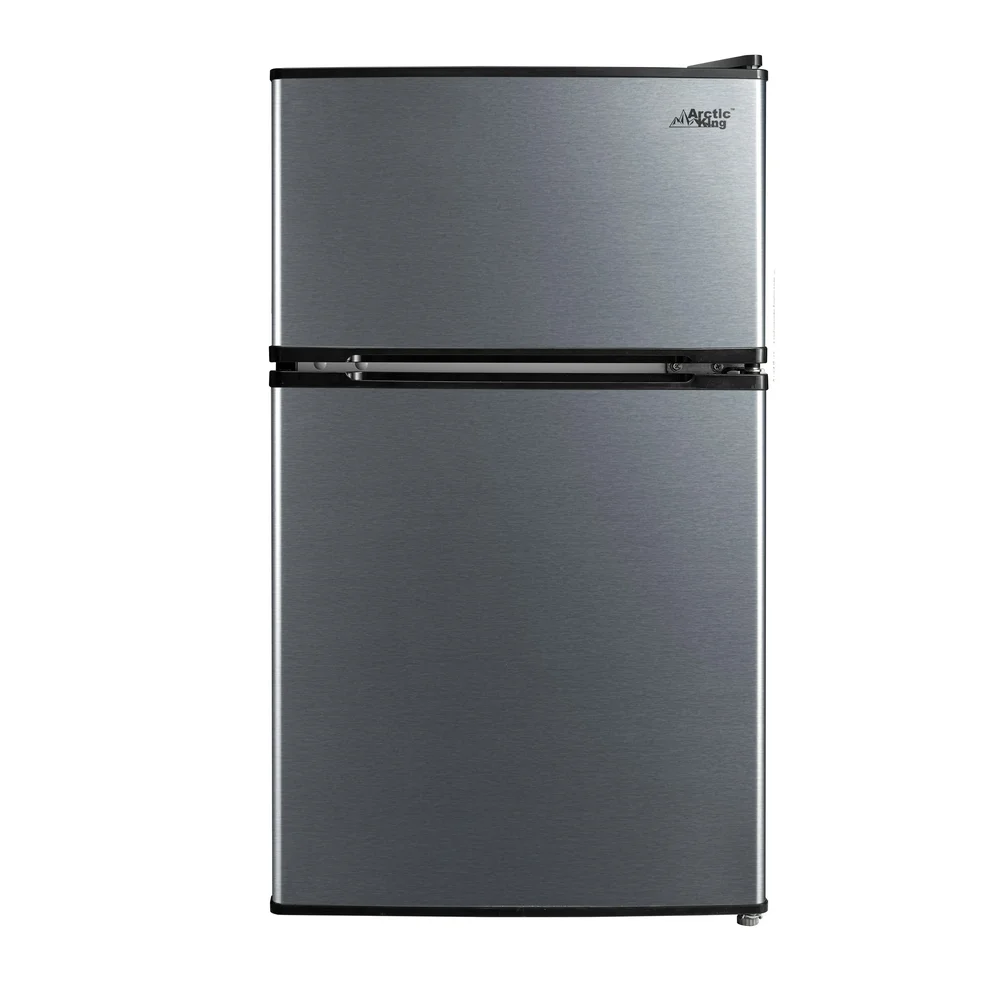
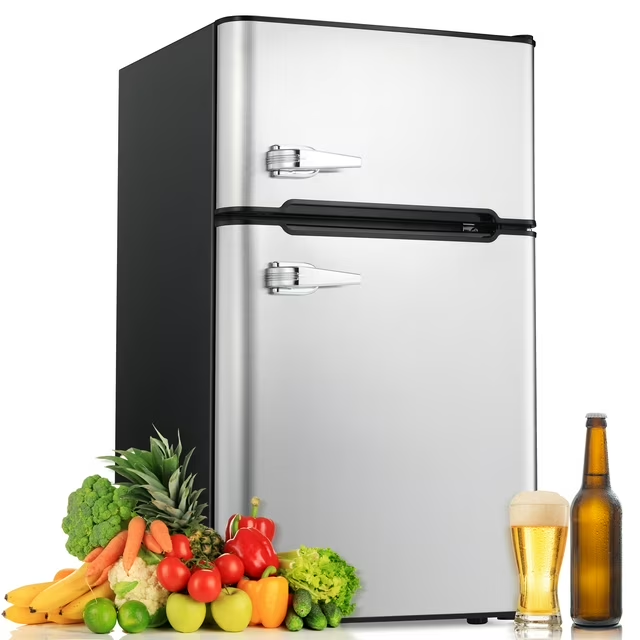
Living in smaller spaces, such as apartments, dormitories, or offices, often presents unique challenges; accordingly, effective storage solutions become imperative. One innovative option that has gained popularity is the 2 door mini fridge. This compact appliance combines stylish appearance with functionality. It helps optimize small living areas effectively. These fridges accommodate diverse storage needs. In this article, we will discuss the benefits of a 2-door mini fridge. We will explore how its dual-compartment design creates efficient storage arrangements. It also enhances the use of vertical space.
 Maximizing Storage with 2 Door Design
The Advantage of Dual Compartment Design
A 2 door mini fridge typically comprises a separate refrigeration area and a freezer compartment; thus, it presents several advantages over traditional single-door models:
- Enhanced Organization: By having distinct sections for freezing and cooling, users can easily separate different food categories, thereby minimizing confusion and maximizing accessibility.
- Increased Capacity: The independent zones allow users to store more items without compromising on organization. For example, you can keep drinks cool in one section while placing frozen meals in the other.
- Improved Functionality: A dual-zone design enables users to manage their perishable goods more efficiently, ensuring optimal storage conditions for various items.
The Importance of Vertical Space Utilization
Indoor designers often emphasize the value of vertical space in small living areas; consequently, a 2 door mini fridge can significantly contribute to effective vertical utilization:
- Stackable Storage: With the right shelving or organizers, you can take advantage of the top section of the fridge for items that don’t require frequent access or that are less perishable.
- Wall-Mounted Solutions: Consider installing shelves above or alongside the fridge for additional storage options for non-perishable items or kitchenware, thereby keeping your countertops clutter-free.
Practical Solutions for Apartment Living
Categorized Storage Strategies
Using a 2 door mini fridge can make a difference in how you categorize and store your food and beverages; therefore, here are some strategies to make the most out of your fridge:
- Segregating Beverages and Snacks: By keeping your beverages on the door shelves for easy access, you can utilize the main section for food. This approach not only fosters organization but also provides location certainty.
- Meal Prep Sections: If you designate one shelf for prepped meals and another for fresh produce, this practice maintains food freshness while making meal preparation quicker.
- Using Clear Containers: For smaller items, consider using clear bins to help you see what’s inside at a glance, thus making organization much easier.
Overcoming Space Limitations
The concern that small appliances like a 2 door mini fridge may not sufficiently cater to diverse needs is common among consumers. However, by adapting usage techniques, you can maximize your results:
- Opt for Smaller Portions: By buying smaller quantities of perishable goods, you can manage storage efficiently.
- Freezing as an Option: You can utilize the freezer compartment for items that can be preserved for longer periods, thus effectively doubling the storage capability of your mini fridge.
 Designing Your Space Around Your Mini Fridge
Visual Appeal and Layout Consideration
Integrating a 2 door mini fridge into your living space calls for thoughtful design considerations; thus, here are some suggestions:
- Choose the Right Spot: Position your fridge where it’s easily accessible. Moreover, consider placing it near your cooking area to streamline the meal prep process, thereby enhancing overall efficiency.
- Create a Cohesive Look: Use the fridge color and finish to complement your interior design; additionally, organizing nearby storage solutions can create a balanced aesthetic.
Enhancing Functionality with Accessories
Incorporating storage accessories can further enhance the functionality of a 2 door mini fridge. For instance:
- Magnetic Organizers: Use magnetic strips or holders on the side of the fridge for additional storage space for spices or kitchen tools.
- Under-Fridge Storage: If clearance allows, a rolling cart or flat containers can fit beneath the fridge to store non-perishable items or kitchen equipment, reflecting efficiency.
Sustainability and Efficiency
Energy Efficiency of Modern Mini Fridges
Many newer models of 2 door mini fridge are designed with energy efficiency in mind. As a result, not only do these models benefit the environment, but they also contribute to lower utility bills:
- Energy Star Ratings: When you look for fridges that meet Energy Star guidelines, you ensure that you are making a sustainable choice.
- Smart Temperature Control: Some models come with advanced temperature settings that help preserve food longer, using less energy along the way.
 Real-life Testimonials
Case Studies: Real Users, Real Benefits
Feedback from individuals living in small spaces consistently highlights the advantages gained from utilizing a 2 door mini fridge. For instance:
- University Student: Many students store healthy snacks and study essentials in the dual-compartment layout. This design keeps their limited kitchen space organized.
- Professional in a Small Apartment: Users find the mini fridge efficient for meal prep during busy work weeks. It helps them have fresh meals and snacks available.
The Architecture of Cooling Technologies: Semiconductor vs. Compressor
Exploring Cooling Methods
One of the primary factors to consider when investing in a 2 door mini fridge is the cooling technology used. There are two main types: semiconductor (thermoelectric) and compressor-based systems.
- Semiconductor Cooling: This method uses semiconductor devices to generate a temperature difference via electrical current. While these refrigerators are often quieter, they generally offer lower cooling efficiency and might not be suitable for maintaining frozen goods.
- Compressor Cooling: This traditional method relies on a compressor mechanism to cycle refrigerant gas and produce consistent cooling. As a result, compressor-based mini fridges typically have higher cooling capacities and are better equipped for freezing capabilities, making them the popular choice for 2 door mini fridges.
Capacity Ratios: Refrigeration and Freezer Space
When evaluating 2 door mini fridges, it’s crucial to analyze the capacity distribution between the fridge and freezer compartments. A well-balanced ratio typically includes:
- Refrigeration Compartment: Standard models may offer up to 70% of their total capacity for refrigeration, providing ample space for fruits, vegetables, and daily essentials.
- Freezer Compartment: Ideally, the freezer section should comprise around 30%. This proportion allows for storing frozen meals and ice without sacrificing overall functionality.
 Energy Efficiency and Noise Control
Understanding Energy Efficiency Ratings
Energy efficiency is a critical measure when choosing a 2 door mini fridge. Look for models with Energy Star certification, which guarantees lower energy consumption without sacrificing performance. For example, a model with an energy rating of A++ will use approximately 25% less electricity than a standard A-rated unit.
- Noise Control: Different brands, such as Midea and Danby, offer various features related to noise control. Both brands produce high-quality mini fridges. However, user reviews often highlight Midea’s effectiveness in minimizing operational noise. This feature makes it suitable for quieter environments, such as bedrooms or offices.
User Reviews and Recommendations
User feedback is invaluable in the selection process. According to various customer reviews:
- Midea 2 Door Mini Fridge: Highly rated for its energy efficiency, compact size (1.7 cubic feet), and quiet operation, making it a suitable choice for home use or dorm rooms.
- Danby 2 Door Mini Fridge: Known for its reliable cooling and larger freezer space, this fridge garners praise for its durability and performance in shared living situations.
Based on user evaluations, both models represent high value; however, for those prioritizing noise levels, Midea tends to be the frontrunner.
Space-Efficient Designs For Various Living Conditions
Quiet Operation and Mini Dimensions
Opt for 2 door mini fridges designed with sound-dampening technology for quieter performance, particularly models that boast:
- Decibel Ratings: Choose models that advertise noise levels under 40 dB for almost silent operation, ideal for bedrooms or offices.
- Compact Sizes: The widely acceptable mini size of about 1.6 cubic feet helps facilitate space-saving without sacrificing storage efficiency.
Reversible Doors and Shell Design
Consider models with reversible doors, allowing adaptability for your living or workplace. This flexibility is beneficial for small spaces, providing options on which direction the door opens based on your arrangement.
Furthermore, a 2 door mini fridge with a condensation-resistant exterior can prevent unsightly water spots and frost buildup—a particularly important quality in humid environments.
Smart Space Arrangements with Your Mini Fridge
Integrating a 2 door mini fridge into your living area can also encompass creative space layouts. For instance:
- Alignment with a Desk: Positioning a mini fridge next to your desk can enhance your working environment, allowing easy access to drinks and snacks during work hours.
- Near a File Cabinet: This arrangement can also help maintain an organized workspace, keeping refreshments and files in close proximity without cluttering the main area.
 Conclusion: The Future of Small Living
As living spaces shrink, the demand for efficient storage solutions rises. The 2-door mini fridge meets this need effectively. Its dual-zone design offers versatile storage options. Anyone can transform small areas into organized spaces. This is especially useful for students and young professionals. For those wanting to optimize their kitchens, the 2-door mini fridge is an excellent choice. It’s a top option for compact living.
Ultimately, the decision to incorporate a 2 door mini fridge can lead to a more organized and enjoyable living experience. After all, it dispels the myth that small spaces can’t accommodate diverse needs. It’s time to embrace efficient solutions that enhance both functionality and style. With this in mind, your compact living area can flourish with the right tools—starting with a 2 door mini fridge to rediscover the beauty of organized living!
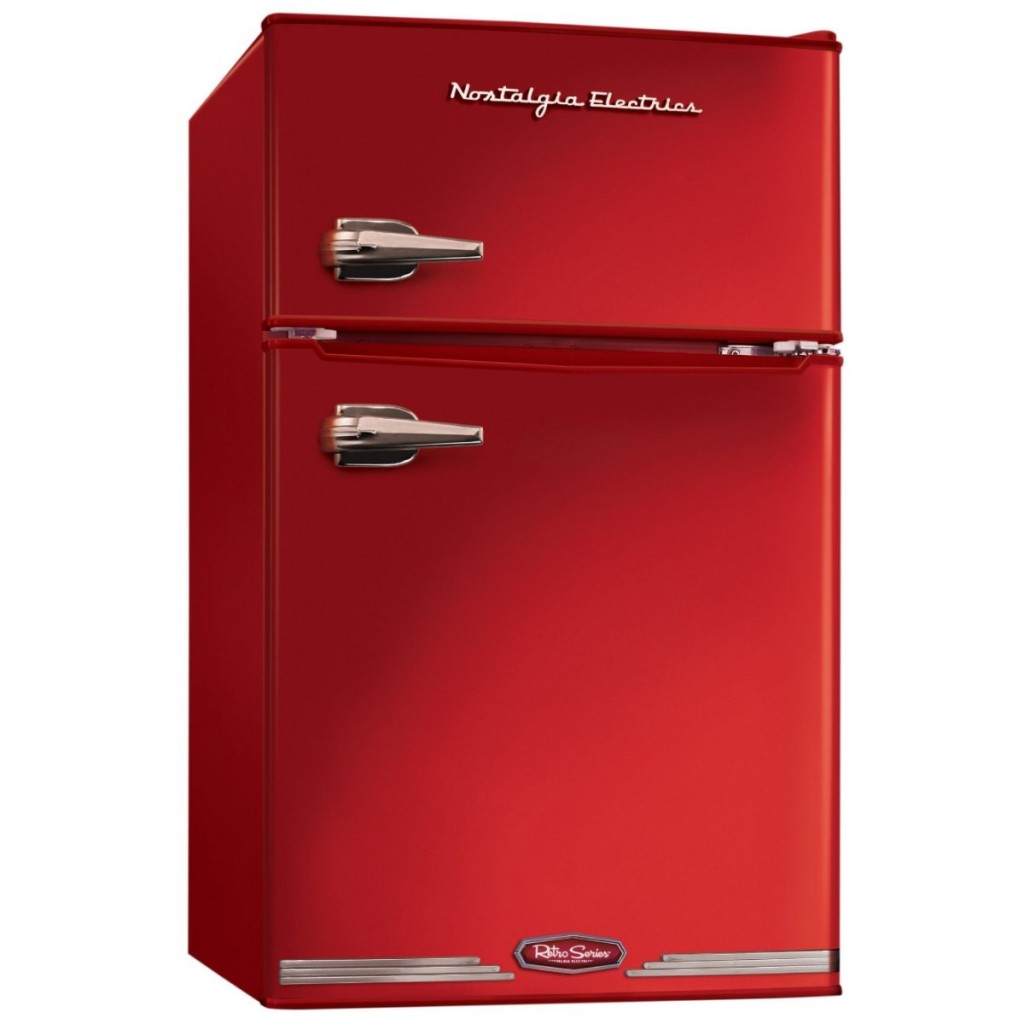 The Charm of Retro Design Elements
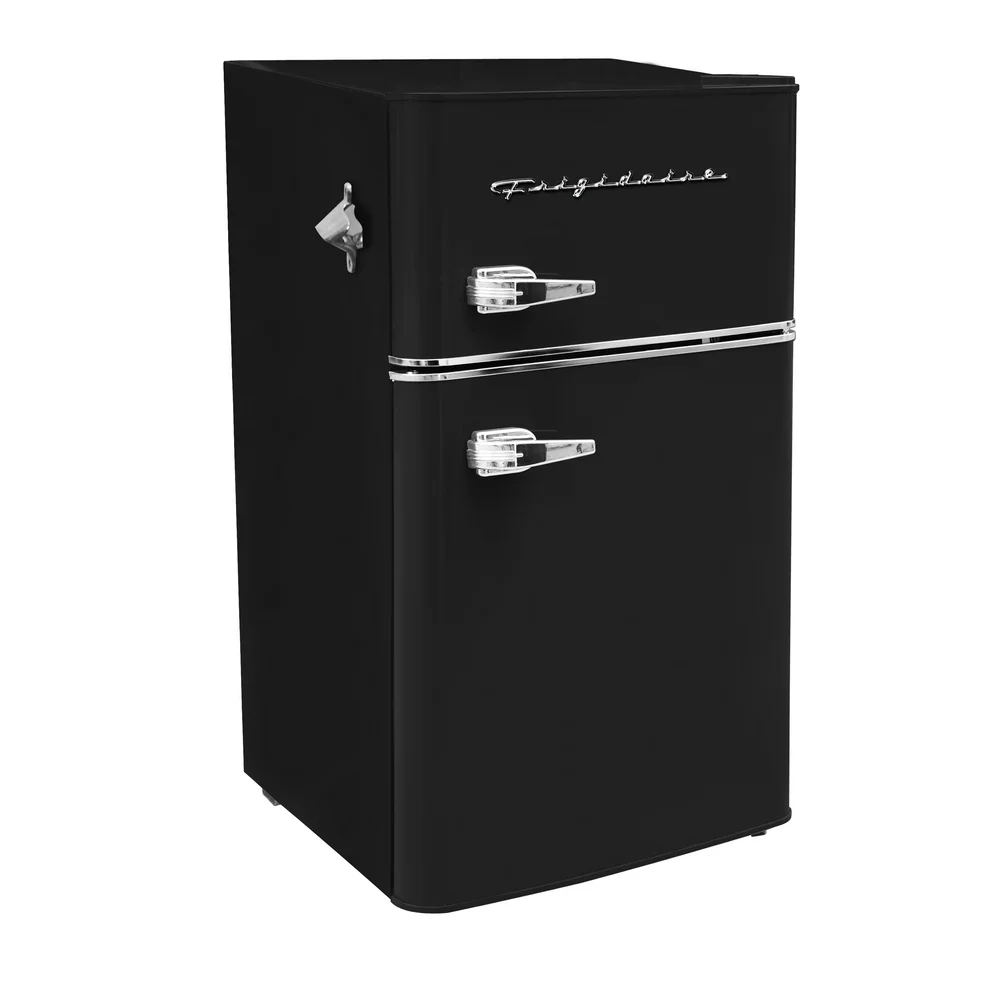 Crafting Focal Points in Small Spaces
 The Investment: A Long-Term Addition to Your Home
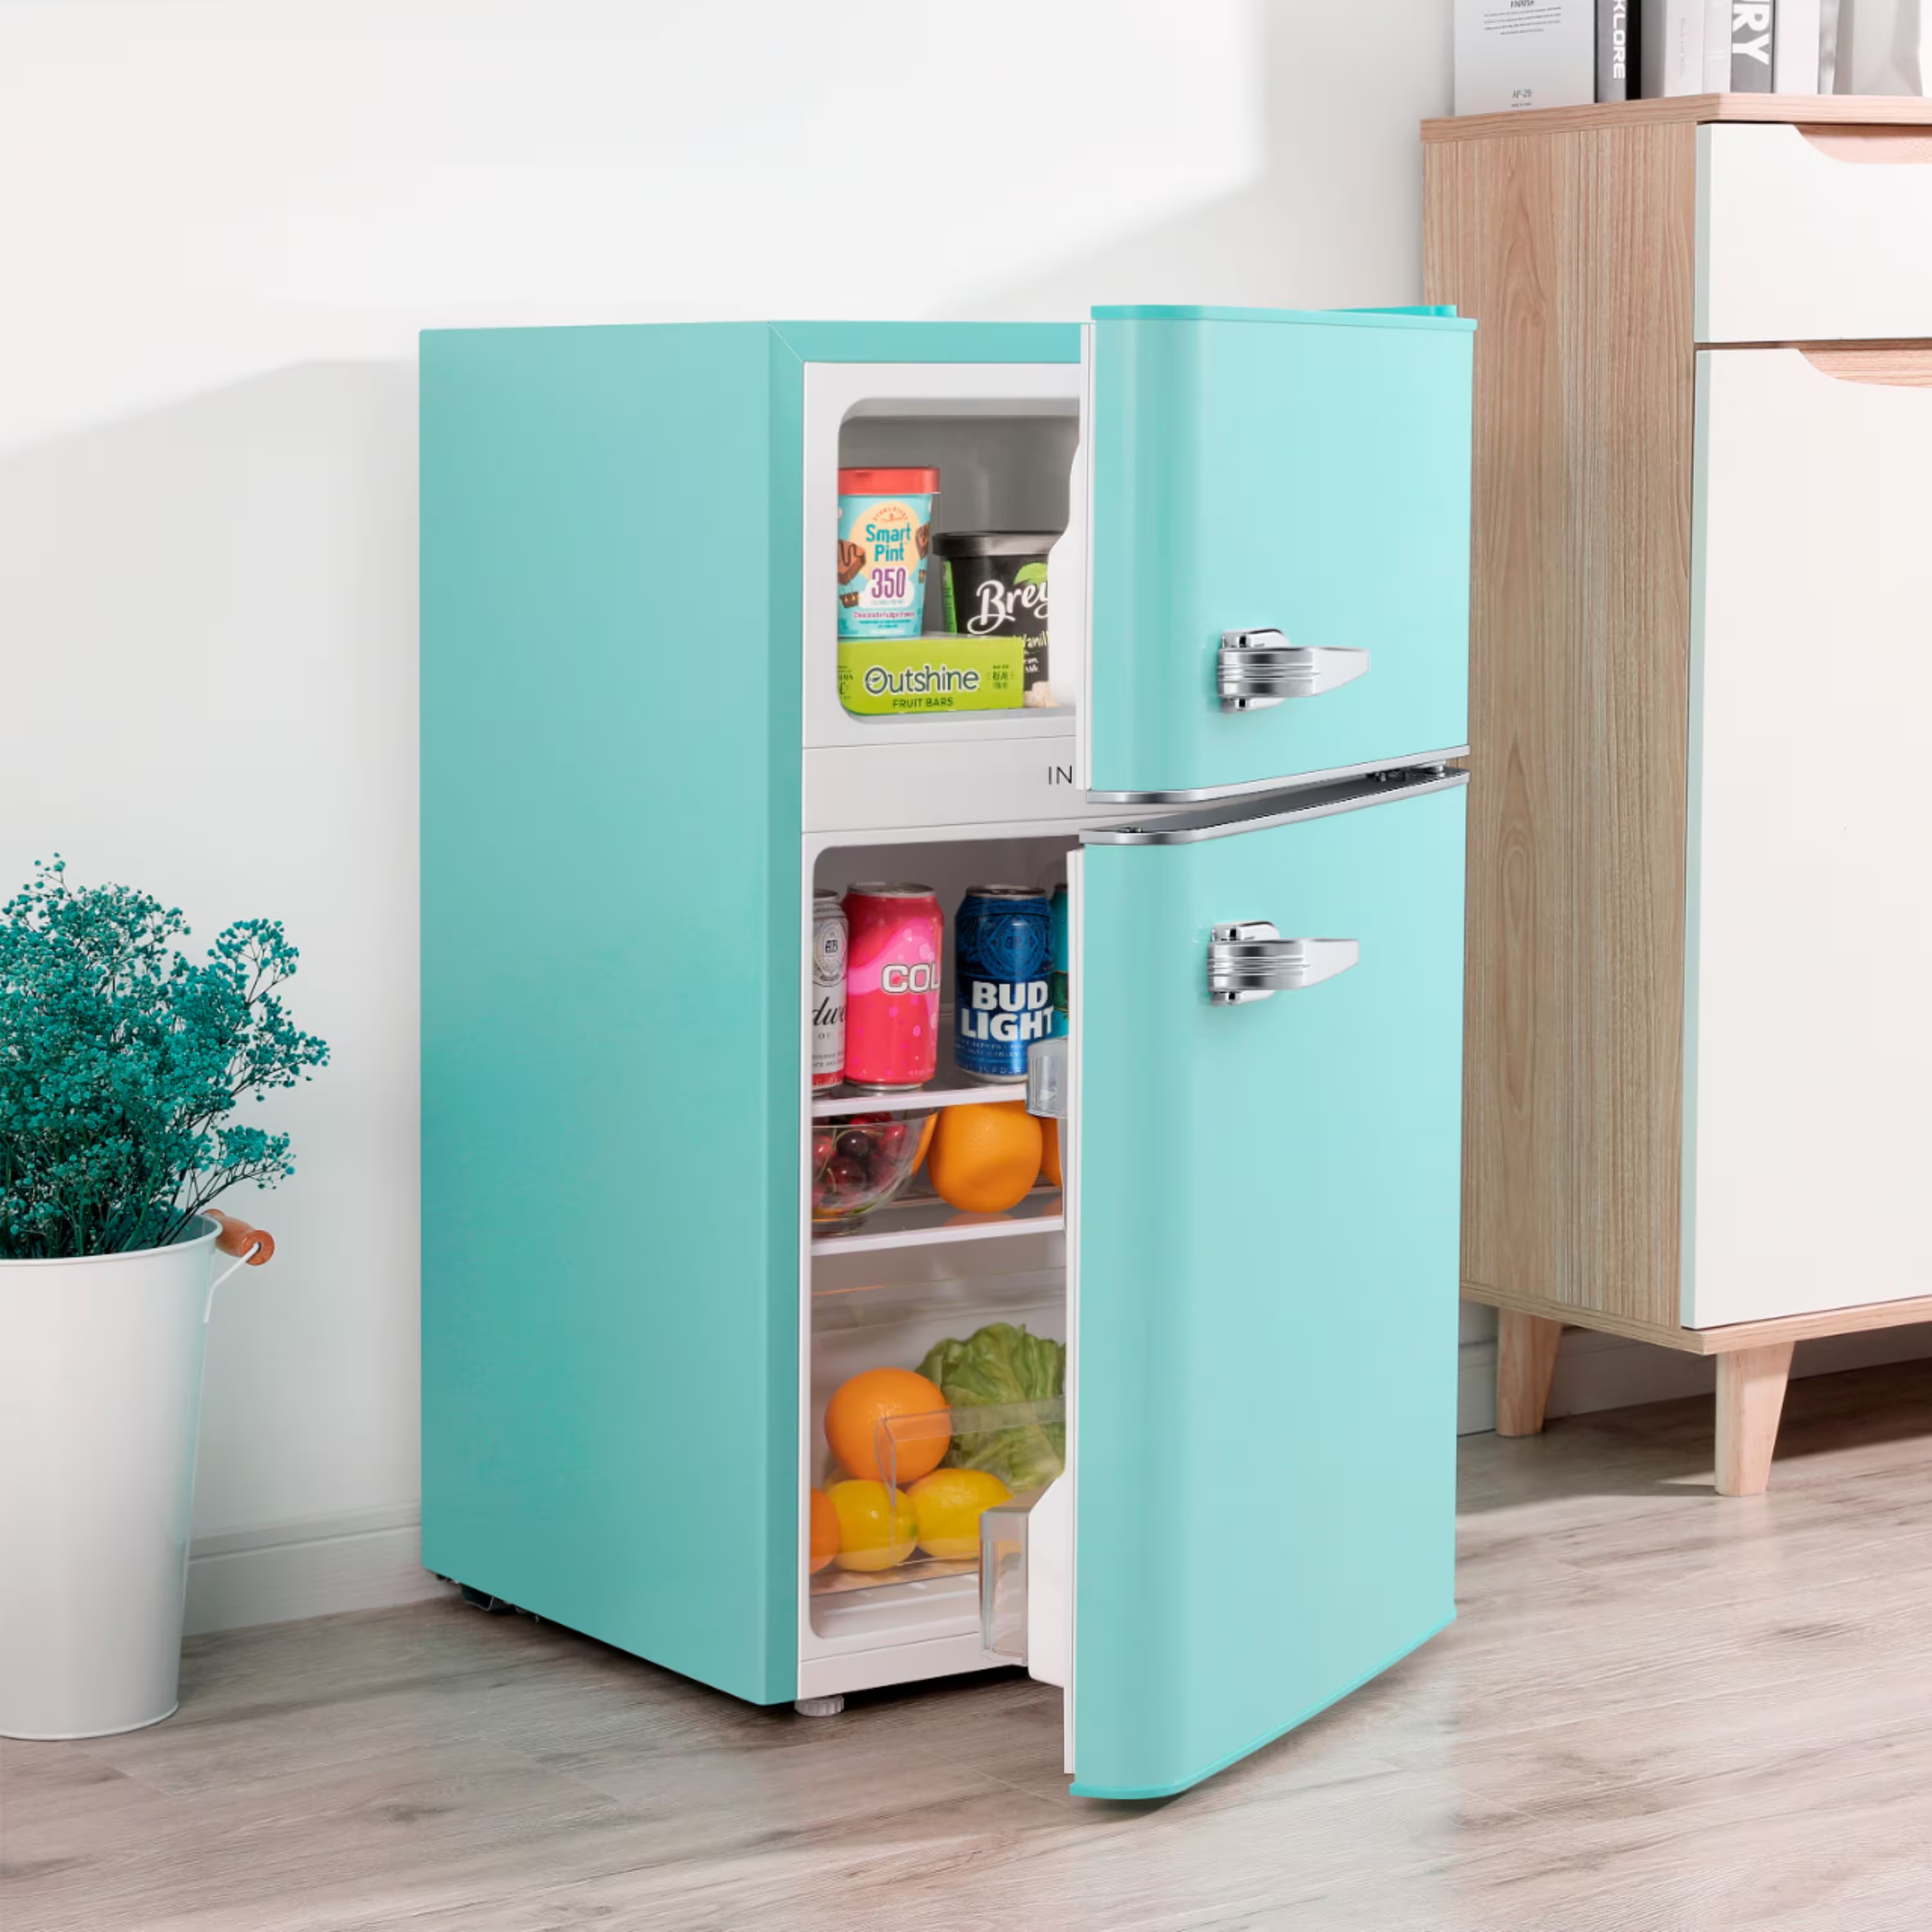 Performance Comparison of Leading Retro Brands
 Important Notes for Electrical Modifications
 The Size Comparison: Traditional Fridges vs. Mini Makeup Fridges
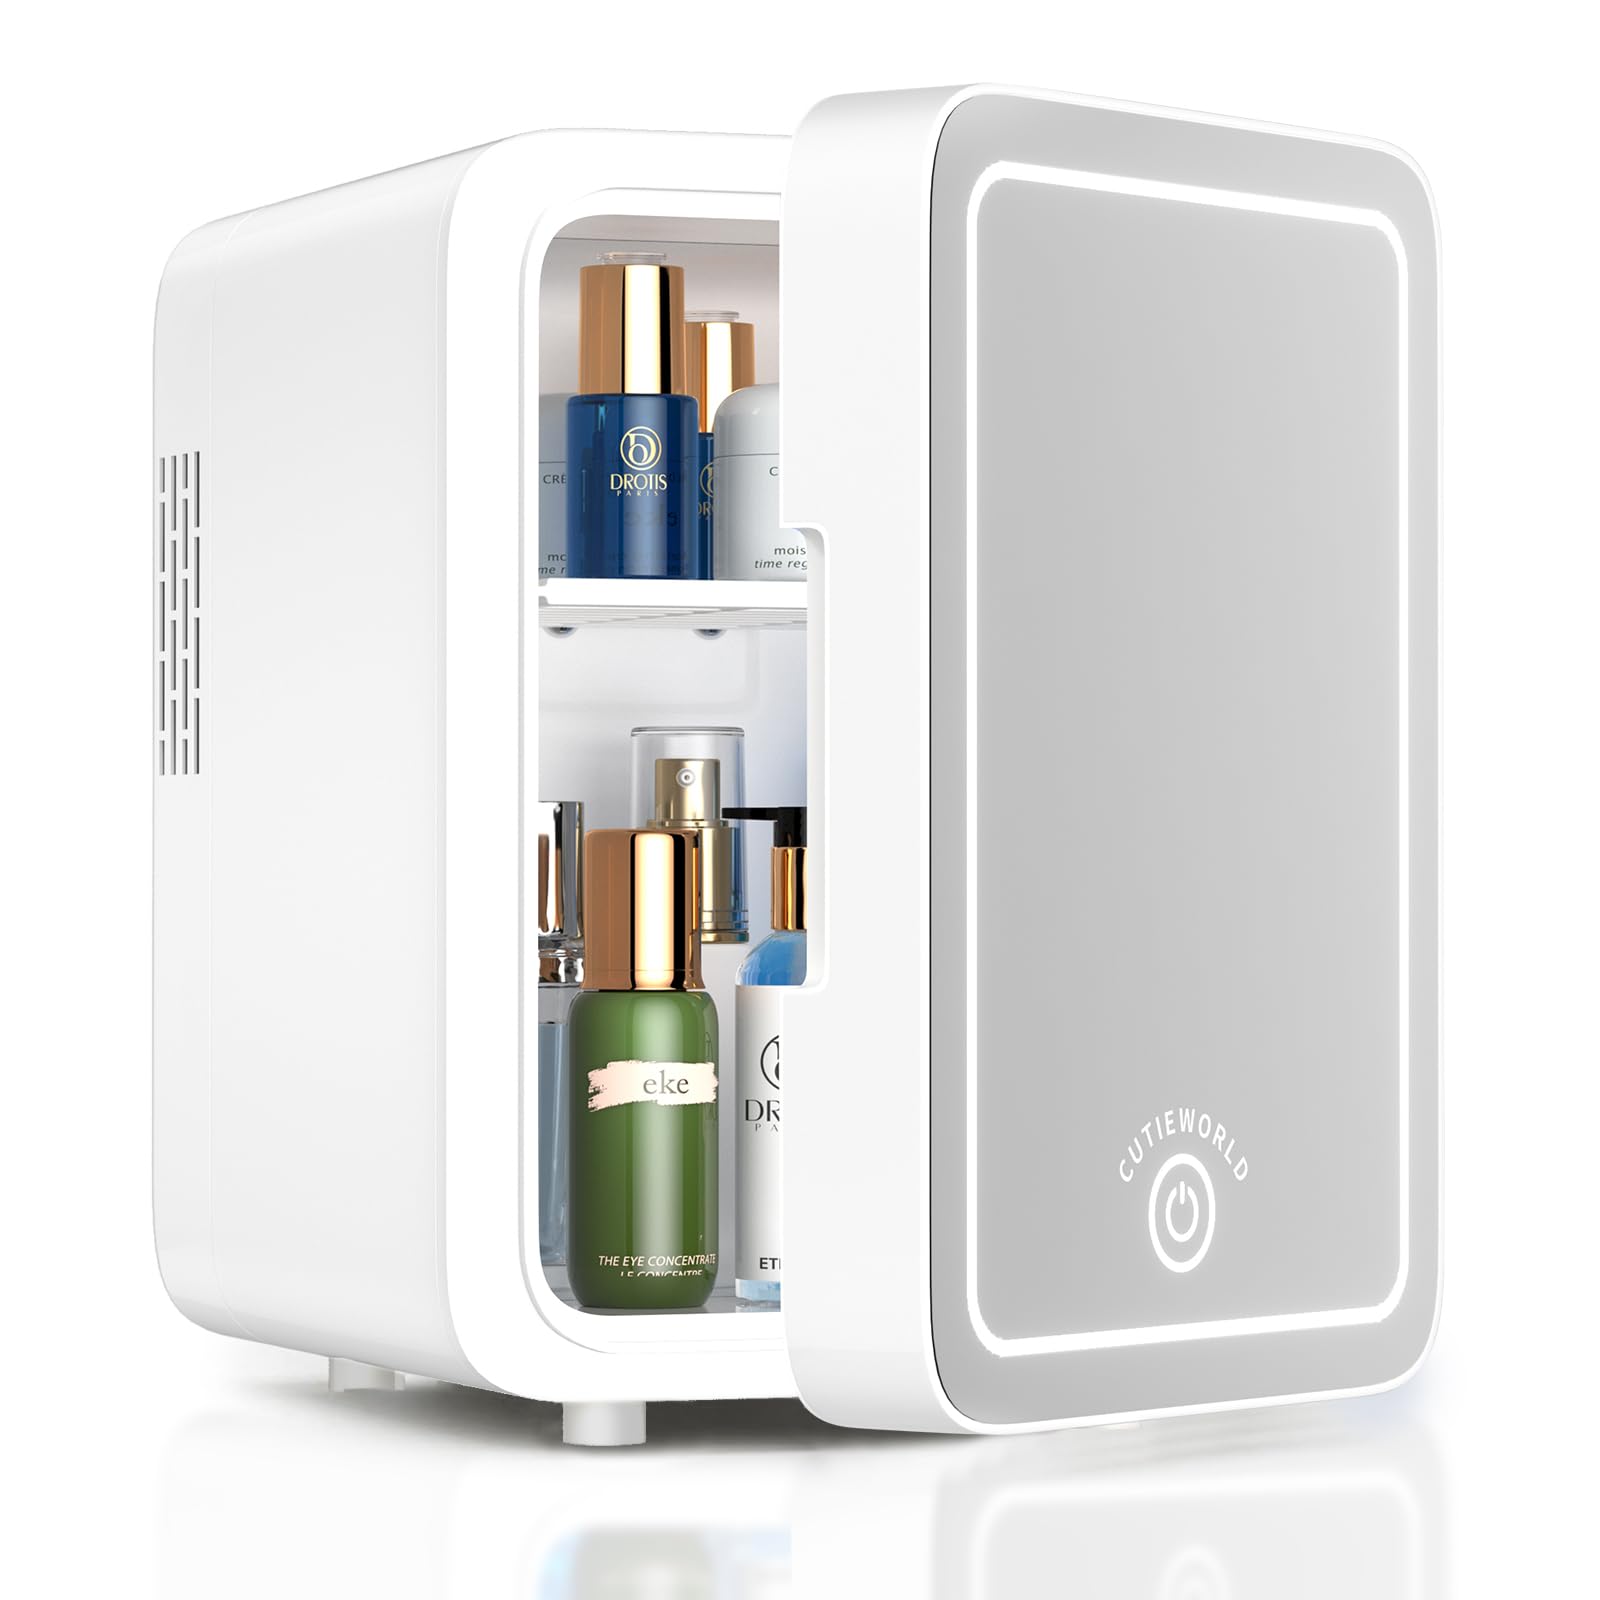 The Science of Low-Temperature Storage
 Understanding Cooling Technology: Semiconductor vs. Compressor
 Common Maintenance Tips for Your Mini Fridge
 Conclusion: The Skincare Upgrade You Didn’t Know You Needed
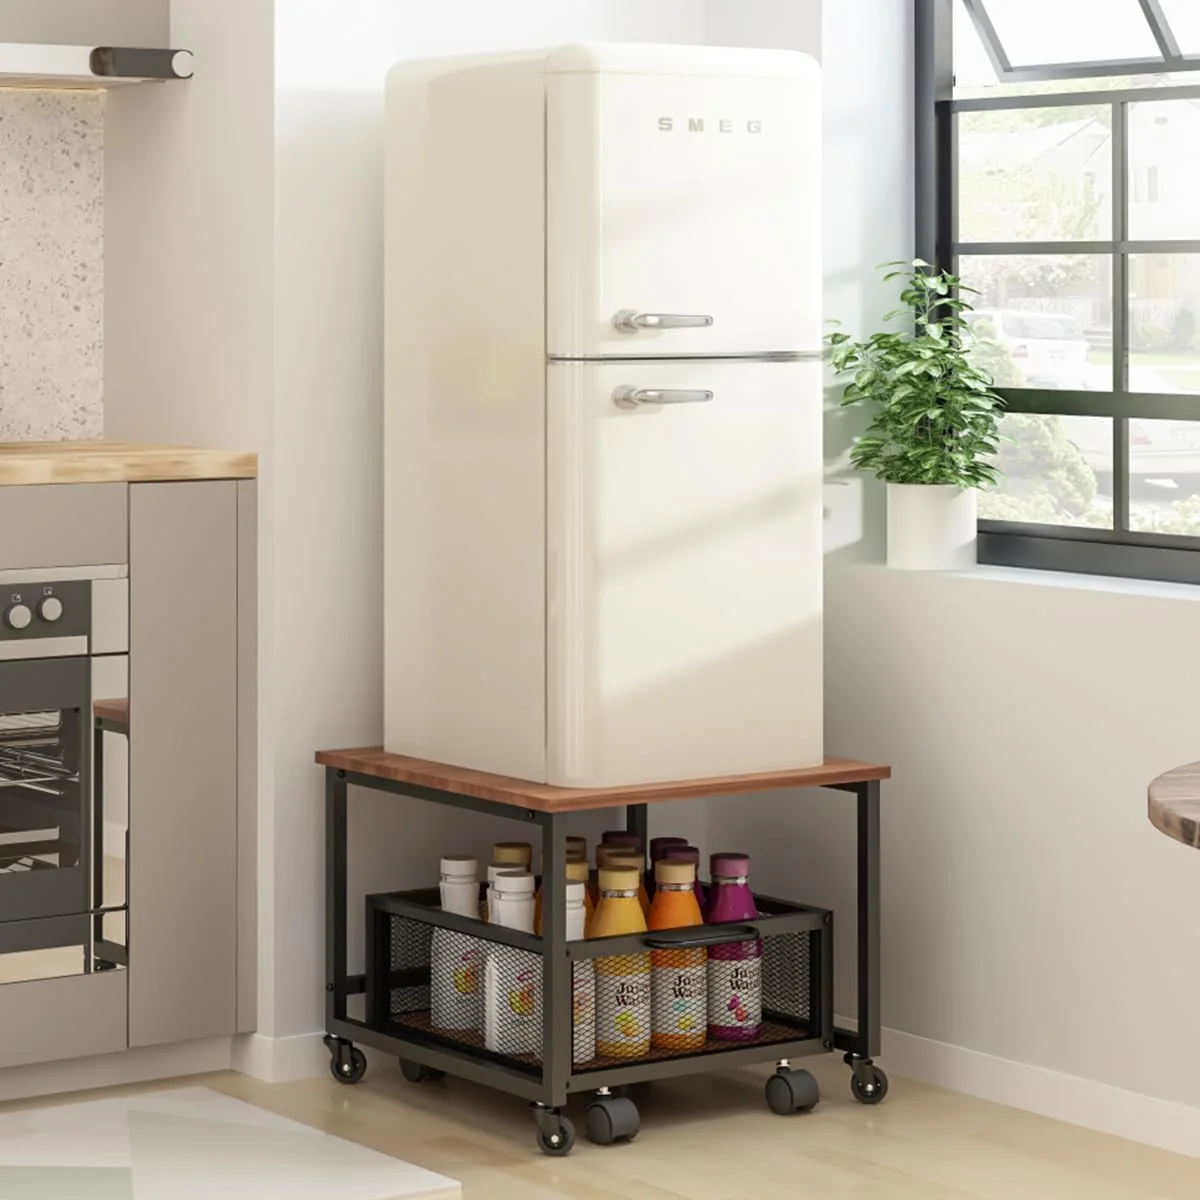 Dimensions and Sizes
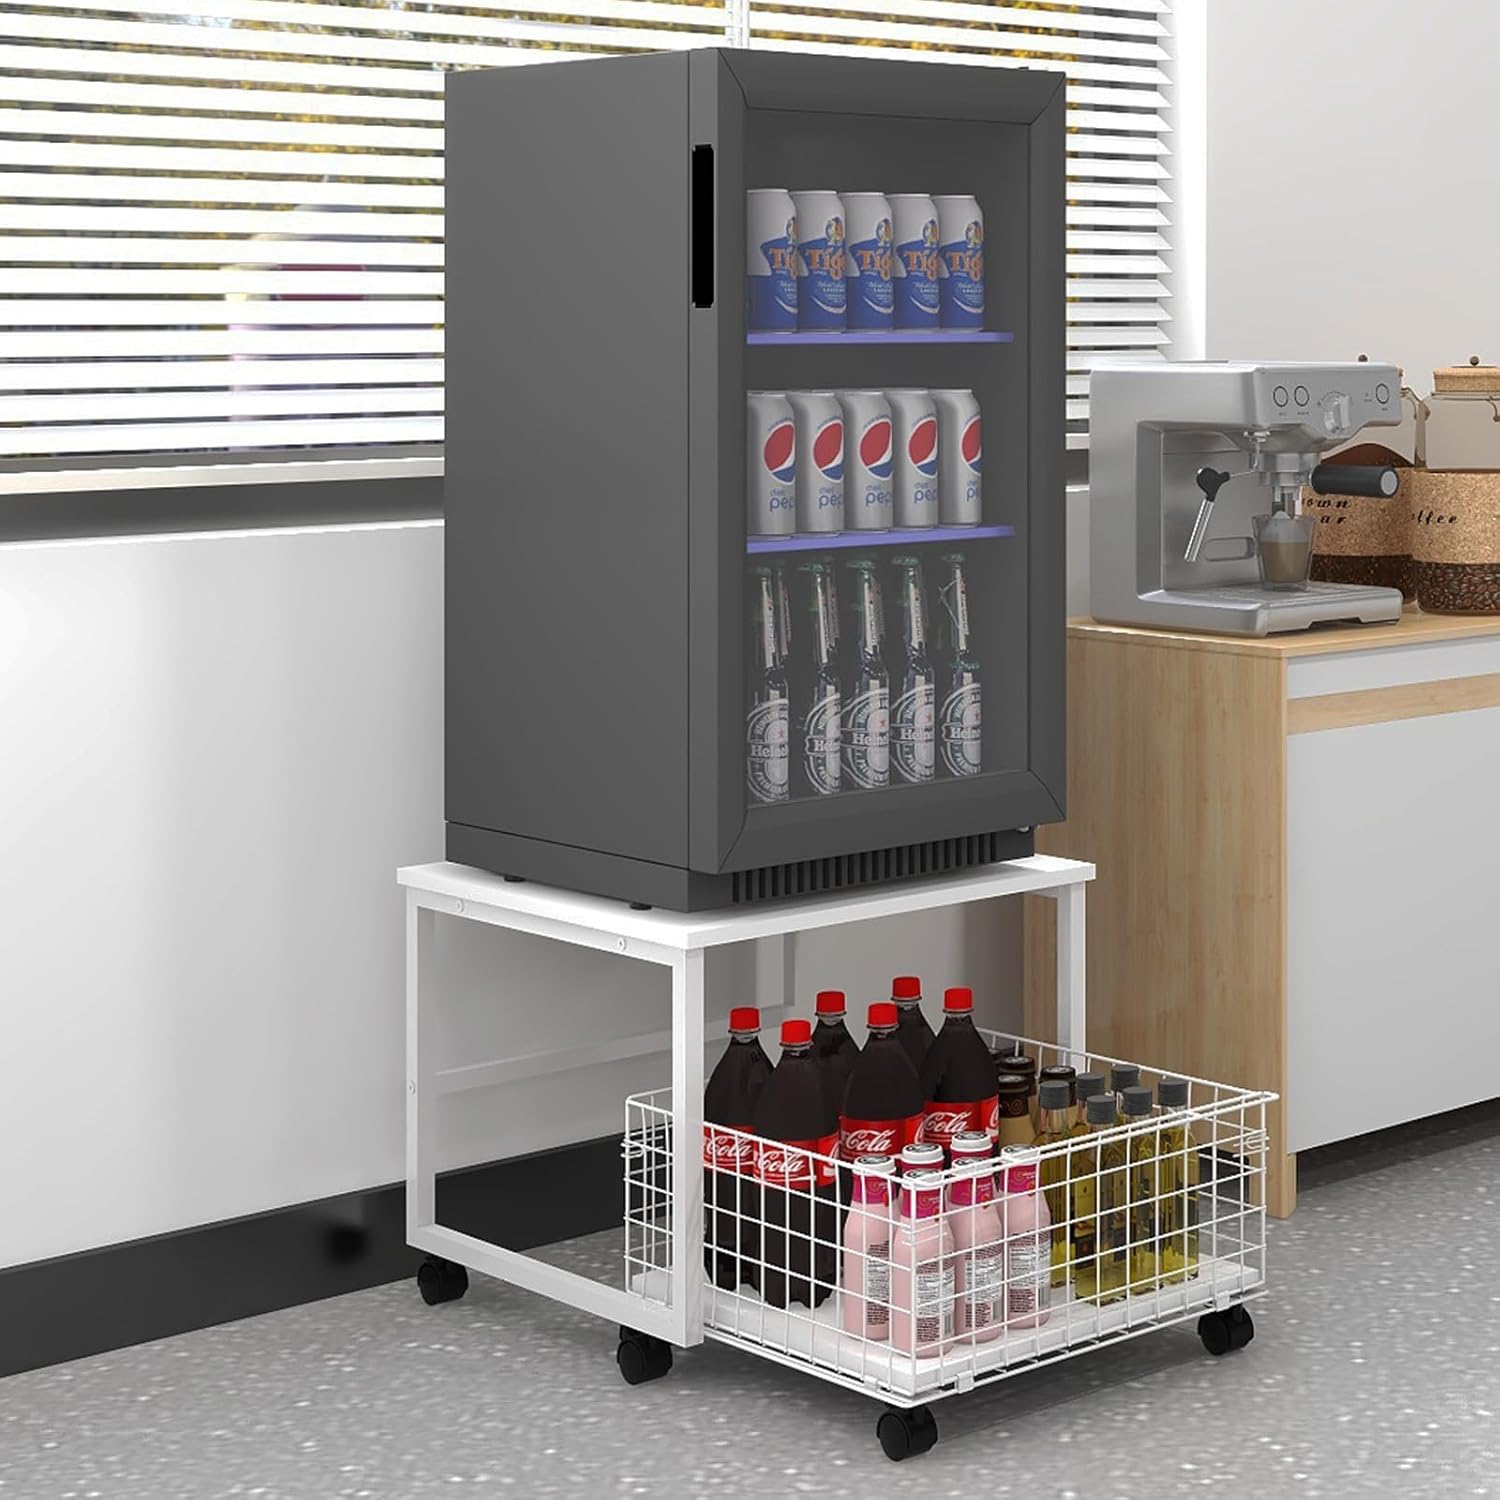 Personal Storage Habits
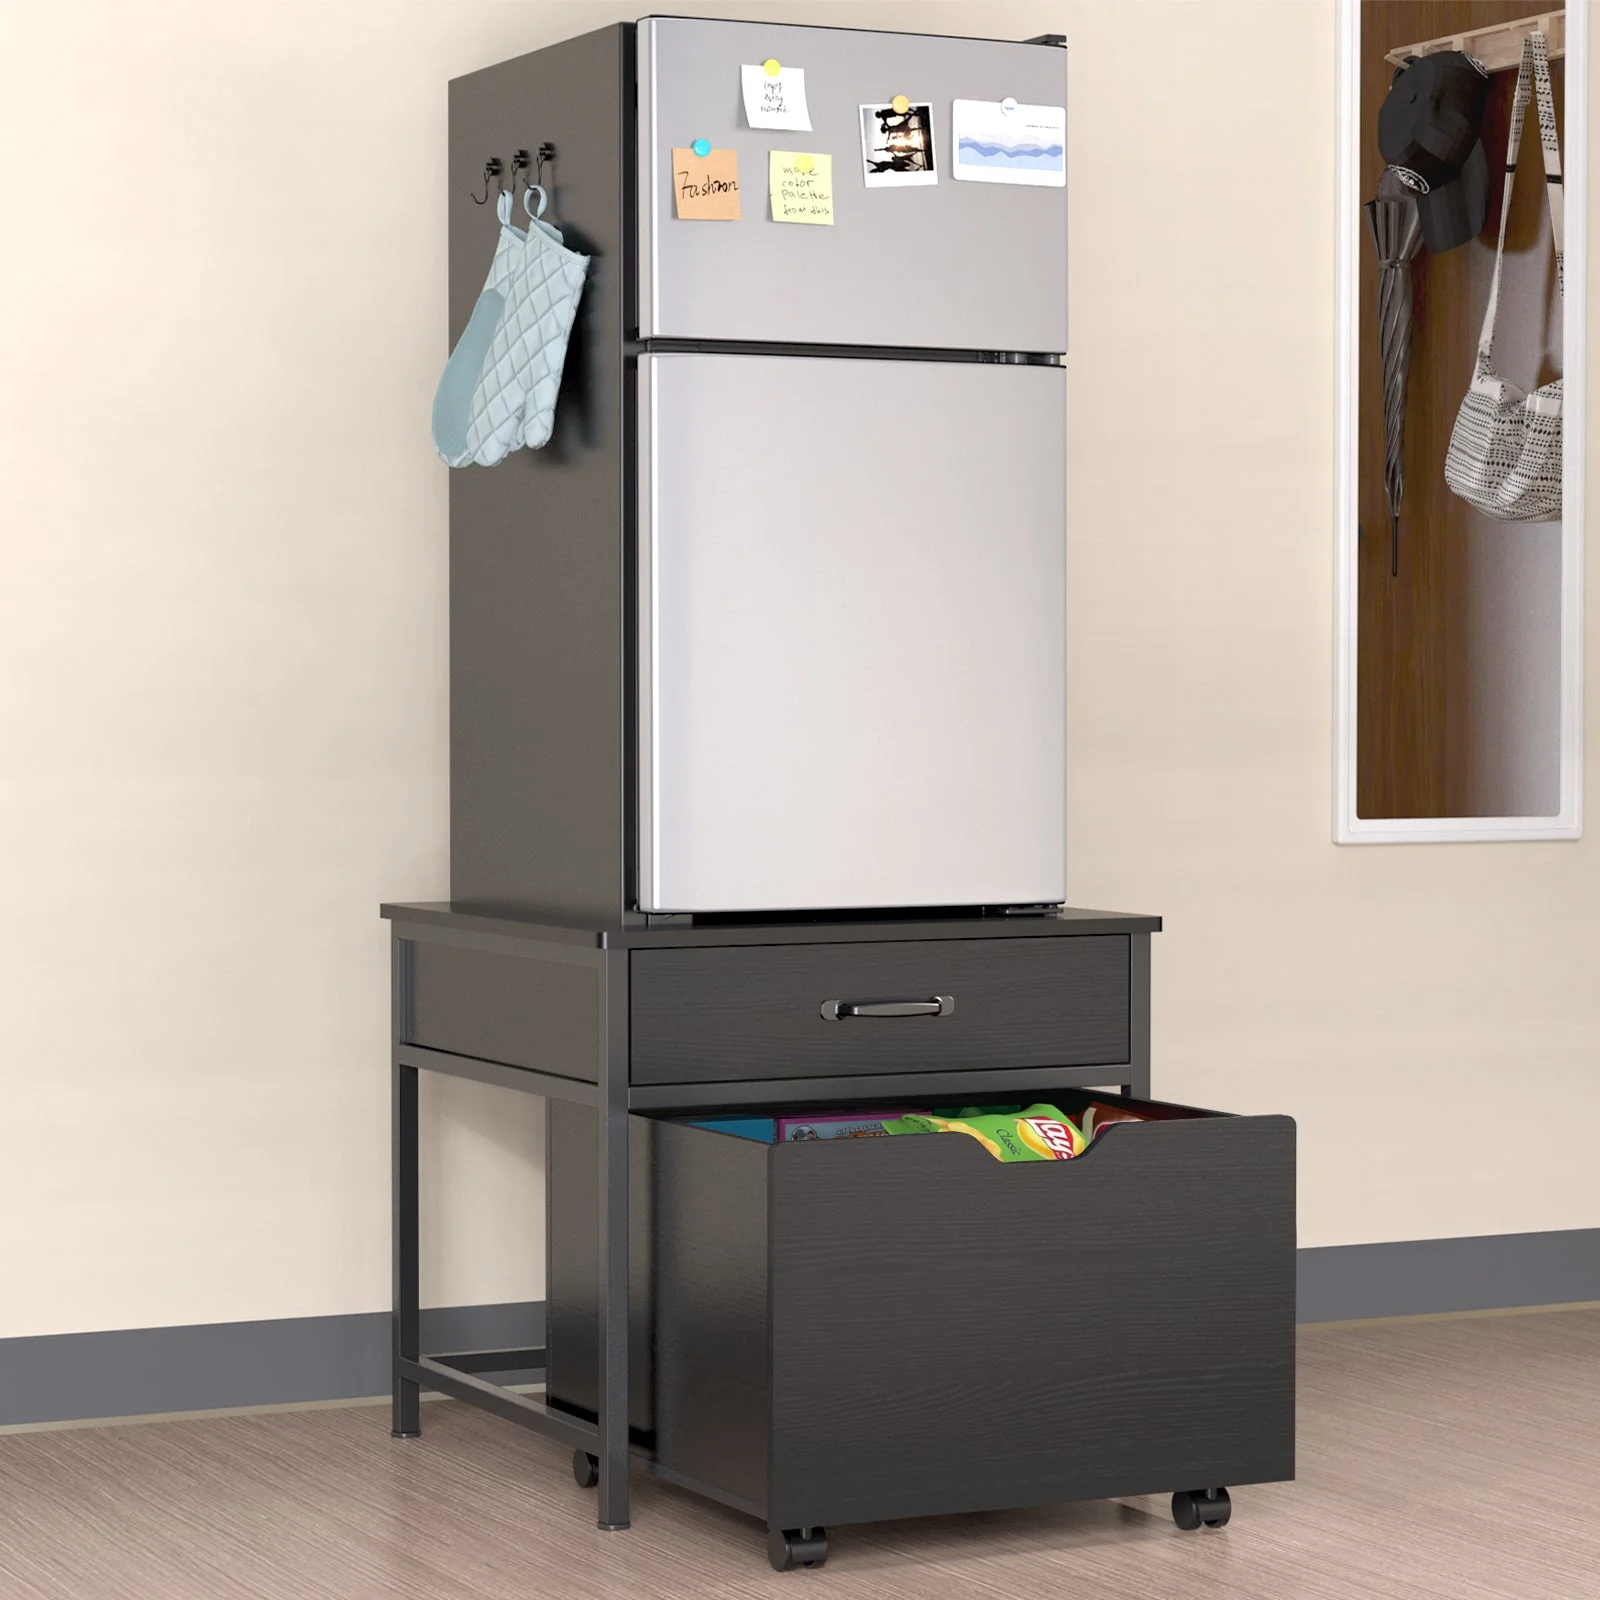 Recommended Brands and Models
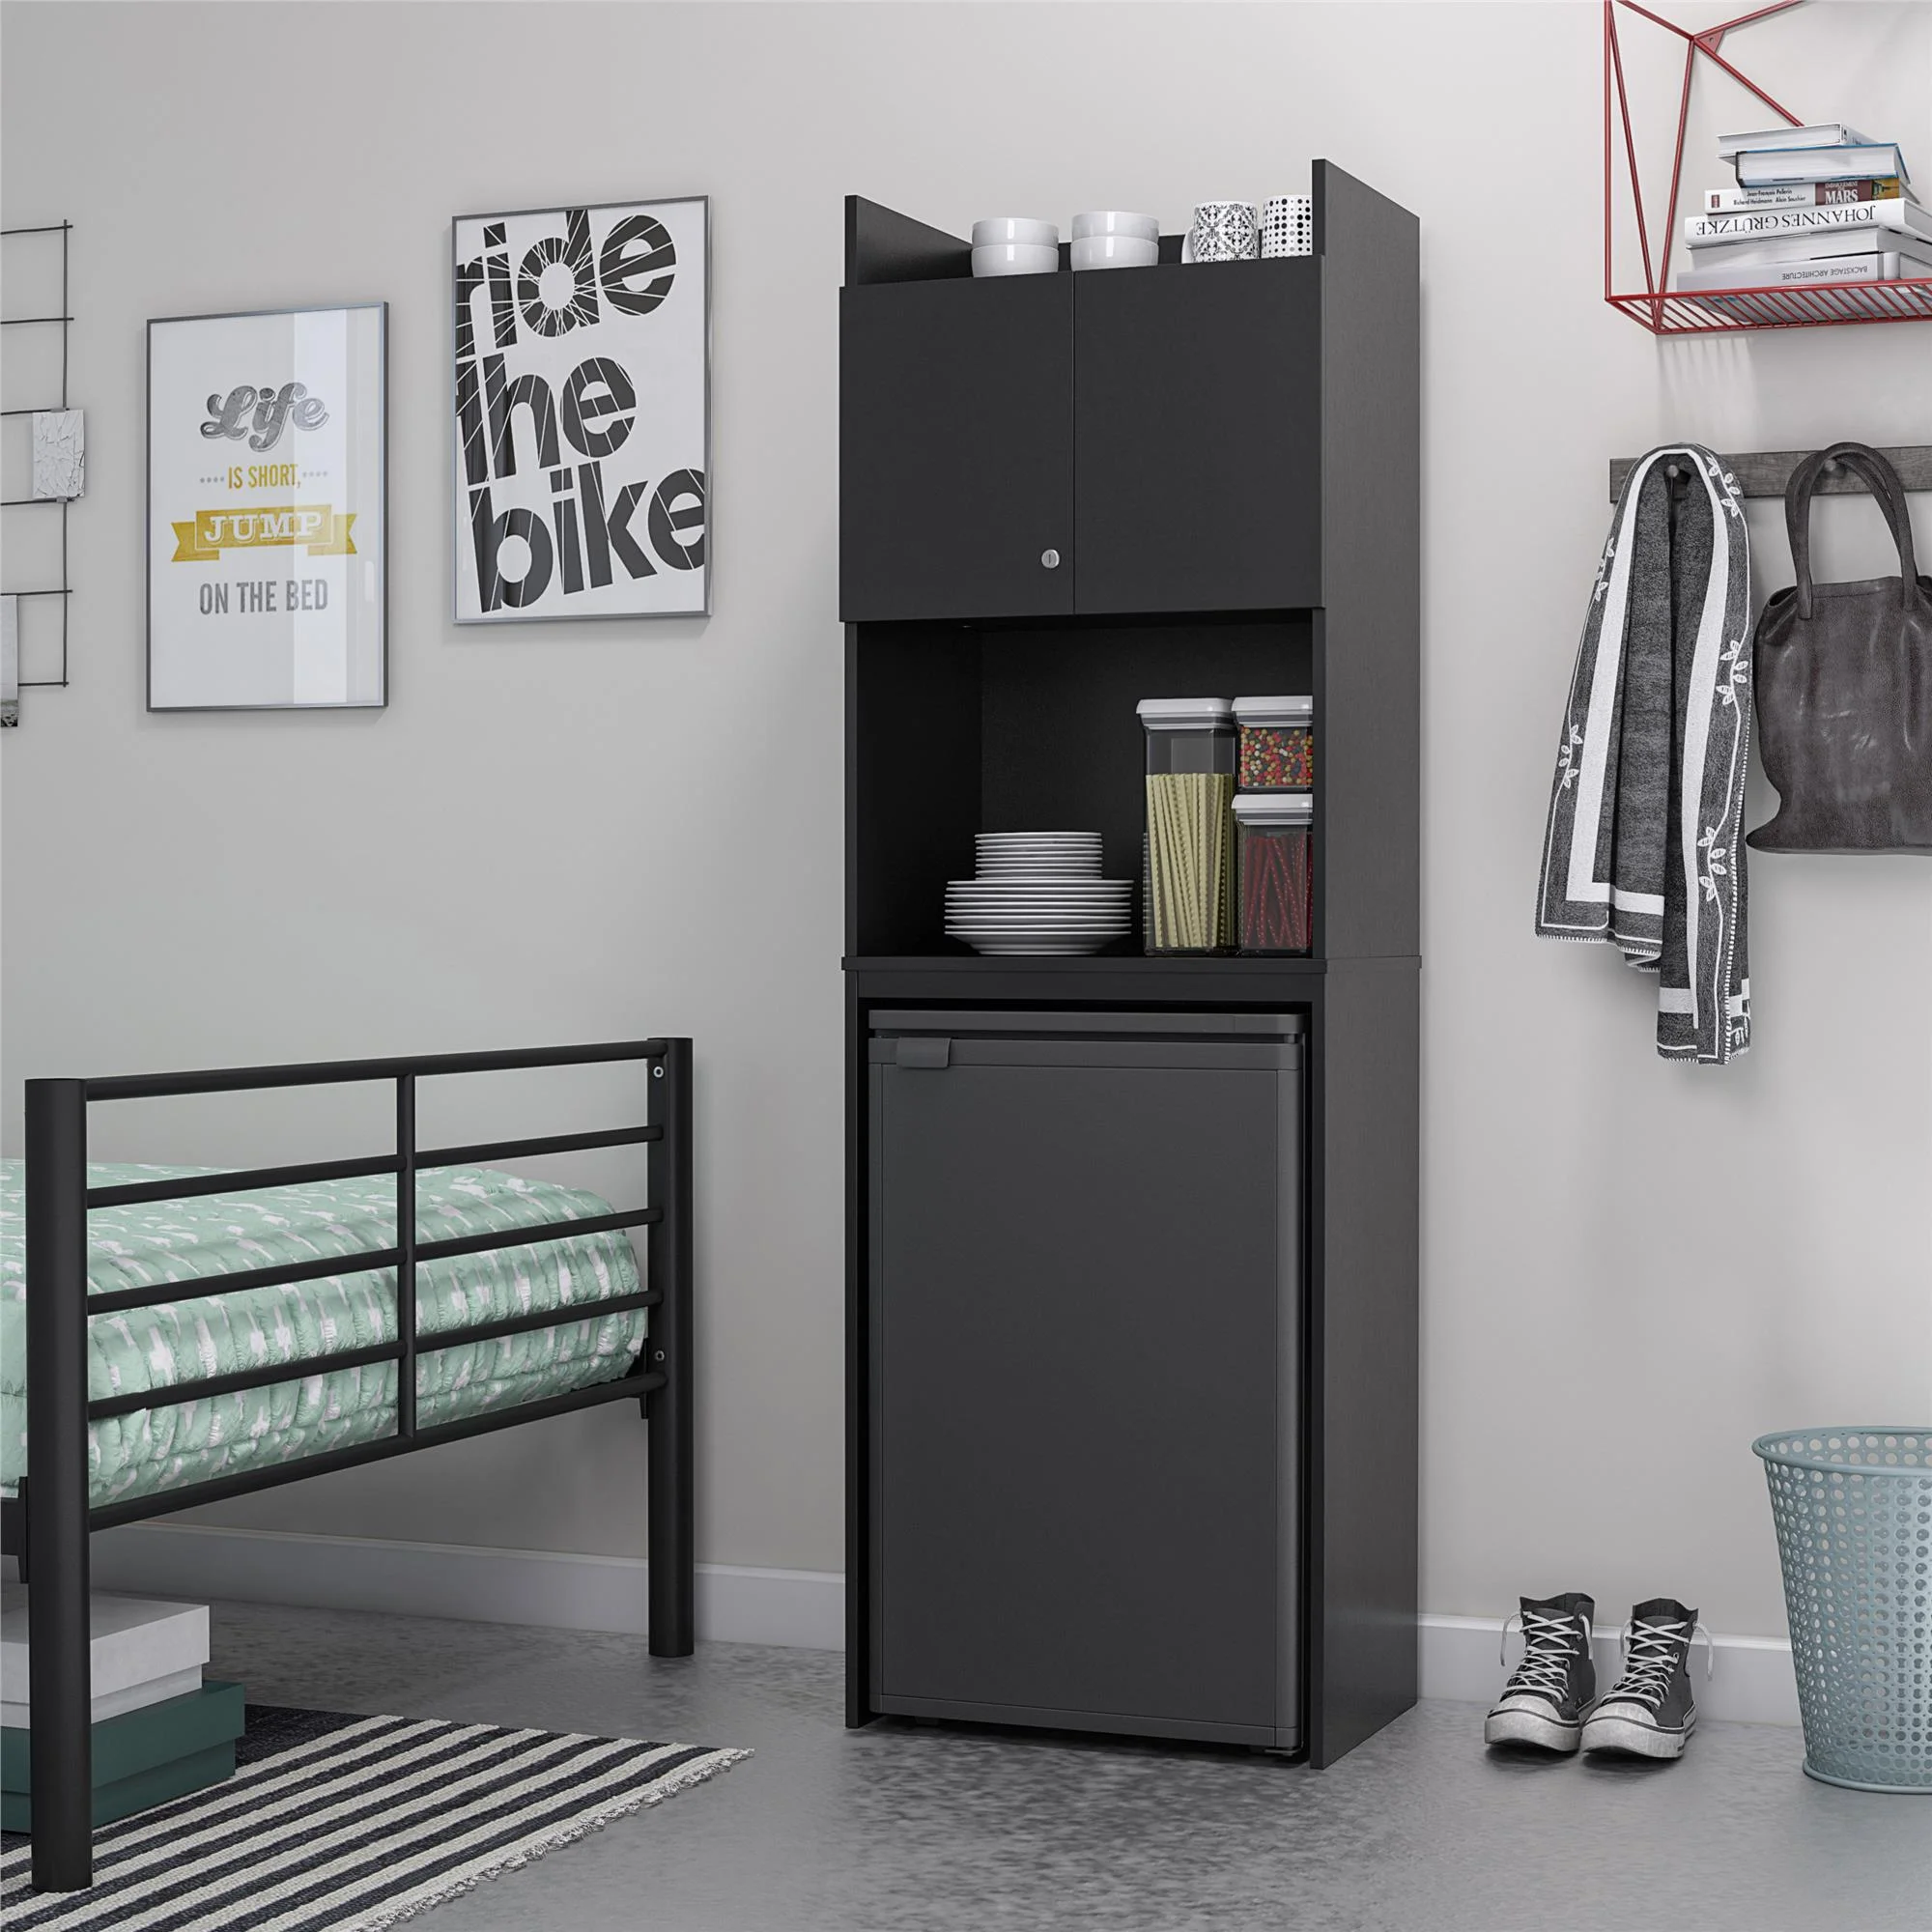 Versatility of Mini Fridge Stands with Storage
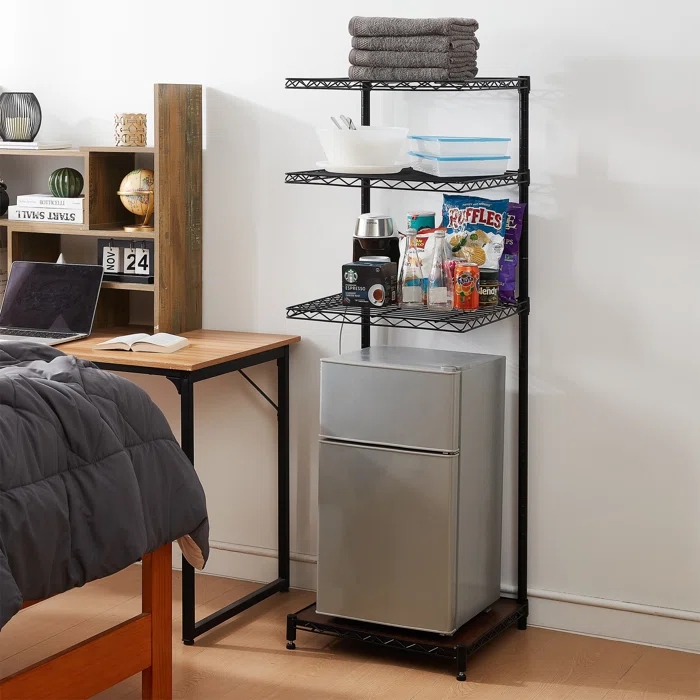 Conclusion: Making an Informed Decision
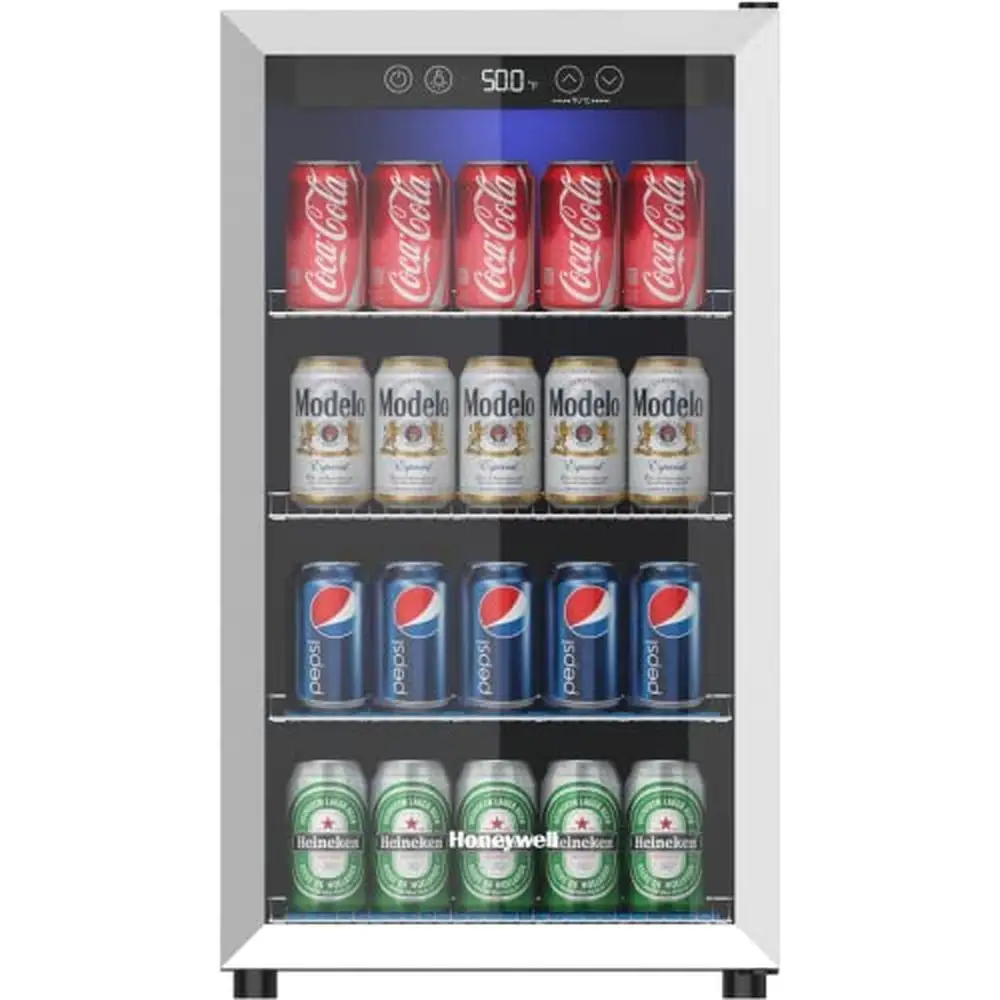 Why Choose a Glass Mini Fridge?
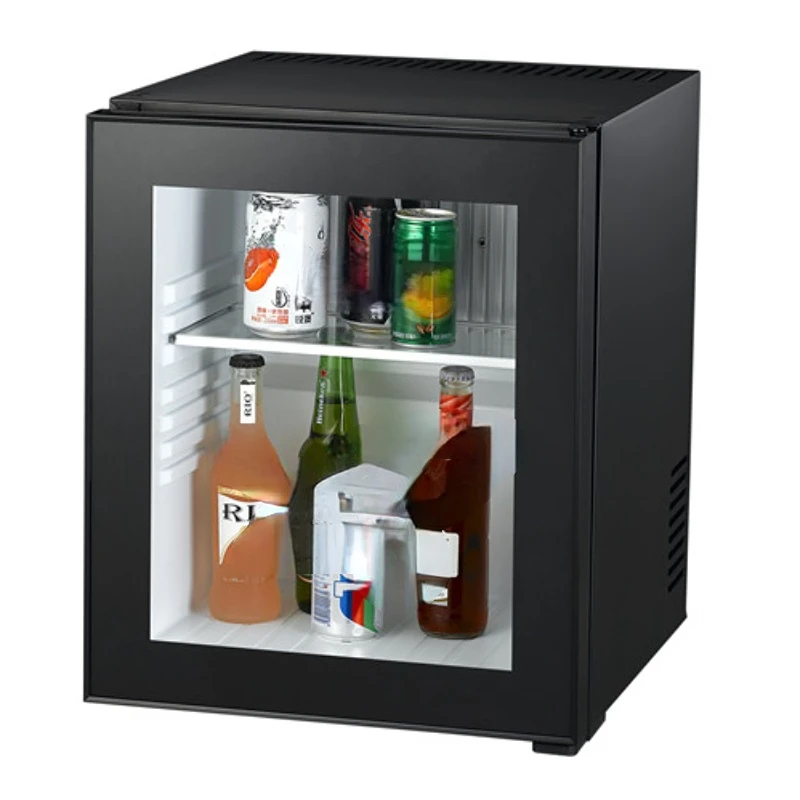 Top Brands Offering Glass Mini Fridges
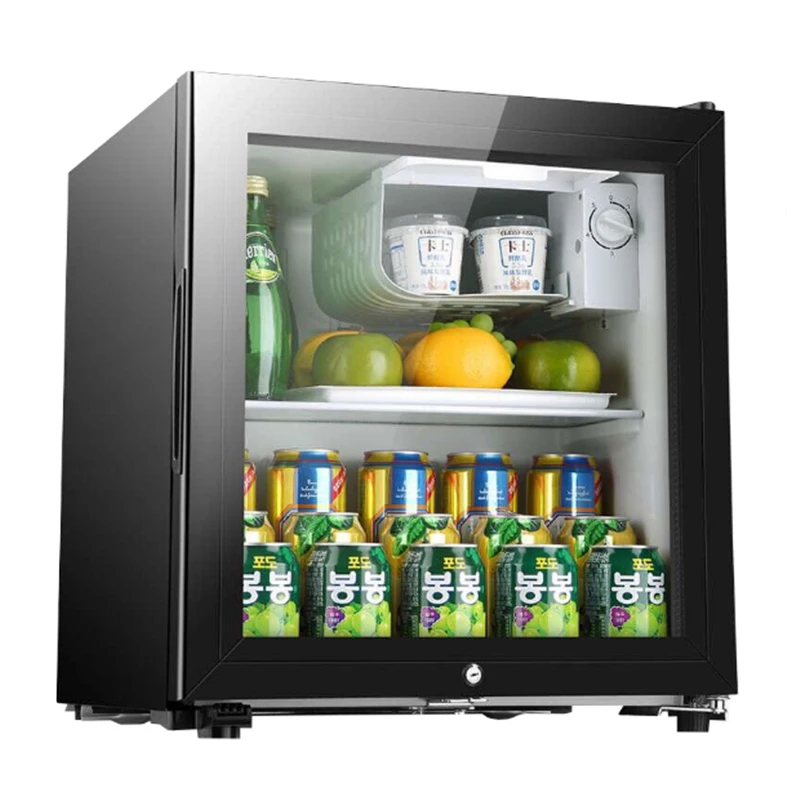 Key Features to Look for in a Mini Fridge
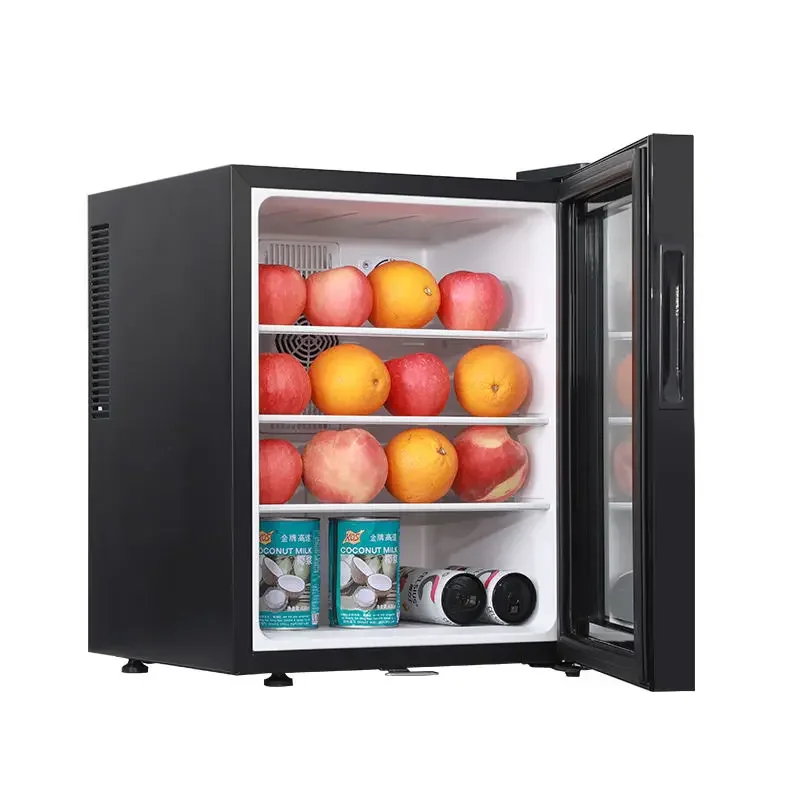 Maintenance and Care for Your Fridge
 Conclusion
 Understanding the Importance of Aesthetics in the Workplace
 Creative Ideas for Decorating Your Mini Fridge
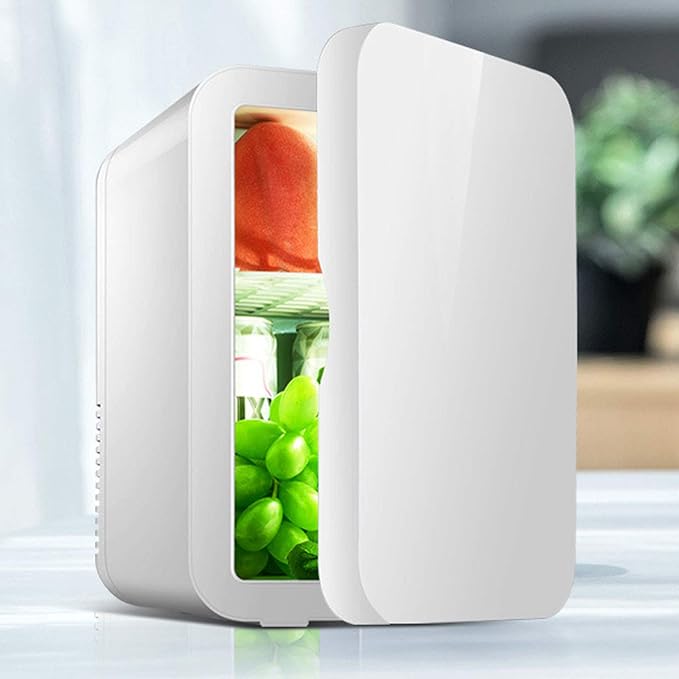 Themed Decorations: Tailoring Your Fridge to Your Office Environment
 Practical Tips for Maintaining Your Decor
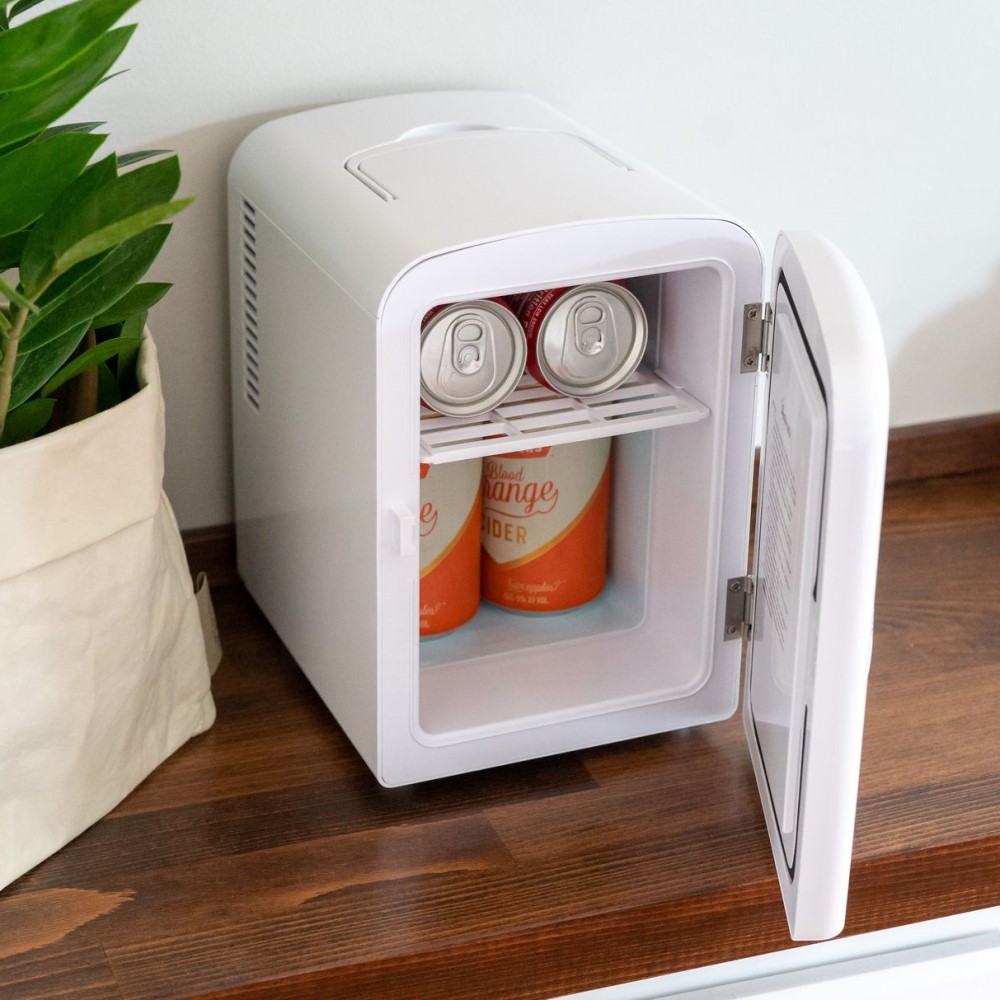 Conclusion: Making Your Mini Fridge a Centerpiece of Your Workspace
 Why Choose a Beer Small Fridge?
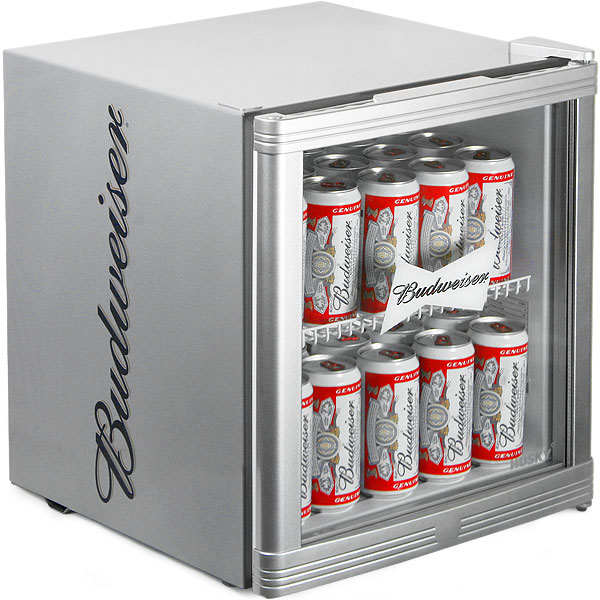 How to Choose the Right Beer Small Fridge
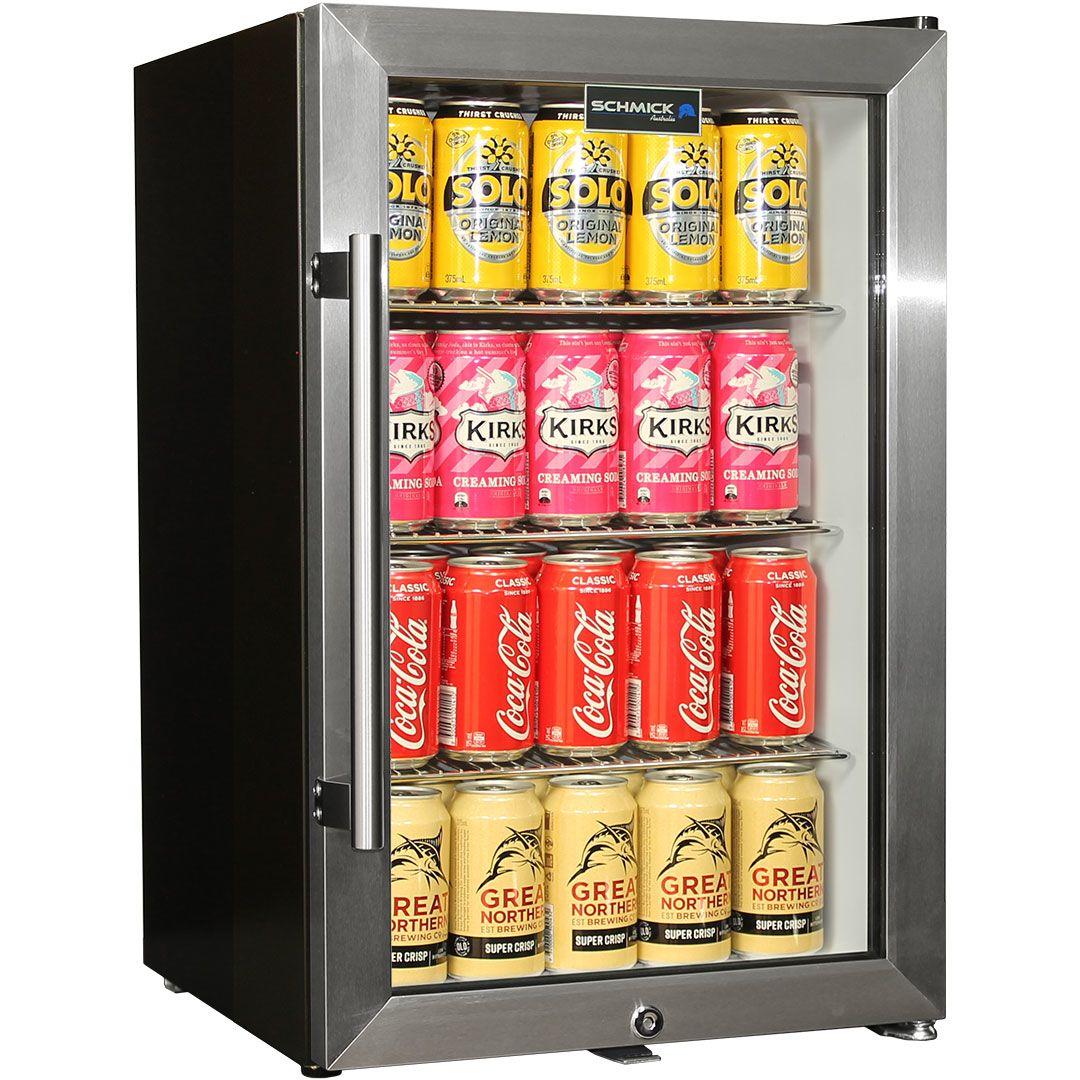 Maintaining Your Beer Small Fridge
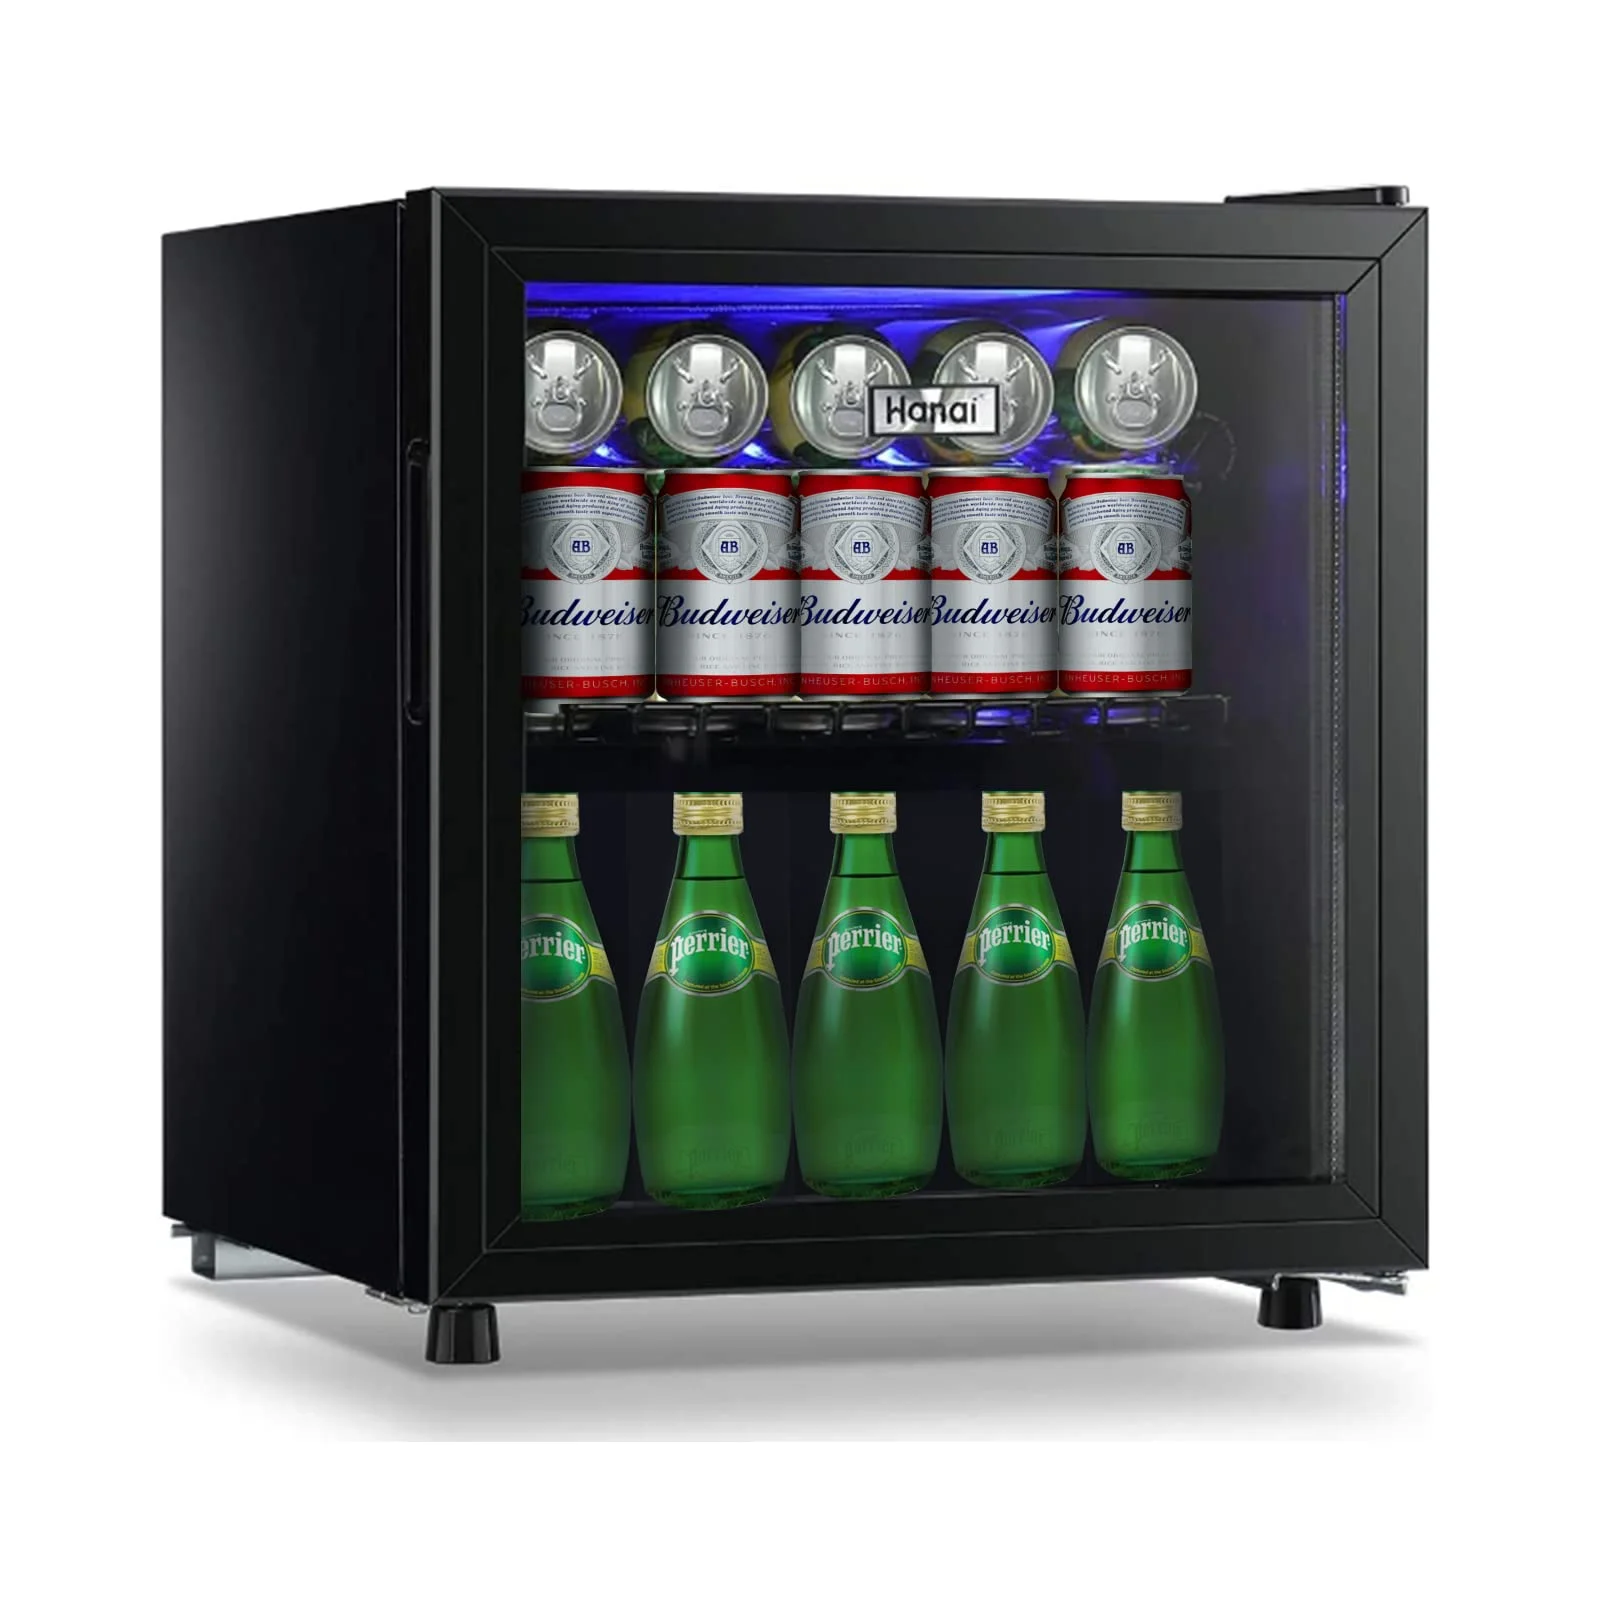 Customizing Your Beer Small Fridge Experience
 Installation and Setup: Step-by-Step Guide
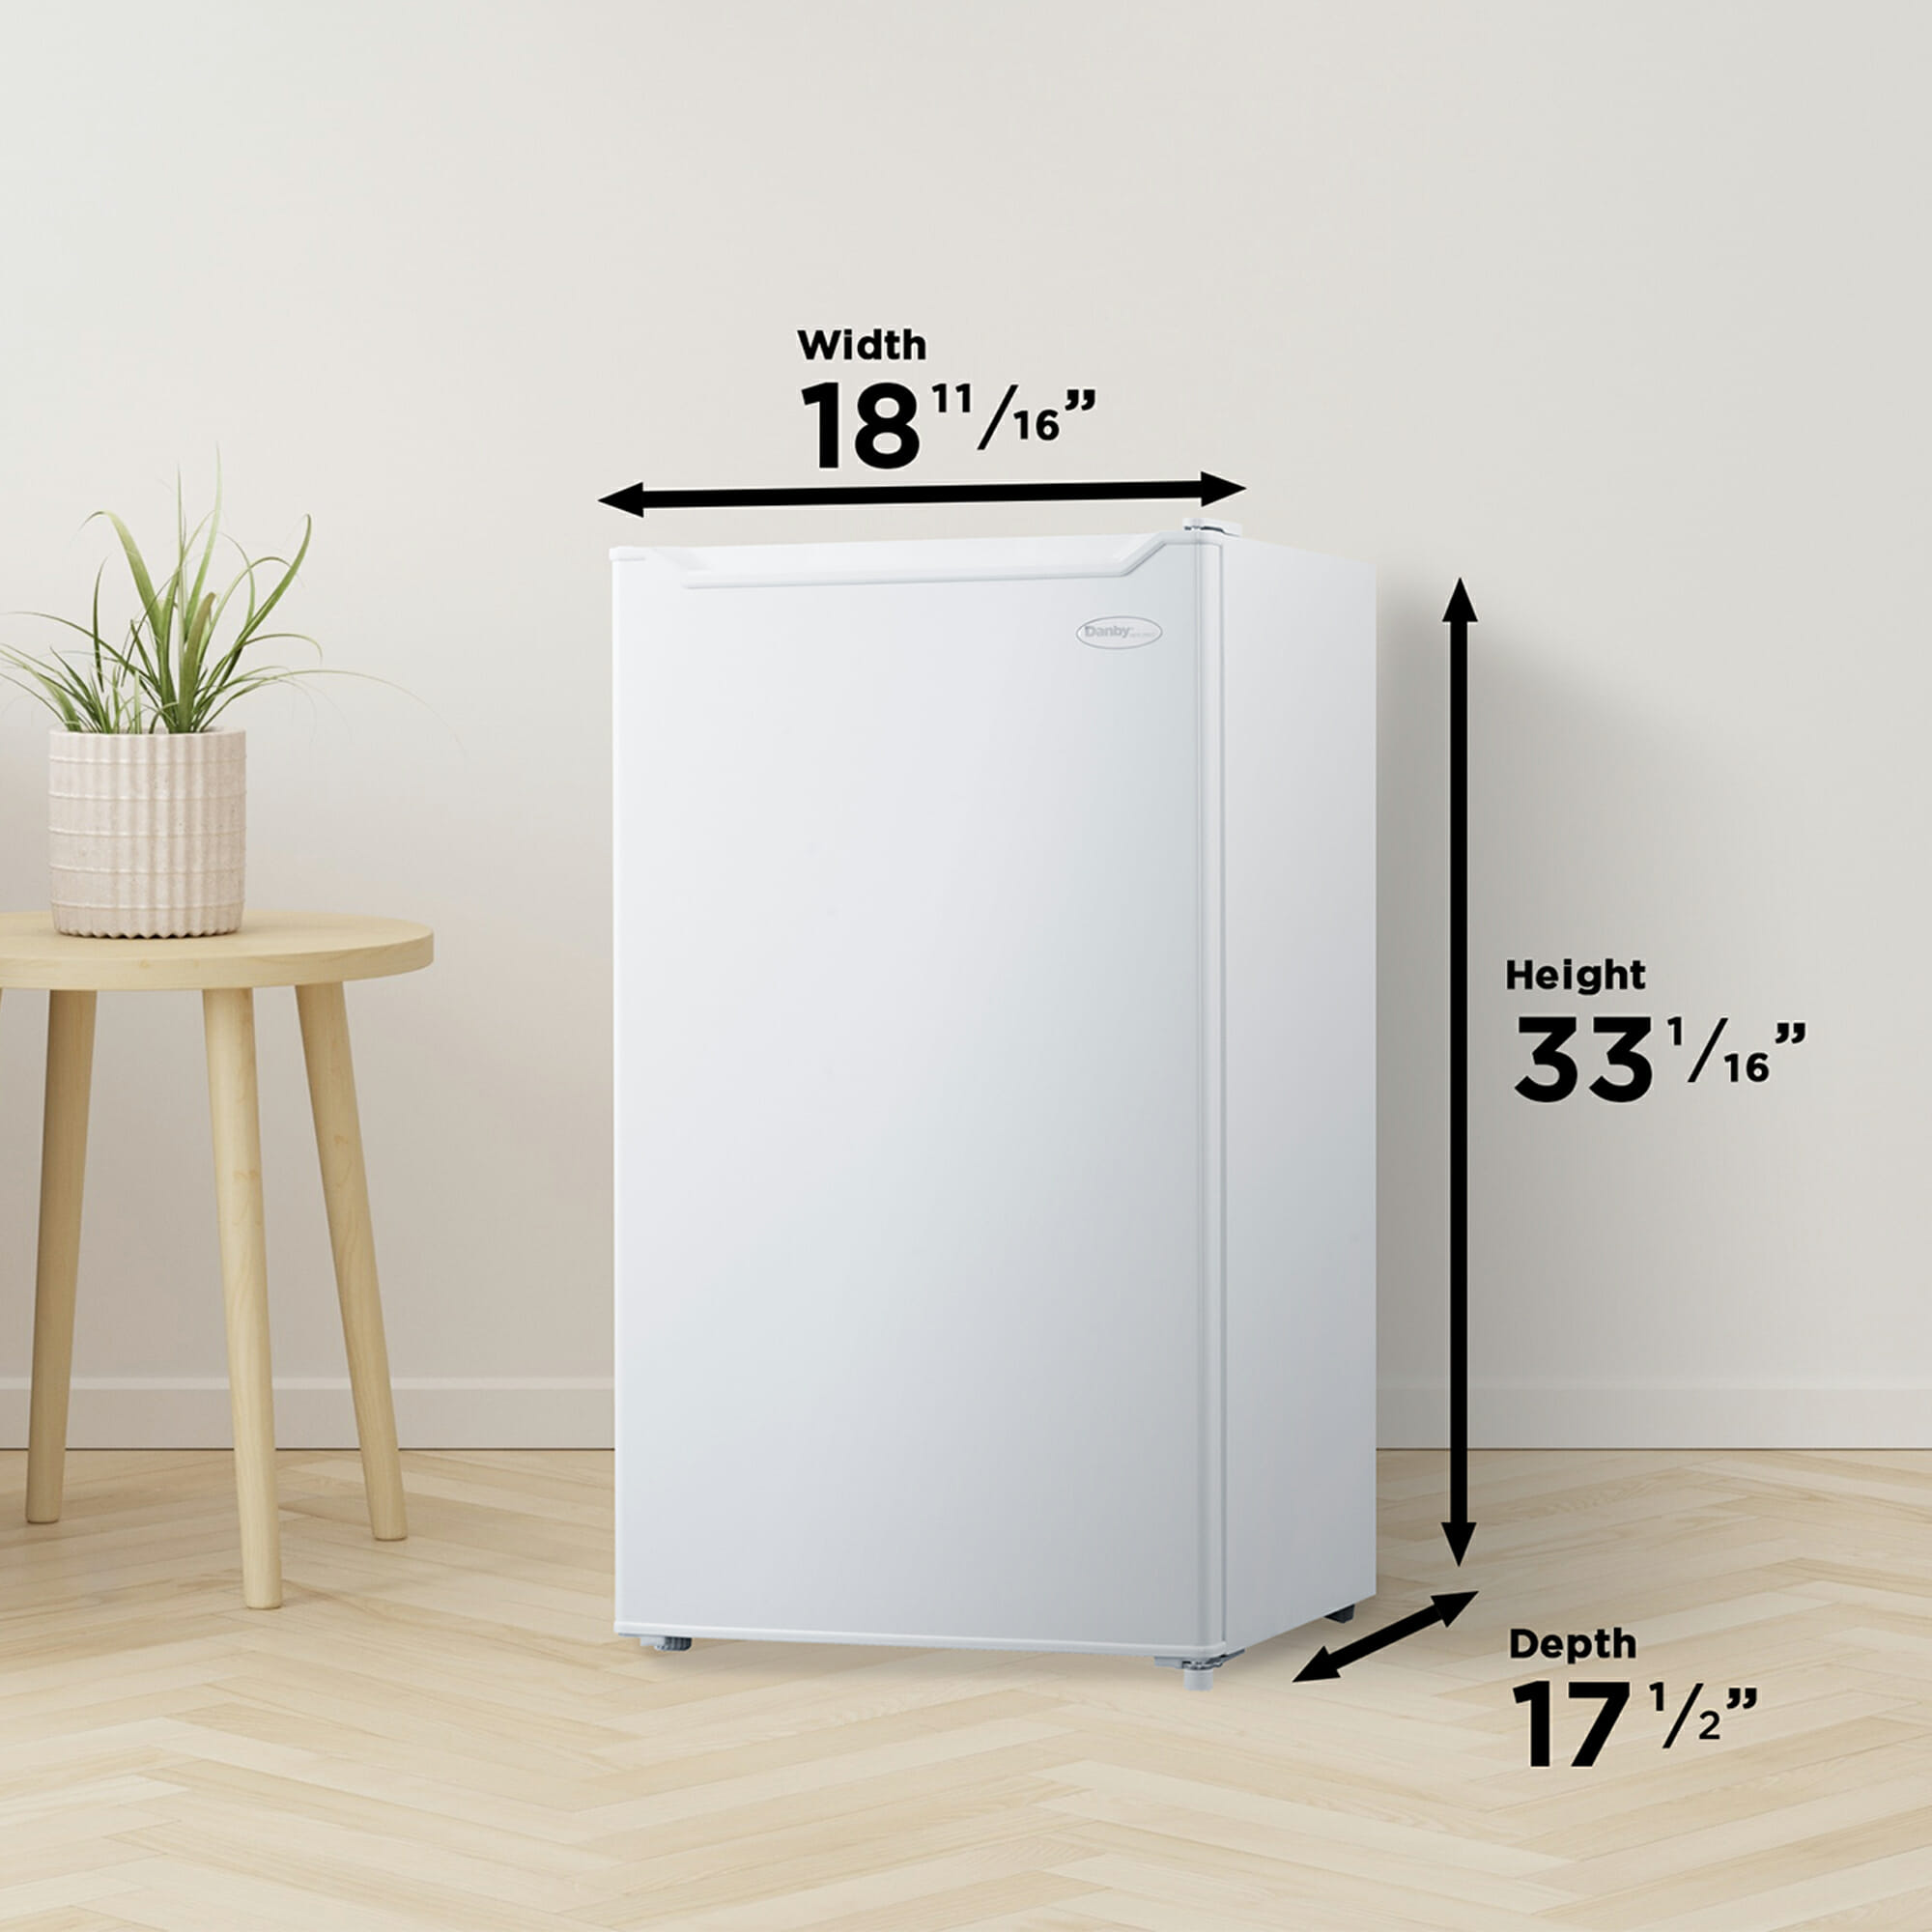 Understanding the Different Mini Fridge Dimensions
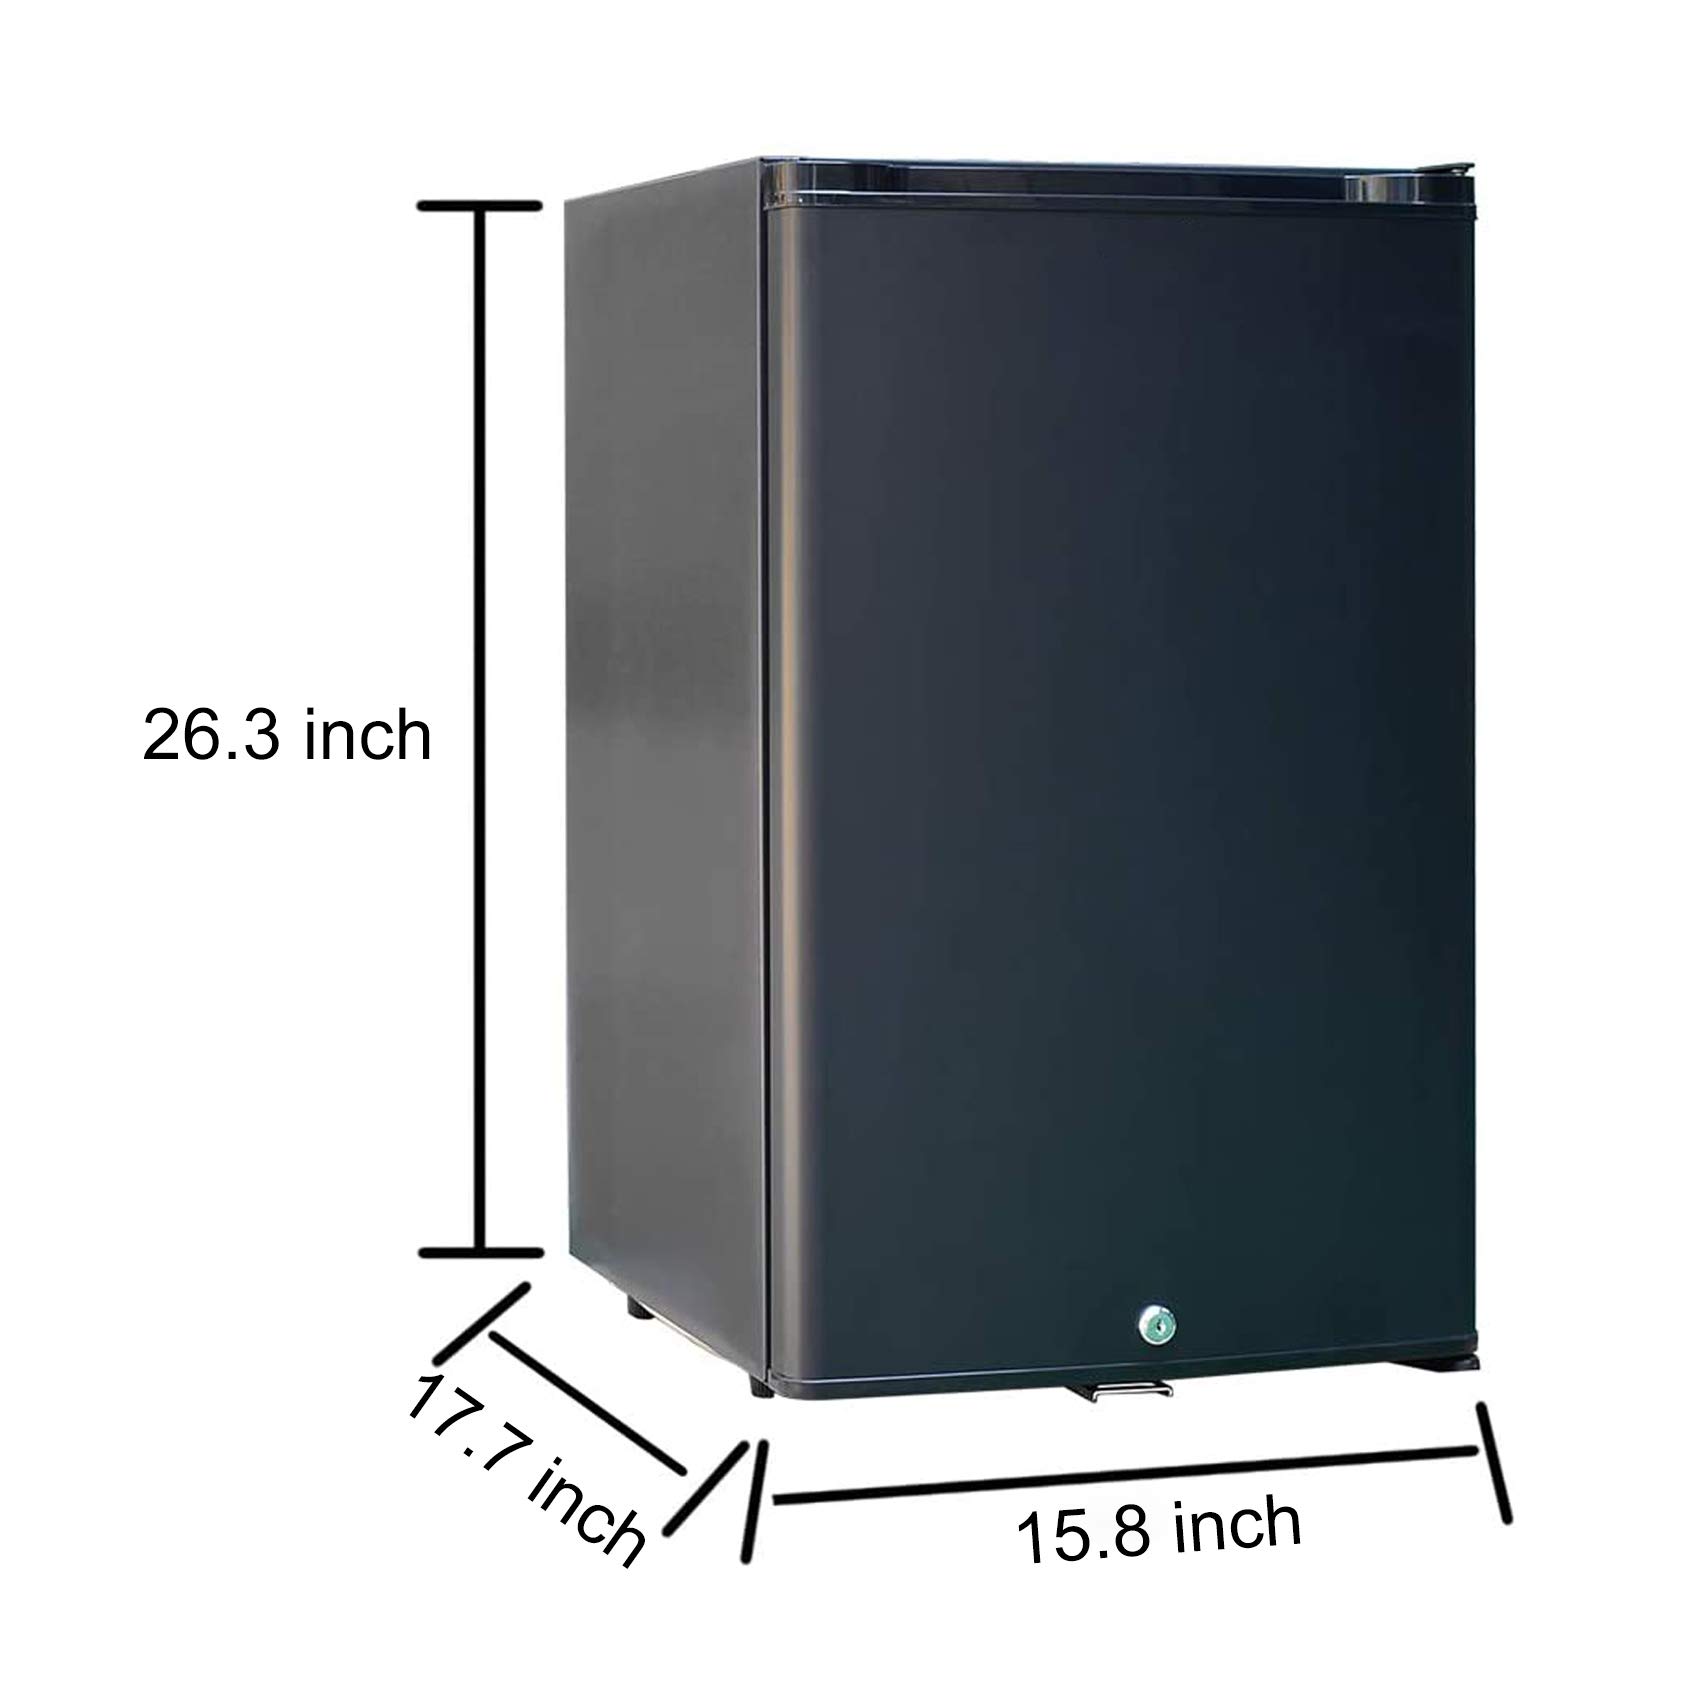 Choosing the Right Mini Fridge Dimension for Your Space
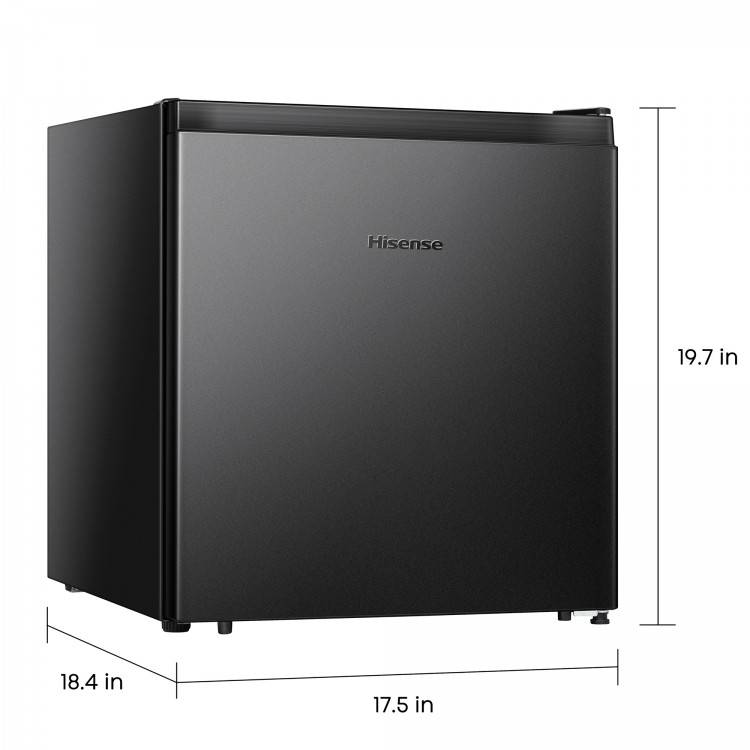 Tips for Optimizing Storage in Your Mini Fridge
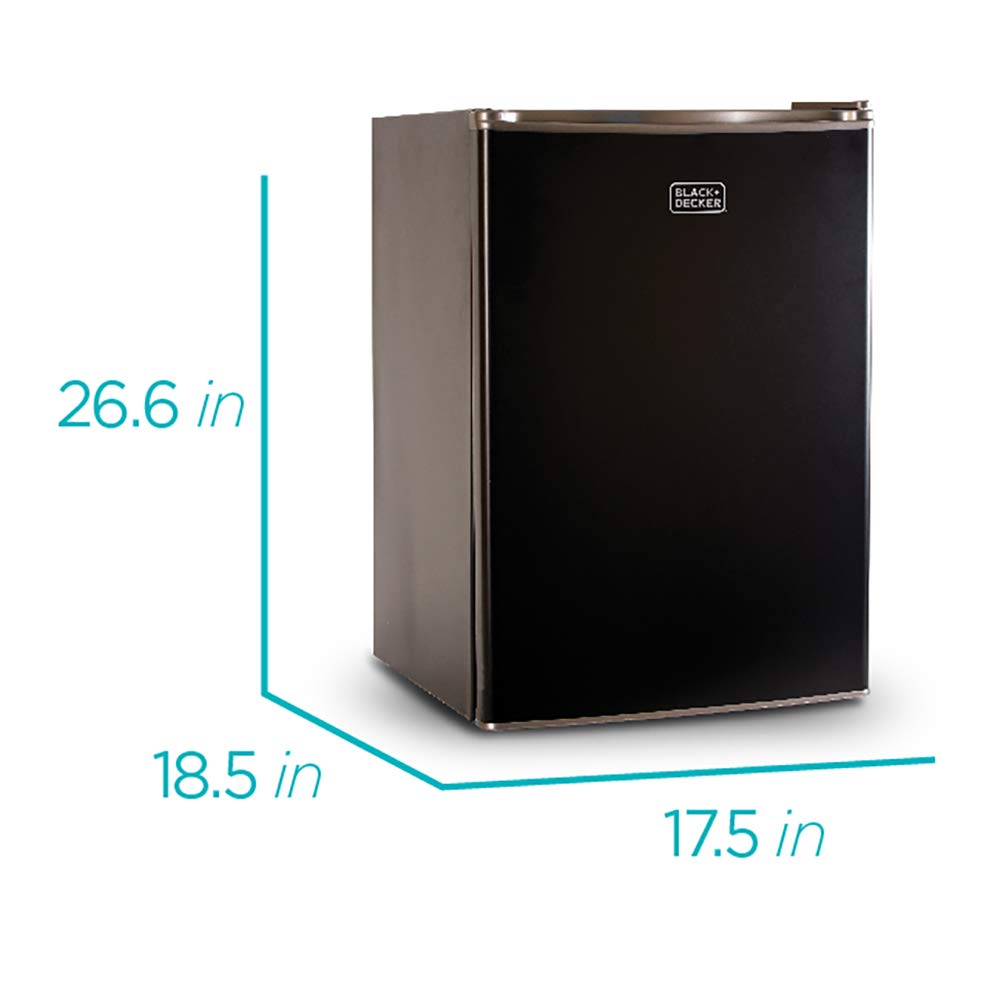 Popular Uses for Different Mini Fridge Dimensions
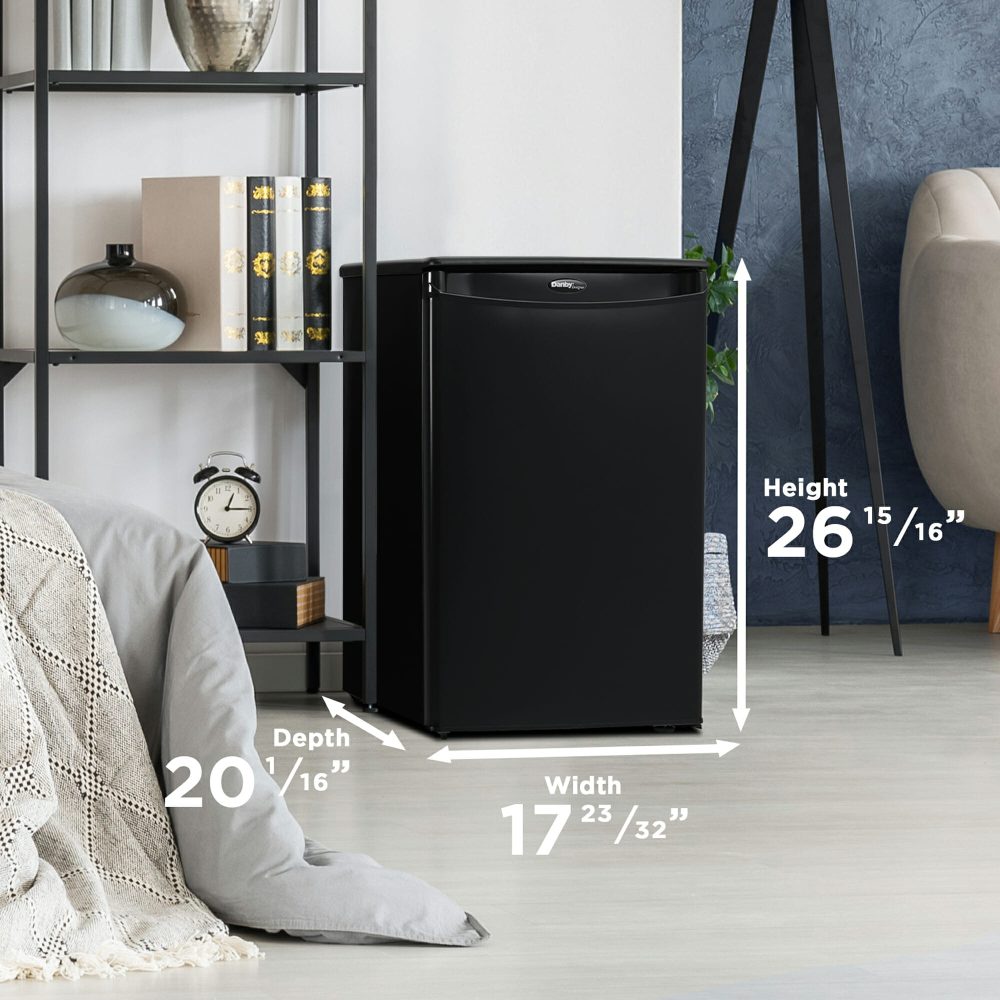 Conclusion
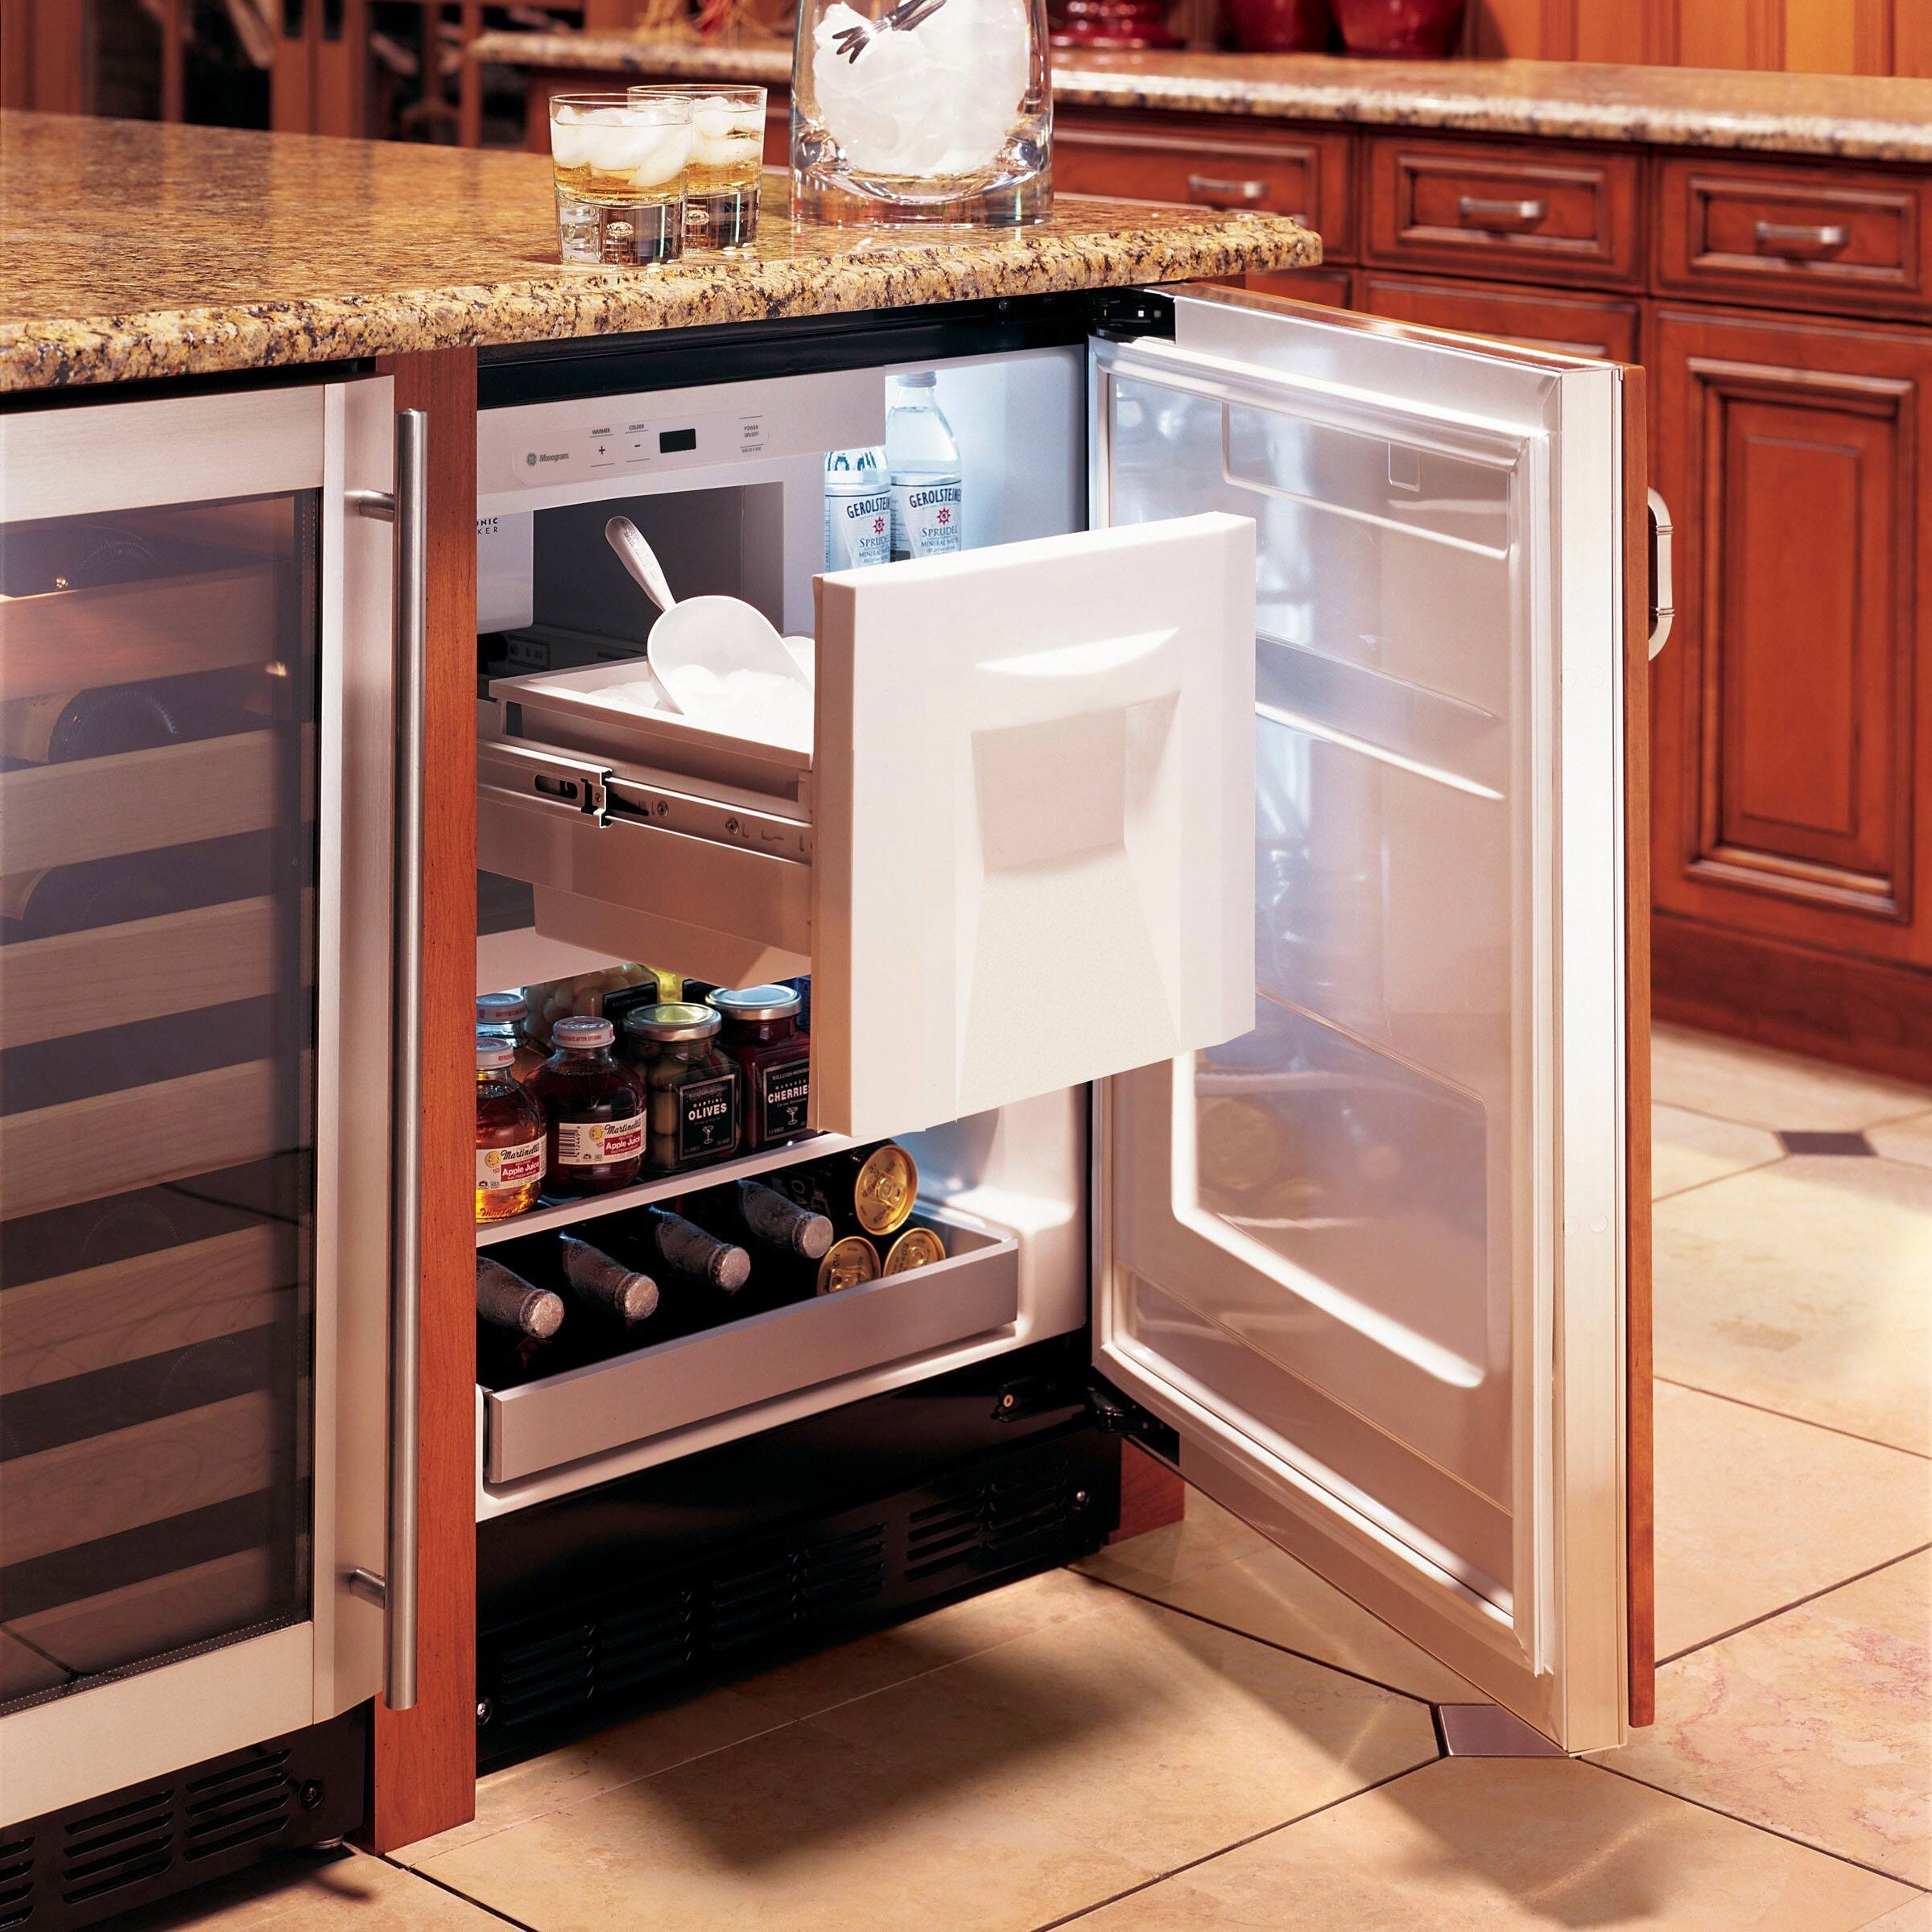 Why a Mini Fridge with Ice Maker is Essential
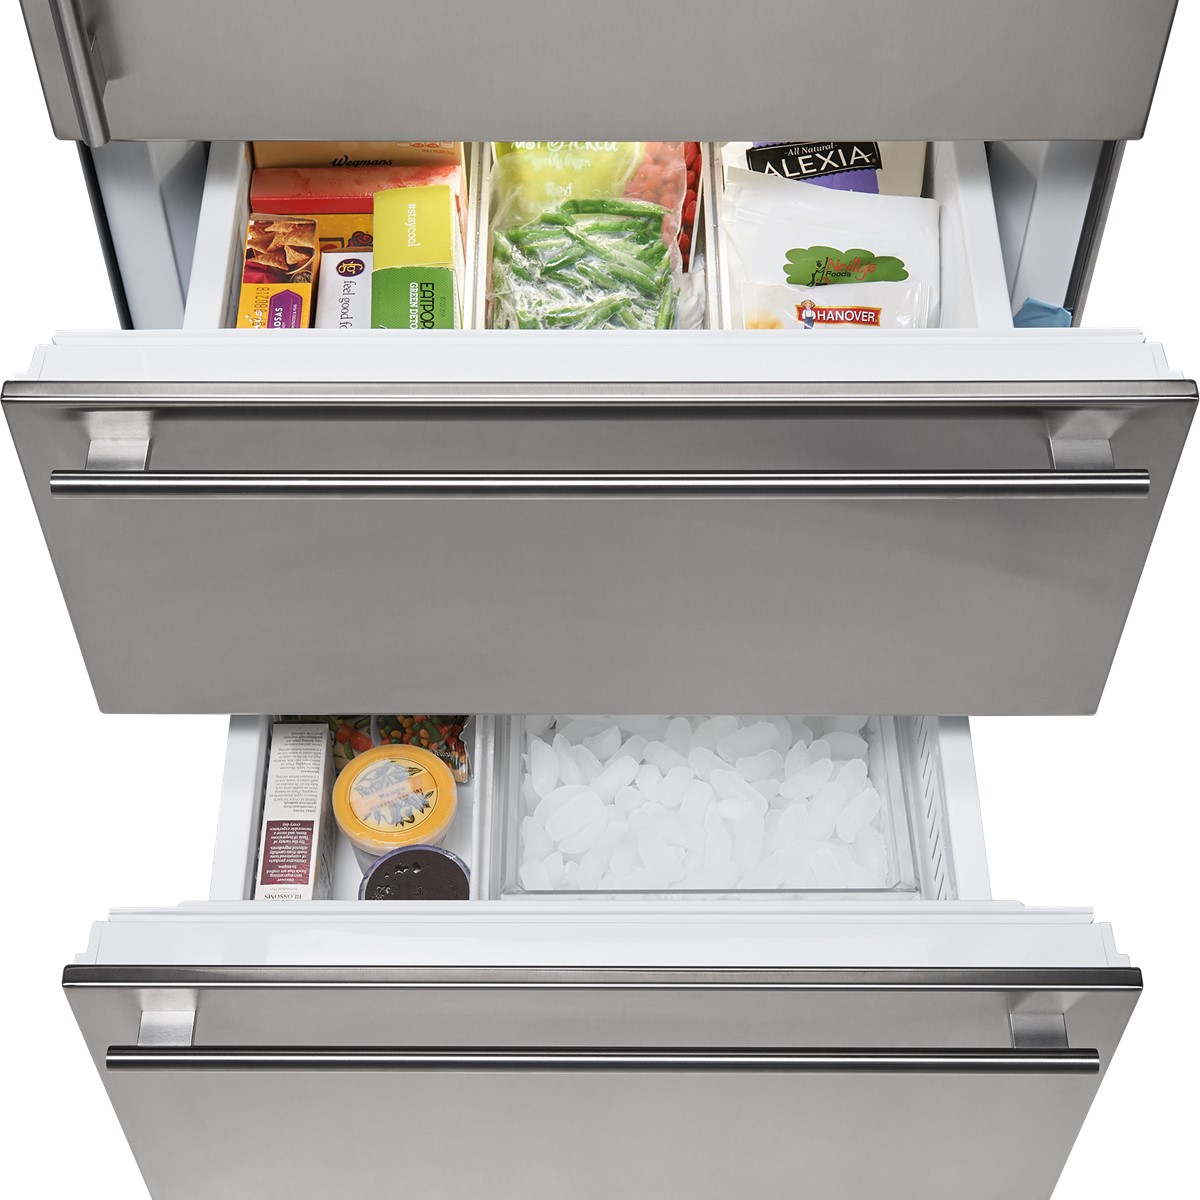 Comparing Mini Fridges with and without Ice Makers
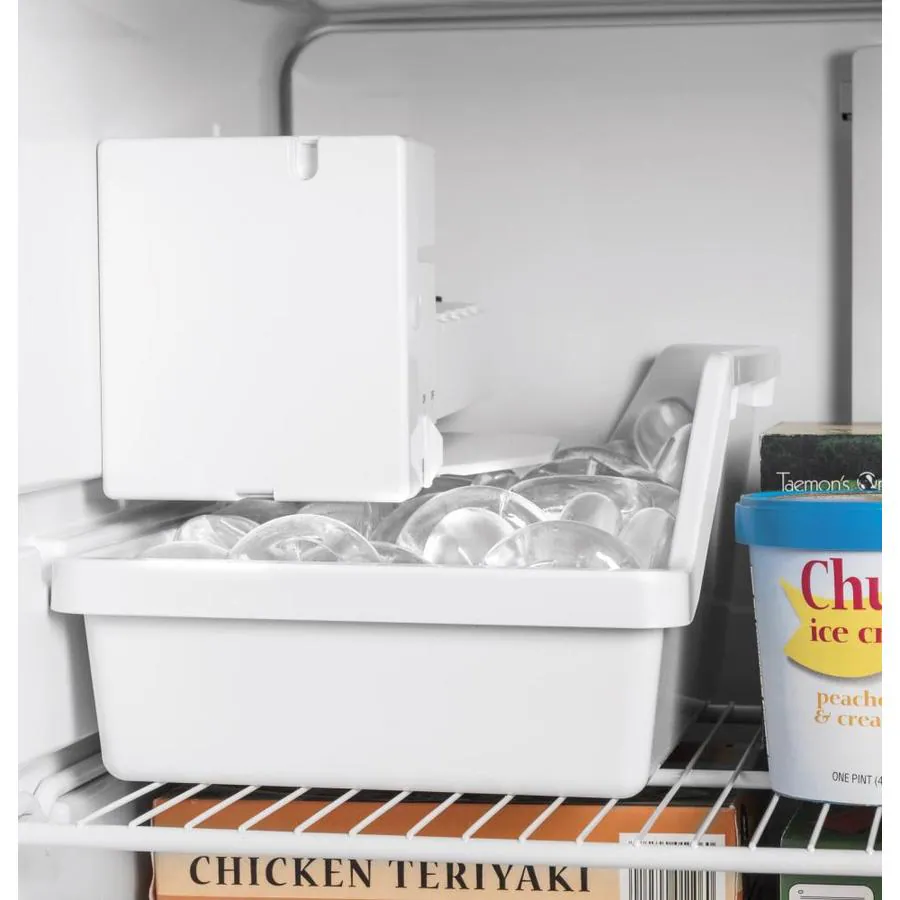 Top Mini Fridges with Ice Makers on the Market
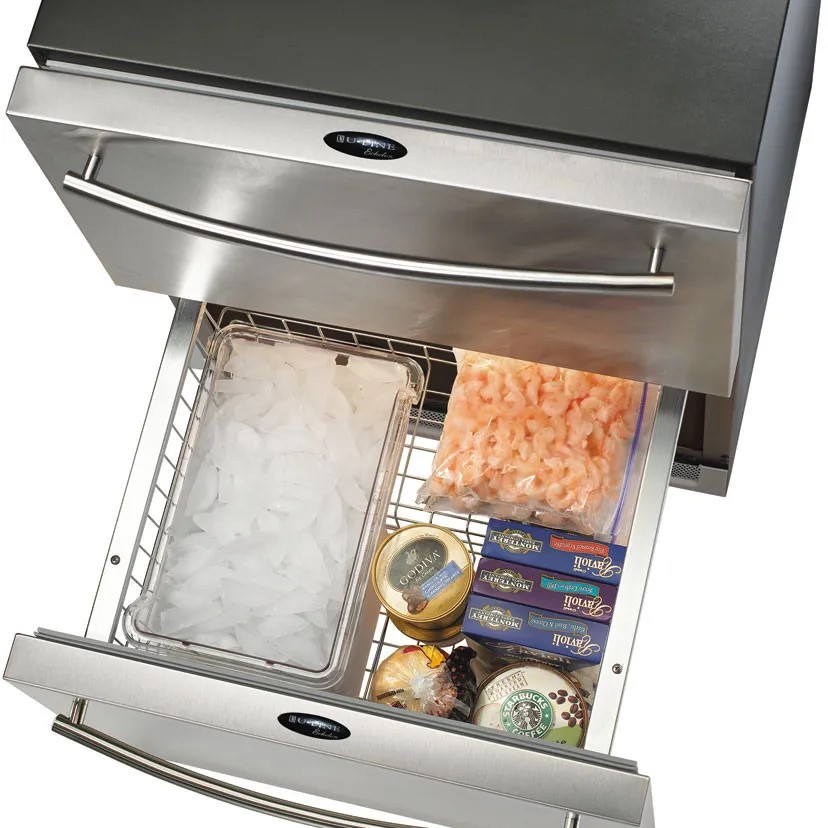 Tips for Maximizing the Use of Your Mini Fridges with Ice Makers
 Conclusion
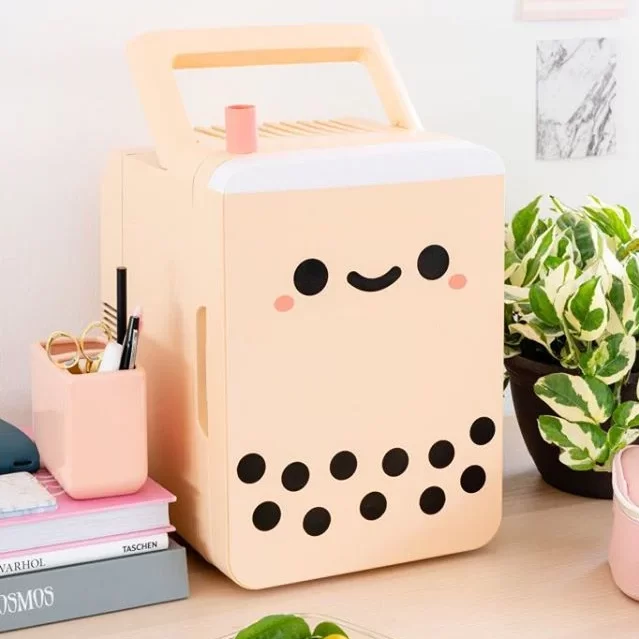 The Rise of Boba Culture and the Need for Specialized Storage
 Choosing the Right Boba Small Fridge for Your Needs
 Maximizing the Use of Your Boba Small Fridge
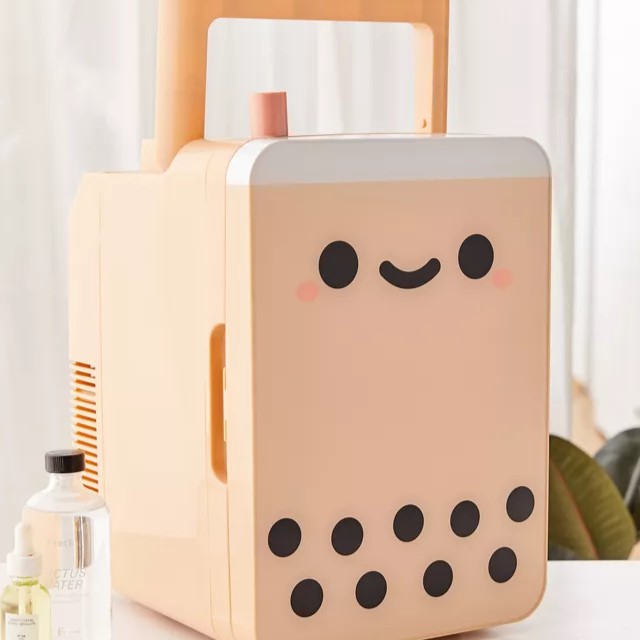 Enhancing Your Boba Experience with a Mini Fridge
 Conclusion