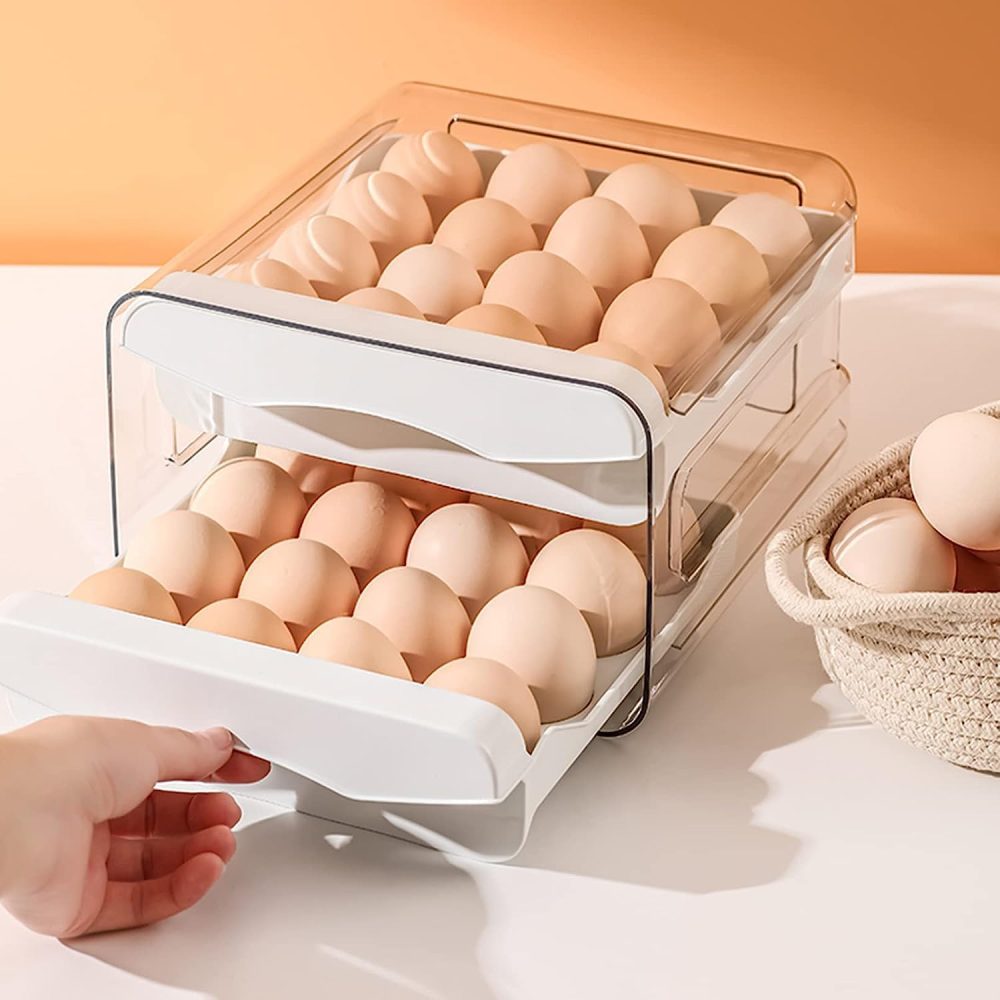
How Long Can You Keep Cooked Bacon in the Refrigerator?

Introduction:

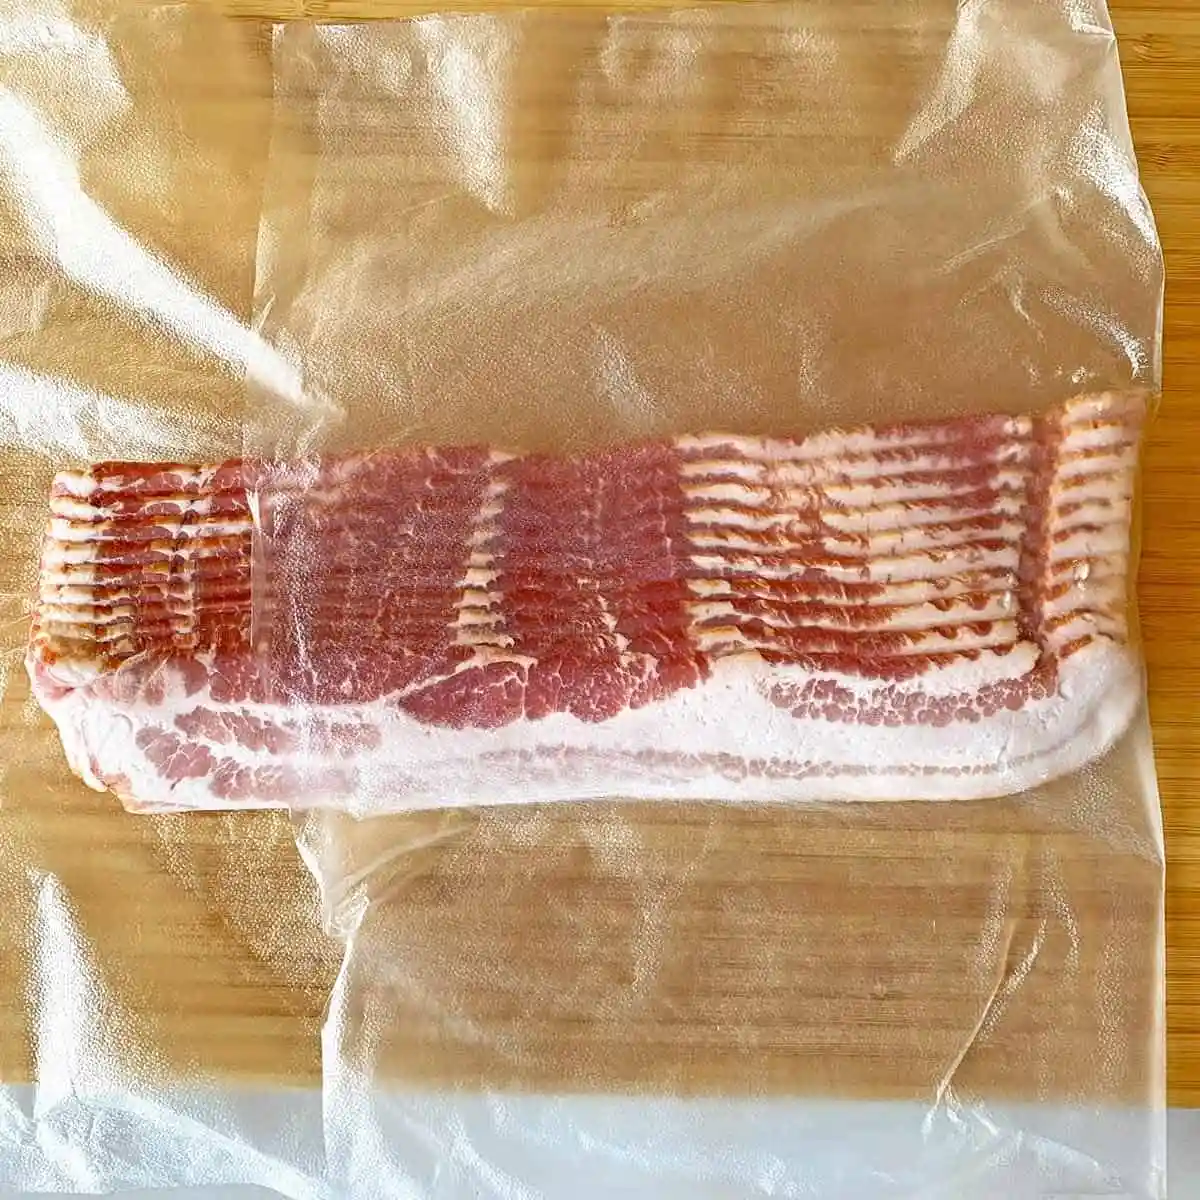
Cooked bacon is a delicious and versatile ingredient that you can enjoy in many dishes. However, knowing how long you can safely store cooked bacon in the refrigerator is crucial for maintaining its taste and ensuring food safety. This comprehensive guide explores the shelf life of cooked bacon, signs of spoilage, proper storage techniques, and useful tips to keep your bacon fresh.

refrigerator

How Long Can You Keep Cooked Bacon in the Refrigerator?

Understanding the Shelf Life of Cooked Bacon

Cooked bacon, like any other cooked meat, has a limited shelf life. Understanding how long it stays fresh can help prevent foodborne illnesses and ensure you enjoy it at its best quality.

Typical Shelf Life: Generally, cooked bacon can safely be stored in the refrigerator for up to 4 to 5 days. This timeframe ensures that the bacon remains safe to eat and retains its flavor and texture.

Factors Affecting Shelf Life: Several factors can influence the shelf life of cooked bacon, including: Storage method: Properly sealing and storing the bacon in the refrigerator impacts its longevity. Temperature: Maintaining a consistent refrigerator temperature below 40°F (4°C) is crucial. Original quality: The freshness of the bacon before cooking affects how long it remains safe to eat post-cooking.

Types of Bacon: Different types of bacon, such as traditional pork bacon, turkey bacon, and other varieties, may have slightly varying shelf lives. However, the general guideline of 4 to 5 days applies to most cooked bacon types.

refrigerator

Signs of Spoiled Bacon

Knowing the signs of spoiled bacon is essential for food safety. Consuming spoiled bacon can lead to foodborne illnesses, so it’s important to recognize when bacon has gone bad.

Unpleasant Odor: One of the most noticeable signs of spoiled bacon is a sour or rancid smell. Fresh bacon has a savory, smoky aroma, but if it starts smelling off, it’s best to discard it.

Discoloration: Cooked bacon should maintain a consistent color. If you notice any unusual discoloration, such as grayish or greenish spots, it indicates spoilage.

Slimy Texture: Fresh cooked bacon should have a crisp or slightly chewy texture. If the bacon develops a slimy or sticky feel, it is no longer safe to eat.

Mold: Visible mold on cooked bacon is a clear sign of spoilage. If you spot any mold, discard the bacon immediately.

Proper Storage Techniques

Proper storage extends the shelf life of cooked bacon and maintains its quality. Here are some best practices for storing cooked bacon in the refrigerator.

Cooling Before Storage: Allow the cooked bacon to cool down to room temperature before refrigerating. This helps prevent condensation, which can lead to moisture buildup and spoilage.

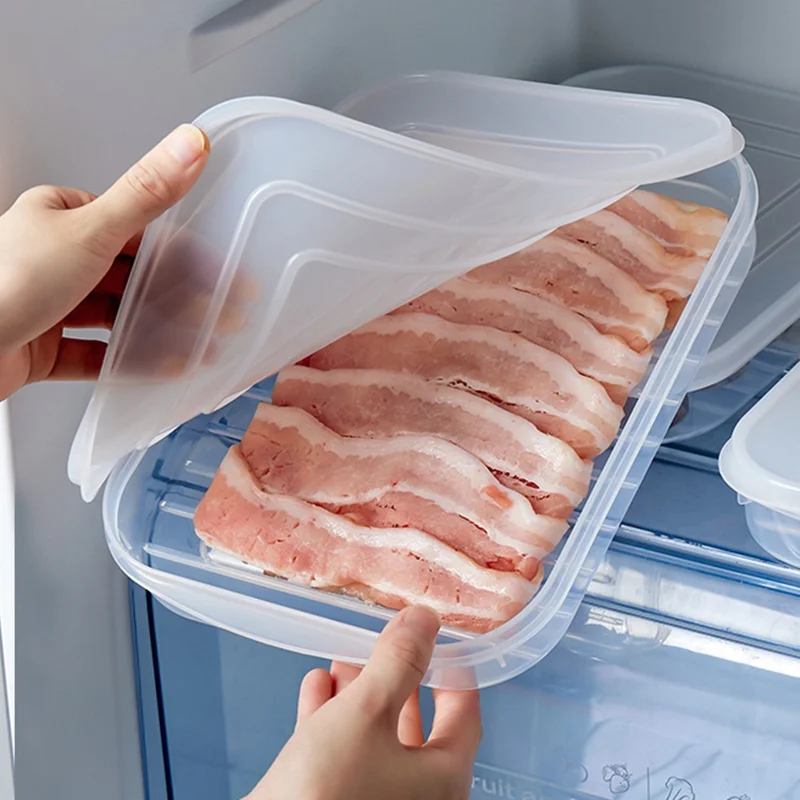
Use Airtight Containers: Store cooked bacon in airtight containers or resealable plastic bags to minimize exposure to air and moisture. Vacuum-sealing is an excellent option for maintaining freshness.

Labeling: Label the storage container or bag with the date of cooking. This helps keep track of how long the bacon has been stored and ensures it gets used within the safe timeframe.

Layering with Paper Towels: If you plan to store bacon strips, consider layering them with paper towels. The paper towels absorb excess grease and moisture, helping maintain the bacon’s crispness.

Refrigerator Placement: Store the bacon in the coldest part of the refrigerator, usually near the back on a middle shelf. Avoid placing it in the door, where temperatures fluctuate more.

refrigerator

Freezing Cooked Bacon for Extended Storage

If you need to store cooked bacon for longer than 4 to 5 days, freezing is a viable option. Properly frozen bacon can last much longer while retaining its quality.

Freezing Guidelines: To freeze cooked bacon, follow these steps: Cool the bacon completely to room temperature. Lay the bacon strips flat on a baking sheet lined with parchment paper and freeze until solid (about an hour). Transfer the frozen bacon strips to a freezer-safe bag or airtight container, removing as much air as possible. Label the bag or container with the date. Frozen cooked bacon can be stored for up to 2 to 3 months for the best quality.

Thawing Frozen Bacon: When you’re ready to use frozen cooked bacon, transfer it to the refrigerator to thaw overnight. Alternatively, you can reheat it directly from frozen using a microwave or oven, though this might slightly affect texture.

Reheating Cooked Bacon

Proper reheating methods can restore cooked bacon’s flavor and texture. Here are some effective ways to reheat cooked bacon.

Microwave: Place the cooked bacon on a microwave-safe plate lined with a paper towel. Cover it with another paper towel to absorb excess grease. Microwave on high for 15-20 seconds or until heated through.

Oven: Preheat the oven to 350°F (175°C). Arrange the bacon on a baking sheet lined with parchment paper. Bake for 5-10 minutes or until heated through and crispy.

Stovetop: Heat a non-stick skillet over medium heat. Place the bacon strips in the skillet, turning occasionally until heated through.

Avoid Overcooking: Avoid overcooking the bacon during reheating, as this can make it overly dry and tough.

refrigerator

Using Cooked Bacon in Recipes

Cooked bacon adds flavor and texture to a variety of dishes. Here are some popular and creative ways to incorporate cooked bacon into your meals.

Breakfast Dishes: Sprinkle cooked bacon over scrambled eggs, omelets, or breakfast casseroles. Add it to pancakes or waffles for a savory twist.

Salads: Chop cooked bacon and sprinkle it over salads for added crunch and flavor. Combine it with avocado, lettuce, and tomatoes for a classic BLT salad.

Sandwiches and Wraps: Include cooked bacon in sandwiches, such as BLTs, club sandwiches, or grilled cheese. Wrap it in tortillas with veggies and sauces for a flavorful wrap.

Soups and Stews: Add cooked bacon to soups and stews for a smoky, savory flavor. Use it as a garnish for creamy soups like potato or clam chowder.

Pasta and Rice Dishes: Incorporate cooked bacon into pasta dishes like carbonara or mac and cheese. Mix it into rice dishes or risottos for added richness.

Homemade Bacon Bits: Crumble cooked bacon into small pieces and use as homemade bacon bits for topping various dishes.

refrigerator

Frequently Asked Questions About Storing Cooked Bacon

Addressing common questions about storing cooked bacon provides additional clarity and guidance.

Q: Can I eat cooked bacon that has been left out overnight? A: No, it is not recommended to eat bacon that has been left out at room temperature for more than two hours, as it can lead to bacterial growth and food poisoning.

Q: How can I tell if cooked bacon is still good? A: Check for signs of spoilage such as an unpleasant odor, discoloration, slimy texture, and mold. If any of these signs are present, discard the bacon.

Q: Can I store cooked bacon with other foods in the same container? A: To avoid cross-contamination and preserve the flavor and texture, it is best to store cooked bacon separately in its own airtight container.

Q: How does freezing affect the texture of cooked bacon? A: While freezing cooked bacon can slightly affect its texture, proper freezing and reheating methods can help minimize this impact, keeping the bacon tasty and usable in various dishes.

Q: What is the best way to store bacon grease? A: Pour cooled bacon grease into a glass or metal container with an airtight lid and store it in the refrigerator for up to a month. Bacon grease can be used for cooking and adds flavor to many dishes.

Conclusion

Knowing how long you can keep cooked bacon in the refrigerator and employing proper storage techniques ensures that your bacon remains fresh and safe to eat. Cooked bacon typically lasts up to 4 to 5 days in the fridge, but freezing it can extend its shelf life to 2 to 3 months. Recognizing signs of spoilage, using airtight containers, and reheating the bacon correctly maintains its flavor and texture. By following the guidelines and tips outlined in this comprehensive guide, you can enjoy your cooked bacon safely in various delicious recipes while minimizing waste and enhancing food safety.

Posted in Household appliances, Lifestyle appliance | Tagged , | Leave a comment

How Long Can You Keep a Fresh Turkey in the Refrigerator?

Introduction:

Fresh turkey is a centerpiece for many festive gatherings, particularly during holidays like Thanksgiving and Christmas. To ensure it stays safe and delicious, proper storage is essential. This comprehensive guide delves into the detailed aspects of storing a fresh turkey in the refrigerator, covering how long you can keep it, how to store it properly, signs of spoilage, and additional tips for maintaining its quality.

refrigerator

How Long Can You Keep a Fresh Turkey in the Refrigerator?

Recommended Storage Time for Fresh Turkey

Fresh turkey should be stored in the refrigerator and consumed within a specific timeframe to ensure its safety and quality.

Standard Storage Time: According to the USDA, you can keep a fresh turkey in the refrigerator for 1 to 2 days. This short window helps to limit bacterial growth and preserves the turkey’s quality.

Purchasing Timelines: It’s best to purchase a fresh turkey as close to your planned cooking day as possible. Doing so minimizes the time the turkey spends in your refrigerator, reducing the risk of spoilage.

Important Factors Affecting Storage Duration

Several factors can influence how long a fresh turkey remains safe to eat in the refrigerator. Understanding these factors helps you better manage its storage.

Refrigerator Temperature: Maintaining a constant refrigerator temperature of 40°F (4°C) or below is crucial. Higher temperatures can accelerate bacterial growth, reducing the turkey’s safe storage period.

Packaging Integrity: The packaging plays a crucial role in preserving the turkey’s freshness. Ensure the original packaging is intact and free from leaks. If the packaging is damaged, consider rewrapping the turkey in heavy-duty aluminum foil or placing it in a leak-proof plastic bag.

Size of the Turkey: The storage duration can also be influenced by the size of the turkey. Larger turkeys may have areas that take longer to cool, potentially becoming a breeding ground for bacteria if not stored properly.

Refrigerator Organization: Ensure proper airflow around the turkey by avoiding overcrowding in the refrigerator. Proper air circulation helps maintain an even temperature, crucial for food safety.

turkey in the refrigerator

Proper Storage Methods for Fresh Turkey

Storing your fresh turkey correctly in the refrigerator ensures it remains safe and maintains its quality until you’re ready to cook it.

Keep It Cold: Place the turkey in the coldest part of your refrigerator. Typically, this is the back of the bottom shelf, where temperatures are the most consistent and coldest.

Original Packaging: Keep the turkey in its original packaging until you’re ready to prepare it. The packaging is designed to maintain freshness and prevent contamination from other foods in the refrigerator.

Secondary Containment: To prevent any potential cross-contamination, place the turkey on a tray or in a shallow pan. This catches any drips and prevents the spread of bacteria to other items in the fridge.

Avoid Frequent Handling: Minimize how often you handle the turkey while it’s in storage. Frequent handling increases the risk of introducing bacteria and affecting the integrity of the packaging.

Signs Your Fresh Turkey Has Spoiled

Identifying spoilage signs in your turkey is crucial to prevent foodborne illness. Always check for these signs before cooking.

Unpleasant Odor: A strong, sour, or foul odor is a clear sign that the turkey has spoiled. Fresh turkey has a slight odor, but it should not be overpowering or unpleasant.

Discoloration: Check the turkey’s skin for any unusual discoloration. Spoiled turkey might have a grey, greenish, or excessively dark appearance. Fresh turkey should have a light pink hue.

Slimy Texture: Feel the surface of the turkey; it should be moist but not slimy. A slimy texture indicates bacterial growth, and the turkey should not be consumed.

Excessive Liquid: While some liquid in the packaging is normal, an excess amount of blood or other fluids can be a sign of spoilage. Discard the turkey if you notice a significant amount of liquid.

Expiry Date: Always check the turkey’s expiration date. Even if it looks and smells acceptable, do not consume beyond the recommended storage period as a precaution.

refrigerator

Preparing to Cook the Turkey

Proper preparation practices help ensure your turkey remains safe to eat and enhances its flavor.

Thawing Frozen Turkey: If you need to thaw a frozen turkey, plan ahead. The safest way is to thaw it in the refrigerator, allowing 24 hours for every 4 to 5 pounds of turkey. Keep the turkey in its original packaging and place it in a tray to catch drips.

Avoid Room Temperature Thawing: Never thaw your fresh or frozen turkey at room temperature. Bacteria can grow rapidly in the outer layers while the inside remains frozen. Use the refrigerator method or cold water method if you need a quicker thaw, ensuring you change the water every 30 minutes.

Brining: To enhance the flavor and moisture of your turkey, consider brining. Prepare a brine solution and submerge the turkey, keeping it refrigerated throughout the brining process. Follow the brining time recommendations based on the turkey’s weight.

Seasoning: Before cooking, season the turkey according to your recipe. Seasoning a few hours in advance can improve flavor absorption. Keep the turkey refrigerated during this period.

Stuffing: If you plan to stuff your turkey, prepare the stuffing separately and add it just before cooking. This practice ensures even cooking and reduces the risk of bacterial growth.

Cooking Your Turkey Safely

Cooking your turkey properly ensures that it reaches a safe internal temperature, killing any potential bacteria.

Oven Temperature: Preheat your oven to at least 325°F (165°C). This temperature ensures the turkey cooks evenly and reaches a safe internal temperature.

Use a Thermometer: A meat thermometer is essential for ensuring your turkey is cooked thoroughly. Insert the thermometer into the thickest part of the thigh, without touching the bone. The turkey is safe to eat when the internal temperature reaches 165°F (74°C).

Allow for Resting: After cooking, let the turkey rest for about 20 minutes before carving. This time allows the juices to redistribute, making the turkey more succulent and easier to carve.

Check All Parts: Ensure all parts of the turkey, including the stuffing (if used) and joints, reach the safe temperature of 165°F (74°C). Uneven cooking can leave parts undercooked, posing a risk.

refrigerator

Storing Leftover Turkey

Proper management of leftover turkey is essential to prevent spoilage and foodborne illness.

Cool Quickly: After the meal, cool any leftovers rapidly. Divide the turkey into small portions and place them in shallow containers to promote quick cooling.

Refrigerate Promptly: Store leftovers in the refrigerator within two hours of cooking. Use airtight containers to maintain moisture and prevent contamination.

Label and Date: Label the containers with the date they were stored. This helps you keep track of how long the leftovers have been in the refrigerator.

Use Within Four Days: Consume leftover turkey within 3 to 4 days. For longer storage, freeze the portions, where they can be safe for up to 2 to 6 months.

Reheat Thoroughly: When reheating leftovers, ensure they reach an internal temperature of 165°F (74°C) to kill any potential bacteria.

Freezing Fresh Turkey for Longer Storage

If you need to store your turkey for an extended period, freezing is a viable option that maintains its quality.

Prepare for Freezing: Before freezing, rinse the fresh turkey under cool running water and pat dry with paper towels. This step removes any contaminants and prepares the turkey for safe freezing.

Wrap Properly: Wrap the turkey tightly in heavy-duty aluminum foil or freezer-safe plastic wrap. Overwrap this with a freezer bag or plastic freezer-safe container to prevent freezer burn.

Label and Date: Clearly label and date the wrapped turkey before placing it in the freezer. This helps you monitor how long it has been stored and ensures you use it within the recommended timeframe.

Freezing Time Frame: Fresh turkey can be safely stored in the freezer for up to 6 months. For best quality, use the turkey within this period to ensure optimal taste and texture.

Thaw Safely: When ready to use, thaw the frozen turkey in the refrigerator, allowing adequate time based on its weight. This slow thaw method ensures the turkey remains within a safe temperature range throughout the process.

Meal Planning Tips

Effective meal planning can help you purchase and store your turkey efficiently.

Purchase Timing: Plan your purchase so that the fresh turkey is bought 1 to 2 days before you intend to cook it. This minimizes storage time in the refrigerator and ensures maximum freshness.

Calculate Portions: Estimate the amount of turkey needed based on the number of guests. General guidelines suggest 1 to 1.5 pounds of turkey per person, which helps avoid excessive leftovers.

Diversify Dishes: Plan to use leftovers in different dishes to ensure none goes to waste. Think about recipes such as turkey sandwiches, soups, casseroles, and salads for variety.

Food Safety Practices: Incorporate food safety practices such as using separate cutting boards for raw turkey and other foods, washing hands and surfaces frequently, and ensuring proper cooking and storage temperatures.

turkey in the refrigerator

Environmental Considerations

Proper management of turkey storage and leftovers also has environmental benefits.

Reduce Waste: By purchasing the right amount of turkey and properly storing leftovers, you can significantly reduce food waste. Every bit of turkey that is safely consumed instead of discarded helps in this effort.

Sustainable Choices: Consider purchasing turkeys from sustainable and ethical sources. This supports environmentally friendly farming practices and reduces overall environmental impact.

Reuse and Recycle: Use reusable containers and bags for storing turkey and leftovers. This reduces single-use plastic waste and promotes eco-friendly habits in your kitchen.

Energy Efficiency: Keeping your refrigerator at the optimal temperature helps it run efficiently, conserving energy and reducing your carbon footprint.

Composting: If some parts of the turkey cannot be used, like bones after making stock, consider composting them if appropriate for your composting system. This reduces waste and benefits your garden.

Conclusion

Fresh turkey can be kept in the refrigerator for up to 1 to 2 days, provided it is stored correctly to maintain safety and quality. Factors such as refrigerator temperature, packaging, and proper handling play significant roles in preserving turkey. Always check for spoilage signs before cooking, and employ proper cooking and storage techniques to ensure the turkey remains safe to eat. By following these guidelines and incorporating efficient meal planning and environmental practices, you can enjoy your fresh turkey safely and responsibly.

Posted in Household appliances, Lifestyle appliance | Tagged , | Leave a comment

How Long Is Cooked Rice Good for in the Refrigerator?

Introduction:

Cooked rice is a staple in many households, offering versatility and convenience for various meals. However, it’s crucial to store cooked rice properly to ensure it remains safe to eat and maintains its quality. This comprehensive guide explores the shelf life of cooked rice in the refrigerator, factors affecting its longevity, signs of spoilage, and tips for proper storage.

rice in refrigerator

How Long Is Cooked Rice Good for in the Refrigerator?

Understanding the Shelf Life of Cooked Rice

The general consensus is that cooked rice can be safely stored in the refrigerator for 3 to 5 days. This timeframe ensures that the rice stays fresh and minimizes the risk of bacterial growth that can lead to foodborne illnesses.

Standard Shelf Life: When stored correctly in an airtight container, cooked rice typically remains good for about 3 to 5 days in the refrigerator. Beyond this period, the risk of bacterial contamination increases.

Variations by Rice Type: Different types of rice may have slightly varying shelf lives. For instance, white rice generally lasts longer than brown rice due to its lower oil content. Brown rice has more natural oils, which can cause it to spoil faster, often closer to the 3-day mark.

Factors Affecting the Longevity of Cooked Rice

Several factors can influence how long cooked rice remains safe to eat, including storage conditions, cooking methods, and temperature.

Storage Temperature: Refrigeration slows the growth of bacteria, making the fridge the best place to store cooked rice. The temperature should be consistently below 40°F (4°C) to ensure safety.

Airtight Containers: Using airtight containers for storing rice prevents it from drying out and protects it from absorbing other odors in the fridge. Airtight containers also limit exposure to air, reducing bacterial growth.

Prompt Refrigeration: Cooked rice should be refrigerated within two hours of cooking. Leaving rice at room temperature for longer periods allows bacteria like Bacillus cereus to thrive, leading to potential food poisoning.

Initial Cooking Quality: The shelf life of rice can also depend on how well it was cooked initially. Properly cooked rice has fewer residual bacteria and a more stable texture, extending its shelf life.

refrigerator

Signs of Spoiled Rice

It’s important to recognize the signs of spoilage to avoid consuming rice that is no longer safe to eat.

Unpleasant Odor: One of the most apparent signs of spoiled rice is an off or sour smell. Fresh rice has a neutral, mildly nutty aroma, while spoiled rice emits a distinctly unpleasant odor.

Texture Changes: Spoiled rice may become excessively dry and hard or overly wet and mushy. The change in texture is a clear indication that the rice should not be consumed.

Visible Mold: Mold growth on rice is often seen as discolored spots, usually black, green, or blue. Any visible mold means the rice is unsafe to eat and should be discarded immediately.

Slimy Coating: A slimy or sticky coating on the rice indicates bacterial growth. This texture signifies that the rice has gone bad and should not be eaten.

Unappealing Taste: If the rice has developed a sour or off taste, it is likely spoiled. Always trust your senses—if it doesn’t smell, look, or taste right, it’s best to discard it.

Proper Storage Techniques

Storing cooked rice properly is essential to extend its shelf life and ensure it remains safe to eat.

Cool Rice Rapidly: After cooking, let the rice cool slightly at room temperature but do not leave it out for more than two hours. Rapidly cool the rice by spreading it out on a baking sheet or using a shallow container.

Use Airtight Containers: Transfer the cooled rice to airtight containers before placing it in the refrigerator. Airtight containers help maintain moisture levels and prevent the rice from absorbing other odors.

Label and Date: Labeling the container with the date of cooking helps you keep track of how long the rice has been stored. This practice ensures you use the rice within the safe time frame and reduces the risk of consuming spoiled rice.

Avoid Stacking Containers: Avoid stacking multiple containers of rice immediately in the refrigerator, as this can trap heat and slow down the cooling process. Allow adequate air circulation around each container.

Reheat Properly: When reheating rice, ensure it reaches an internal temperature of 165°F (74°C). This temperature kills any potential bacteria and ensures the rice is safe to eat.

rice in refrigerator

Reheating Cooked Rice Safely

Properly reheating cooked rice is crucial to maintaining food safety and texture.

Microwave Method: To reheat rice in the microwave, place it in a microwave-safe dish and add a few tablespoons of water or broth to moisten it. Cover loosely with a microwave-safe lid or plastic wrap and heat on high for 2-3 minutes, stirring halfway through.

Stovetop Method: For stovetop reheating, place the rice in a saucepan and add a splash of water or broth. Cover the pan and warm the rice over low heat, stirring occasionally until evenly heated.

Oven Method: To reheat rice in the oven, preheat the oven to 300°F (150°C). Spread the rice evenly in an oven-safe dish, add a little water or broth, cover with foil, and bake for about 15-20 minutes until heated through.

Avoid Repeated Reheating: Reheat only the portion of rice you intend to consume, as repeated cooling and reheating can increase the risk of bacterial growth. Once reheated, consume the rice immediately and do not refrigerate leftovers.

Freezing Cooked Rice for Extended Storage

Freezing cooked rice is an excellent option for those who want to extend its shelf life beyond a few days.

Prepare for Freezing: Cool the cooked rice completely before freezing. Spreading it out in a single layer on a baking sheet helps cool it quickly and evenly.

Portion Control: Divide the rice into portion-sized amounts before freezing. This allows you to thaw and use only what you need without having to defrost the entire batch.

Use Freezer Bags: Place the portioned rice in freezer-safe bags, squeeze out as much air as possible, and seal tightly. Label the bags with the date of freezing for easy tracking.

Freeze Flat: Lay the freezer bags flat in the freezer to save space and ensure the rice freezes evenly. Once frozen, you can stack the bags to maximize freezer space.

Thawing and Reheating: Thaw frozen rice in the refrigerator overnight or use the microwave for quick thawing. Reheat the thawed rice using the microwave, stovetop, or oven methods mentioned earlier, ensuring it reaches 165°F (74°C) for food safety.

rice in refrigerator

Using Leftover Rice in Recipes

Repurposing leftover rice in various recipes can help minimize food waste and add variety to your meals.

Fried Rice: Leftover rice is perfect for making fried rice. The firm texture of day-old rice holds up well during stir-frying, absorbing flavors from sauces and seasonings.

Rice Salad: Use chilled leftover rice to create rice salads. Combine with fresh vegetables, herbs, proteins, and a light dressing for a wholesome, refreshing dish.

Rice Pudding: Transform leftover rice into a sweet treat by making rice pudding. Cook the rice with milk, sugar, and spices until creamy and serve warm or chilled.

Soups and Stews: Add leftover rice to soups and stews to bulk up the meal and make it more filling. Stir the rice in during the final stages of cooking to heat through without becoming mushy.

Rice Bowls: Create rice bowls by topping the leftover rice with proteins like chicken, tofu, or beef, and a mix of vegetables. Drizzle with sauces for a quick, balanced meal.

Minimizing Food Waste with Rice

Efficiently managing rice portions and storage can help reduce food waste and make the most of this versatile staple.

Cook Appropriate Portions: Estimate the amount of rice needed per meal to avoid excessive leftovers. Typically, 1/2 to 1 cup of cooked rice per person is sufficient.

Plan Meals: Incorporate leftover rice into your meal planning. Knowing how you will use the leftover rice reduces the likelihood of spoilage and waste.

FIFO Principle: Follow the “first in, first out” principle, using older rice first and ensuring stored rice is consumed within the safe timeframe.

Creative Recipes: Get creative with using leftover rice in different recipes, exploring various cuisines and dishes to keep meals exciting and reduce food monotony.

Donations: If you have a surplus of cooked rice that you cannot use within the safe storage window, consider donating it to food banks or shelters where possible.

refrigerator

Health and Safety Considerations

Ensuring the health and safety of stored cooked rice is paramount to avoid foodborne illnesses.

Prevent Cross-Contamination: Store rice separately from raw meats and other perishable items to prevent cross-contamination. Use separate utensils and cutting boards to handle rice and raw food items.

Temperature Control: Maintain a consistent refrigerator temperature below 40°F (4°C) to inhibit bacterial growth on stored rice. Use a fridge thermometer to monitor any fluctuations.

Hygienic Practices: Practice good hygiene when handling rice, including washing hands, using clean utensils, and ensuring the cooking and storage areas are clean.

Understand Food Safety: Familiarize yourself with food safety guidelines to ensure you handle and store cooked rice properly. Knowledge of best practices can prevent common food safety mistakes.

Consult Professionals: For large-scale food preparation, such as in restaurants or catering, consult food safety professionals to ensure compliance with local health regulations and standards.

Conclusion

Cooked rice can be safely stored in the refrigerator for 3 to 5 days when proper storage techniques are used. Understanding the factors that influence rice’s shelf life, recognizing signs of spoilage, and applying effective storage and reheating methods ensure that your rice remains safe to eat and retains its quality. By implementing proper food safety measures, planning meals efficiently, and exploring creative recipes, you can make the most of your cooked rice while minimizing food waste and maintaining a healthy, safe kitchen environment.

Posted in Household appliances, Lifestyle appliance | Tagged , | Leave a comment

How Long Can Raw Chicken Stay in the Refrigerator?

Introduction:

Raw chicken is a staple in many kitchens, prized for its versatility and nutritional benefits. However, when it comes to food safety, correctly handling and storing raw chicken is crucial. Improper storage can lead to spoilage and foodborne illnesses. So, how long can raw chicken stay in the refrigerator? Let’s explore this topic in detail, considering factors like storage conditions, types of chicken, and best practices to ensure that your chicken stays safe and fresh.

refrigerator

How Long Can Raw Chicken Stay in the Refrigerator?

Refrigeration Basics

Refrigeration slows down the growth of bacteria, helping to keep perishable foods like raw chicken fresh for longer periods. However, refrigeration only delays bacterial growth; it doesn’t stop it entirely.

Optimal Temperature: To keep raw chicken safe, it should be stored at a temperature of 40°F (4°C) or lower. Bacterial growth accelerates at temperatures above this threshold, making it essential to keep your refrigerator at the appropriate setting.

Air Circulation: Proper air circulation within the refrigerator helps maintain a consistent temperature, ensuring that all stored items, including raw chicken, remain adequately chilled. Avoid overcrowding the fridge to facilitate efficient air movement.

Shelf Life of Raw Chicken

Understanding the general shelf life of raw chicken can help you plan and manage your meal preparations more effectively.

Whole Chicken: Raw whole chicken can safely stay in the refrigerator for up to 2 days. After this period, the risk of bacterial growth increases significantly, making it less safe to consume.

Chicken Parts: Chicken parts, such as breasts, thighs, and wings, also have a similar shelf life of up to 2 days in the refrigerator. The risk of spoilage and contamination increases after this duration, so it’s crucial to use or freeze them promptly.

Ground Chicken: Ground chicken has a slightly shorter shelf life, typically lasting around 1 to 2 days in the refrigerator. The higher surface area of ground meat makes it more susceptible to bacterial contamination, necessitating quicker use.

refrigerator

Factors Influencing Shelf Life

Several factors can influence how long raw chicken stays fresh in the refrigerator. Understanding these factors can help you make informed decisions about storage.

Packaging: The type and quality of packaging play a significant role in preserving raw chicken. Vacuum-sealed packages can extend the shelf life by reducing exposure to air and contaminants. Conversely, loosely wrapped chicken may spoil faster due to increased exposure to air and moisture.

Freshness at Purchase: The initial freshness of the raw chicken when purchased affects its shelf life. Always check the sell-by date and choose the freshest possible option. Chicken that is closer to its sell-by date will have a shorter shelf life once you bring it home.

Refrigerator Conditions: The overall condition of your refrigerator can impact the shelf life of raw chicken. Consistent temperature maintenance, cleanliness, and proper storage practices contribute to keeping chicken fresh for longer periods.

Best Practices for Storing Raw Chicken

Following best practices for storing raw chicken in the refrigerator can help ensure safety and extend its shelf life.

Original Packaging: Store raw chicken in its original packaging until you’re ready to use it. The packaging is designed to maintain freshness and prevent contamination. If you need to transfer it, use an airtight container or resealable plastic bag.

Placement in the Fridge: Store raw chicken on the bottom shelf of the refrigerator to prevent cross-contamination. Placing it on a lower shelf reduces the risk of its juices dripping onto other foods.

Separation from Ready-to-Eat Foods: Keep raw chicken separate from ready-to-eat foods, such as fruits and vegetables, to avoid cross-contamination. Using separate compartments or containers is an effective way to prevent this.

Wrapping and Sealing: If the original packaging is damaged, rewrap the chicken in plastic wrap or aluminum foil and place it in a resealable plastic bag. Ensure it is sealed tightly to prevent air exposure and contamination.

refrigerator

Signs of Spoilage

Recognizing signs of spoilage in raw chicken is vital to prevent consuming unsafe food. Being aware of these indicators can help you make better decisions about food safety.

Unpleasant Odor: One of the first signs of spoilage is an unpleasant, sour, or ammonia-like odor. If the chicken emits any strong, off-putting smell, it is best to discard it.

Color Changes: Fresh raw chicken should have a pink, flesh-colored hue. Discoloration to gray, green, or yellow indicates spoilage. Check for any unusual color changes before using the chicken.

Slimy Texture: Spoiled chicken often develops a slimy or sticky texture. If the chicken feels slimy to the touch, it is likely spoiled and should be thrown away.

Mold or Spots: Visible mold or dark spots on the chicken indicate that it has gone bad. Any such signs should prompt immediate disposal to avoid the risk of foodborne illness.

Freezing as an Alternative

Freezing raw chicken is an excellent alternative if you don’t plan to use it within the recommended refrigeration time. Proper freezing techniques can extend its shelf life significantly.

Freezing Times: When properly frozen, raw chicken can last up to 9 months for whole chickens and up to 6 months for chicken parts. Ground chicken can be safely frozen for up to 3 to 4 months.

Packaging for Freezing: For best results, wrap the chicken tightly in plastic wrap or aluminum foil, followed by a layer of freezer paper or a resealable plastic freezer bag. This prevents freezer burn and maintains quality.

Labeling: Always label the package with the date of freezing. This practice helps you keep track of how long the chicken has been stored and ensures you use it within the optimal period.

refrigerator

Thawing and Using Frozen Chicken

Proper thawing techniques are essential to ensure safety and maintain the quality of frozen raw chicken.

Refrigerator Thawing: The safest method for thawing frozen chicken is in the refrigerator. Place the chicken in a dish or on a tray to catch any drips. Allow 24 hours for every 4 to 5 pounds of chicken.

Cold Water Thawing: For quicker thawing, submerge the chicken in cold water, changing the water every 30 minutes. This method can take several hours, depending on the size of the chicken.

Microwave Thawing: Thawing in the microwave is the fastest method, but it requires immediate cooking to ensure safety. Use the defrost setting and follow your microwave’s instructions for best results.

Avoiding Contamination During Storage

Preventing contamination during the storage of raw chicken is crucial for maintaining food safety. Follow these guidelines to minimize the risk of bacterial transfer.

Hand Hygiene: Always wash your hands with soap and water before and after handling raw chicken to prevent the spread of bacteria.

Surface Cleaning: Clean and sanitize any surfaces, cutting boards, and utensils that come into contact with raw chicken. Use hot, soapy water followed by a disinfectant.

Separate Cutting Boards: Use separate cutting boards for raw chicken and other foods, especially ready-to-eat items, to prevent cross-contamination.

Proper Temperature: Ensure your refrigerator maintains a consistent temperature of 40°F (4°C) or lower. Use an appliance thermometer to monitor and adjust the temperature settings as needed.

refrigerator

Conclusion

How long can raw chicken stay in the refrigerator? Generally, raw chicken can be safely refrigerated for up to 2 days. Adhering to best practices for storage, recognizing signs of spoilage, and using proper thawing techniques can help maintain both the safety and quality of raw chicken. By understanding the factors influencing shelf life, following proper storage guidelines, and utilizing freezing as an alternative, you can ensure that raw chicken remains safe to consume. Maintaining cleanliness and avoiding cross-contamination are also key components of responsible food handling. With these detailed insights, you can better manage your raw chicken, keeping your meals safe and delicious.

Posted in Household appliances, Lifestyle appliance | Tagged , | Leave a comment

How Long Can a Refrigerator Lay on Its Back?

Introduction:

Understanding the Impact of Laying a Refrigerator on its Back

When moving or transporting a refrigerator, there may be instances where it needs to be laid on its back. However, it is crucial to consider the potential consequences and time limits associated with this position. Laying a refrigerator on its back can impact its internal components, particularly the compressor and refrigerant system. In this comprehensive guide, we will explore the effects of laying a refrigerator on its back and provide guidelines to ensure its safe operation. By understanding the impact and following the instructions below, you can effectively handle your refrigerator during transportation without compromising its performance or damaging its internal systems.

refrigerator

How Long Can a Refrigerator Lay on Its Back? A Comprehensive Guide

  1. Potential Risks and Consequences

a. Impact on the compressor: Laying a refrigerator on its back can cause the compressor oil to flow into the refrigerant lines, potentially leading to compressor damage or failure. When the refrigerator is returned to an upright position, allowing sufficient time for the oil to drain back is essential to prevent these issues.

b. Damage to the refrigerant system: In addition to the compressor, the refrigerant system components, such as the condenser coils and evaporator coils, may also be at risk when the refrigerator is laid on its back. Mishandling or improper positioning during transport can cause damage or misalignment to these delicate parts.

c. Potential refrigerant leaks: If the refrigerant lines are compromised or damaged while laying the refrigerator on its back, it can result in refrigerant leaks. These leaks not only impact the cooling efficiency of the refrigerator but also pose environmental hazards.

refrigerator

  1. Minimizing the Time Laid on its Back

a. Time limits for transportation: When laying a refrigerator on its back during transportation, it is crucial to minimize the duration. The longer the refrigerator remains in this position, the higher the risk of oil migration and potential damage to internal components.

b. Prioritize efficiency and planning: Plan the transportation process efficiently to minimize the time the refrigerator remains on its back. This includes ensuring a clear and safe path, having the necessary equipment ready in advance, and properly securing the refrigerator during transport.

  1. Best Practices for Transporting a Refrigerator

a. Securing the refrigerator: During transportation, securely fasten the refrigerator to prevent it from tipping or rolling over. Utilize straps or other reliable fastening methods to ensure the refrigerator remains stable and in the desired position.

b. Consider alternative positions: If possible, prioritize transporting the refrigerator in an upright position rather than laying it on its back. This reduces the risk of damage to internal components and avoids potential complications associated with the oil migration.

c. Additional precautions: Take extra precautions during transport by maintaining a level position and ensuring the refrigerator is protected from any impacts or sudden movements that could cause damage.

refrigerator

  1. Preparing the Refrigerator for Transport

a. Emptying and cleaning: Before moving the refrigerator, remove all contents, including perishable items, trays, and drawers. Clean and dry the interior thoroughly to prevent the growth of mold or unpleasant odors during transportation.

b. Securing loose components: Remove any loose or detachable parts, such as doors, shelves, or drawers, and pack them separately. Securely pack these components to prevent them from becoming dislodged during transportation and causing damage.

c. Securing the doors: Ensure the doors are tightly closed and, if necessary, use tape or other secure fastening methods to prevent them from swinging open during transport.

  1. Handling a Refrigerator When Laid on its Back

a. Allowing recovery time: If the refrigerator needs to be laid on its back, it is crucial to allow sufficient recovery time. This period allows any compressor oil that may have migrated into the refrigerant lines to drain back to its original position.

b. Carefully uprighting the refrigerator: When returning the refrigerator to an upright position, proceed slowly and gently. Avoid any sudden movements or impacts that could cause further damage to internal components.

c. Waiting before powering on: After the refrigerator has been uprighted, wait at least the same duration it was laid on its back before plugging it back in. This waiting time allows the compressor oil to settle and reduces the risk of compressor damage.

refrigerator

  1. Seeking Professional Assistance and Manufacturer Guidelines

a. Consult the manufacturer: If you have concerns about laying your refrigerator on its back or encounter any operational issues after transport, refer to the manufacturer’s guidelines and recommendations. Manufacturers often provide specific instructions to ensure the safe transport and operation of their appliances.

b. Professional evaluation and assistance: If you are unsure about the impact of laying your refrigerator on its back or encounter any issues after transportation, it is advisable to seek assistance from a professional refrigerator technician. They have the expertise to assess the situation, identify potential damage, and provide necessary repairs or recommendations.

c. Adhering to electrical codes and regulations: Always adhere to local electrical codes when moving or installing a refrigerator. This ensures that the electrical connections and power supply are compliant with safety standards and prevents potential hazards.

  1. Understanding Individual Refrigerator Requirements

a. Variations in individual refrigerators: While general guidelines can be followed, it is important to recognize that different refrigerators may have unique requirements. Factors such as the refrigerator’s specific design, age, and model may influence the impact of laying it on its back.

b. Reviewing the user manual: Consult the user manual or documentation provided with your refrigerator. The manufacturer’s instructions may contain specific guidance regarding transport, including information about the maximum allowable time for laying the refrigerator on its back.

c. Factors to consider: If no specific guidelines are available, factors such as the age and condition of the refrigerator should be taken into account. Older refrigerators or those with preexisting issues may be more sensitive to being laid on their backs.

  1. Monitoring for Potential Issues

a. Post-transport inspection: After transporting and reconnecting the refrigerator, perform a thorough inspection to identify any visible damage or issues. Check for leaks, unusual noises, functionality issues, or any signs of damage to the compressor or refrigerant system.

b. Promptly address concerns: If you notice any unusual or concerning issues after transport, take immediate action. Consult a professional technician to assess and address the problem to prevent further damage or disruption.

c. Regular maintenance and servicing: Proper maintenance and periodic servicing of the refrigerator can ensure its optimal performance and longevity. Schedule regular inspections and cleaning to keep the refrigerator in good condition and prevent potential issues.

refrigerator

Conclusion: Ensuring Safe Refrigerator Transport

Laying a refrigerator on its back during transportation carries potential risks, particularly for internal components like the compressor and refrigerant system. Prioritizing minimal time spent in this position, securely fastening the refrigerator during transport, and minimizing potential impacts are essential to ensure safe transportation. Other considerations, such as cleaning and securing loose components, should also be taken into account. By following these guidelines and adhering to best practices, you can safely transport your refrigerator without compromising its performance or causing damage.

Posted in Household appliances, Lifestyle appliance | Tagged , | Leave a comment

Refrigerator Pickles: Understanding Their Shelf Life

Introduction: The Appeal of Refrigerator Pickles

Refrigerator pickles are a popular choice for preserving cucumbers and other vegetables. Unlike traditional canned pickles, they are quick and easy to make, require no canning equipment, and can be enjoyed within a short time frame. In this comprehensive guide, we will explore the shelf life of refrigerator pickles, factors that affect their longevity, and tips for extending their freshness.

refrigerator

Refrigerator Pickles: Understanding Their Shelf Life

  1. Understanding the Shelf Life of Refrigerator Pickles

Refrigerator pickles, also known as quick pickles, have a shorter shelf life compared to their canned counterparts. This is because they are not preserved in vinegar or subjected to the traditional canning process, which provides a longer shelf life. The shelf life of refrigerator pickles can vary depending on several factors.

  1. Factors Affecting the Shelf Life of Refrigerator Pickles

a. Vinegar-to-water ratio: The vinegar-to-water ratio used in the pickling brine can impact the shelf life of refrigerator pickles. A higher proportion of vinegar, along with adequate salt and sugar, helps preserve the cucumbers and other vegetables for a longer period.

b. pH levels: The pH level of the pickling brine is crucial for preventing bacterial growth and extending the shelf life of refrigerator pickles. The lower the pH level, the more acidic the environment, making it less favorable for bacterial spoilage. Maintaining a pH level below 4.6 is necessary for preservation.

c. Vegetable condition: The freshness and quality of the vegetables used in refrigerator pickles can affect their shelf life. It is important to select fresh cucumbers and other vegetables without any signs of spoilage or soft spots.

d. Storage conditions: Proper storage is essential for maximizing the shelf life of refrigerator pickles. They should be stored in a clean, airtight container in the refrigerator, away from other strong-smelling foods that could affect their taste and aroma.

refrigerator

  1. The Expected Shelf Life of Refrigerator Pickles

Refrigerator pickles are best consumed within a relatively short timeframe. While they are typically ready to eat within a day or two of preparation, their peak freshness and flavor can be enjoyed for approximately 1-2 months when stored properly. Beyond this period, the quality may decline, and the pickles may become less crisp.

  1. Tips for Extending the Shelf Life of Refrigerator Pickles

a. Maintain proper brine levels: As you consume the pickles, ensure that the remaining vegetables are fully submerged in the pickling brine. This helps prevent exposure to air, which can lead to spoilage.

b. Keep the container sealed: Always seal the container tightly after each use to preserve the flavor, texture, and freshness of the pickles. This prevents any outside contaminants from infiltrating the pickles.

c. Use clean utensils: When handling refrigerator pickles, use clean utensils to prevent cross-contamination. This helps maintain the integrity of the pickles and prevents the introduction of bacteria that may shorten their shelf life.

d. Observe for signs of spoilage: Regularly inspect the pickles for any signs of mold, sliminess, unpleasant odors, or changes in color. If you notice any of these signs, it is best to discard the pickles to avoid the risk of foodborne illnesses.

e. Make smaller batches: If you find it challenging to consume a large amount of refrigerator pickles within their expected shelf life, consider making smaller batches.

refrigerator

  1. Proper Handling and Usage of Refrigerator Pickles

a. Keep track of the opening date: To ensure the freshness and safety of your refrigerator pickles, it is helpful to label the container with the date they were made or opened. This helps you keep track of how long they have been stored and when they are approaching their recommended shelf life.

b. Avoid cross-contamination: When serving refrigerator pickles, use clean utensils to prevent cross-contamination with other foods. This helps maintain the integrity of the pickles and prevents the introduction of bacteria that may shorten their shelf life.

c. Use proper hygiene: Before handling refrigerator pickles, wash your hands thoroughly to minimize the risk of introducing any contaminants. This applies especially when reaching into the container to retrieve pickles.

d. Serve with clean utensils: When enjoying refrigerator pickles, always use clean utensils to scoop them out of the container. This prevents the transfer of bacteria from used utensils back into the remaining pickles.

e. Refrigerate after use: After serving refrigerator pickles, promptly return the container to the refrigerator. Avoid leaving them at room temperature for an extended period, as this can promote bacterial growth and compromise their freshness.

refrigerator

Safe Consumption and Storage Practices for Refrigerator Pickles

a. Proper handling: When serving refrigerator pickles, use clean utensils to avoid introducing contaminants that could shorten their shelf life. Additionally, ensure that your hands are clean before touching the pickles.

b. Refrigeration temperature: Store the container of refrigerator pickles in the coldest part of your refrigerator, typically the bottom shelf or the crisper drawer. The optimal refrigerator temperature for pickles is between 32-40°F (0-4°C). Avoid storing them in the refrigerator door as the temperature fluctuates more in that area.

c. Contamination prevention: Avoid double-dipping into the jar with used utensils or fingers, as it can introduce bacteria and compromise the quality of the remaining pickles. Always scoop out what you need into a separate bowl to serve, especially if sharing with others.

d. Flavor development: Refrigerator pickles often benefit from additional flavors developing over time. As they sit in the brine, the flavors mingle and intensify.

e. Adjusting brine levels: Over time, the pickles may release liquid, causing the brine level to decrease. To maintain the flavor and crispness, you can periodically make additional brine and pour it over the pickles to ensure they remain submerged.

f. Transfer to smaller containers: As you consume the pickles and the quantity decreases, consider transferring the remaining pickles into smaller containers. This helps minimize exposure to air, which can cause the pickles to become soft and lose their desirable texture.

g. Enjoy pickling variations: Experiment with different vegetables and spices in your refrigerator pickles to add variety to your meals.

refrigerator

Conclusion: Enjoying Fresh Refrigerator Pickles

Refrigerator pickles offer a convenient and delicious way to preserve cucumbers and other vegetables. Understanding their shelf life and the factors that affect it ensures that you can enjoy their freshness and crispness for an extended period. By maintaining proper brine levels, sealing the container, using clean utensils, observing signs of spoilage, and making smaller batches, you can maximize the shelf life of your refrigerator pickles and savor their tangy flavors whenever you desire.

Posted in Household appliances, Lifestyle appliance | Tagged , | Leave a comment

Understanding Egg Shelf Life in the Refrigerator

Introduction: Importance of Egg Freshness and Safety

Proper storage and handling of eggs is crucial to maintain their freshness and minimize the risk of foodborne illnesses. The refrigerator is the most common storage location for eggs, but it is essential to understand how long they can be safely kept before they should be discarded. In this comprehensive guide, we will explore the factors that affect the shelf life of eggs, safe storage practices, and key signs to look for when determining egg freshness.

refrigerator

Understanding Egg Shelf Life in the Refrigerator

  1. Factors Affecting Egg Shelf Life

a. Packaging date: Eggs typically have a “packaging date” or “sell-by date” printed on the carton. This date serves as a guide for retailers and consumers, indicating the estimated time within which the eggs are at their peak freshness.

b. Egg quality: Eggs with intact shells and no visible cracks or damage tend to have a longer shelf life. Fresher eggs also have a higher moisture content, which can affect their storage longevity.

c. Washing the eggs: Commercially sold eggs in some regions are washed to remove potential bacteria. This process removes the “bloom,” a protective layer on the shell that naturally helps preserve freshness. Washed eggs have a shorter shelf life than unwashed eggs.

  1. Understanding Egg Freshness and Quality

a. The float test: To determine the freshness of an egg, you can conduct a simple float test. Fill a bowl with water and carefully place an egg in it. Fresh eggs sink to the bottom and lay horizontally, while less fresh eggs may tilt up slightly. If the egg floats to the top, it is not fresh and should be discarded.

b. Appearance and odor: Fresh eggs have a clear, bright yolk and a thick, viscous egg white. Any discoloration, off-putting smells, or sliminess indicates spoilage and the need for immediate disposal.

refrigerator

  1. Safe Storage Duration in the Refrigerator

a. Raw eggs in the shell: When stored correctly in the refrigerator, raw eggs in the shell can remain fresh and safe to consume for up to 4-5 weeks past the packaging date. However, for the best quality, it is recommended to use them within 3 weeks.

b. Cooked eggs: Hard-boiled eggs or any eggs that have been cooked should be stored in the refrigerator in a covered container. They can be safely consumed within one week.

c. Leftover egg dishes: Dishes made with eggs, such as quiches or frittatas, should be stored in the refrigerator. Consume them within 3-4 days to ensure freshness and minimize the risk of foodborne illnesses.

  1. Storing Eggs Properly in the Refrigerator

a. Carton storage: Keep the eggs in their original carton, as it provides protection and helps maintain their freshness by minimizing exposure to light, odors, and temperature fluctuations. Store the carton in the main body of the refrigerator, not on the refrigerator door.

b. Avoid temperature fluctuations: Keep the refrigerator temperature consistent to prevent sudden shifts that can affect the quality and shelf life of the eggs. Avoid placing eggs near the refrigerator door, where they are exposed to warmer air whenever the door is opened.

c. Protection from odors: Eggs can absorb odors from other foods in the refrigerator. To prevent this, store them in a separate area away from strong-smelling items such as onions or fish.

d. Use-by date extension: If you have eggs that are nearing their use-by date and won’t be consumed in time, consider freezing them. Crack the eggs into a freezer-safe container, mix gently, and label the container with the number of eggs and the date frozen. Thaw frozen eggs in the refrigerator before use.

refrigerator

  1. Tips for Ensuring Safe Consumption

a. Proper handling: Wash your hands before and after handling eggs to prevent the spread of bacteria. Avoid cracking eggs on the edge of bowls, as this can introduce shell fragments.

b. Cooking thoroughly: To ensure any potential bacteria are killed, cook eggs thoroughly until both the yolk and white are firm. Avoid consuming dishes with raw or undercooked eggs, such as homemade mayonnaise or soft-boiled eggs.

c. Discard if in doubt: If you are uncertain about the freshness of an egg or notice any signs of spoilage, it is safer to discard it rather than risk consuming a potentially contaminated product.

refrigerator

  1. Common Misconceptions and Additional Tips

a. Freezing eggs in the shell: Contrary to popular belief, it is not recommended to freeze eggs in their shells. The moisture inside the egg expands when frozen, causing the shell to crack and potentially introduce bacteria. If you need to freeze eggs, it is best to crack them into a freezer-safe container.

b. Date labeling: To keep better track of your egg’s freshness, consider labeling each carton with the purchase date or the date you transferred the eggs from their original packaging. This practice can help you use the oldest eggs first and avoid any potential waste.

c. Farm-fresh eggs: Eggs obtained directly from local farmers or backyard hens may have a shorter shelf life compared to commercially produced eggs due to the lack of washing and removal of the natural protective bloom. It is best to consult with the producer or follow their recommendations for storage and freshness.

d. Egg substitutes in recipes: If you are out of fresh eggs, you can use certain egg substitutes in recipes. These substitutes can vary, so it is important to consult the package instructions or reliable sources to determine the appropriate conversion measurements.

There are a few options available when it comes to using pasteurized eggs or egg substitutes. Pasteurized eggs go through a process that eliminates potential bacteria while still maintaining their liquid form, making them safe to consume without cooking.

refrigerator

Conclusion: Ensuring Fresh and Safe Eggs

Proper understanding and adherence to safe storage practices play a crucial role in maintaining the freshness and safety of eggs. By considering factors such as packaging date, refrigeration temperature, shell quality, and conducting tests for freshness, you can confidently determine the shelf life of your eggs. Proper storage in the refrigerator, along with safe handling and cooking practices, allows you to enjoy fresh and delicious eggs while minimizing the risk of foodborne illnesses.

Posted in Household appliances, Lifestyle appliance | Tagged , | Leave a comment

The Lifespan of a Refrigerator Without Power: the Limits

Introduction: Exploring the Duration of Refrigeration without Power

The continuity of power supply is crucial for the proper functioning of a refrigerator, which plays a vital role in keeping our food fresh and safe. However, unexpected power outages can occur, leaving us wondering how long a refrigerator can go without electricity before compromising the quality and safety of its contents. In this comprehensive guide, we will explore the factors influencing the duration a refrigerator can sustain without power and provide specific insights related to various aspects. By understanding these factors and their implications, you can make informed decisions during power outages and ensure the preservation of your perishable items.

refrigerator

The Lifespan of a Refrigerator Without Power: Understanding the Limits

  1. Insulation and Temperature Regulation

a. Assessing insulation quality: The insulation properties of a refrigerator play a significant role in maintaining internal temperature stability. Quality refrigerators are designed with effective insulation that helps slow down heat exchange between the interior and exterior environment, thus extending the time before food reaches unsafe temperatures.

b. Monitoring the pre-outage temperature: The initial temperature inside the refrigerator before the power outage affects its ability to maintain safe conditions. If the refrigerator was already at a higher temperature before the outage, it will have a shorter tolerance period without power.

c. Avoiding unnecessary door opening: Each time the refrigerator door is opened during a power outage, warm air enters and disrupts the internal temperature further. Limiting door openings to essential instances helps preserve the cool air inside and prolongs the time before unsafe temperature thresholds are reached.

refrigerator

  1. External Temperature Conditions

a. Climate and ambient temperature: The temperature of the environment in which the refrigerator is located significantly impacts its ability to retain coldness during a power outage. In warm climates or during summer months, refrigerators tend to heat up quicker than in cooler climates or during colder seasons.

b. Ventilation and airflow: Adequate ventilation around the refrigerator is crucial for heat dissipation. Ensure there is enough clearance between the refrigerator and adjacent walls or objects to allow proper airflow. Improved ventilation facilitates heat dispersion and extends the time a refrigerator can maintain lower temperatures during a power loss.

  1. Type and Efficiency of Refrigerator

a. Refrigerator design and insulation: Different refrigerator models and brands vary in terms of insulation techniques and overall energy efficiency. Refrigerators with better insulation are capable of maintaining lower internal temperatures for longer periods without electricity, compared to models with inferior insulation.

b. Energy-saving features: Some modern refrigerators come equipped with energy-saving features, such as enhanced insulation, improved door seals, and innovative cooling systems. These features contribute to prolonged temperature retention during power outages, allowing for extended periods without compromising food safety.

refrigerator

  1. Load and Contents of the Refrigerator

a. Initial temperature of items in the refrigerator: The temperature of the food items already stored inside the refrigerator before the power outage directly affects their longevity. If the items were already at unsafe temperatures, their quality and safety may be compromised sooner, requiring immediate attention once power is restored.

b. Quantity of items and heat load: The amount of food and beverages stored in the refrigerator affects the cooling capacity and the time it can maintain safe temperatures without power. A fully stocked refrigerator retains coldness better because the stored items act as additional thermal mass, helping to delay temperature increase.

c. Non-perishable items and coolers: Separating non-perishable items, such as condiments or beverages that do not require refrigeration, can help reduce the heat load on the refrigerator during a power outage. Placing these items in coolers with ice packs or storing them in a cool location can provide temporary preservation.

  1. Duration and Frequency of the Power Outage

a. Length of the power outage: The duration of the power outage directly impacts the refrigerator’s capability to maintain safe temperatures. The longer the outage, the greater the risk of prolonged exposure to unsafe temperatures, compromising food quality and safety.

b. Opening the refrigerator during the outage: Frequent or unnecessary opening of the refrigerator during a power outage accelerates temperature fluctuations inside. Minimizing door openings and accessing the refrigerator only when necessary helps extend the time before food reaches unsafe conditions.

c. Recovery time upon power restoration: Once power is restored, the time required for the refrigerator to return to safe operating temperatures varies. It depends on factors such as the refrigerator’s model, cooling system, and the load and initial temperature of the items stored inside. It is important to monitor the internal temperature and discard any perishable items that have exceeded safe limits.

refrigerator

Additionally:

  1. Generator or Backup Power Source

Investing in a generator or having access to a backup power source can significantly prolong the time a refrigerator can go without electricity. When power goes out, a generator can be used to provide temporary electricity to the refrigerator, keeping it running and maintaining safe temperatures for a longer period. It is essential to ensure proper installation and adherence to safety guidelines when using a generator.

  1. Thermal Insulation and Cooling Aids

Enhancing the insulation of your refrigerator during a power outage can help maintain lower temperatures for a longer duration. Some techniques include:

a. Applying additional insulation: Consider using thermal blankets or insulation wraps designed specifically for refrigerators. These products provide an extra layer of insulation, reducing heat transfer and extending the time before temperature increases become significant.

b. Using ice packs or dry ice: Preparing ice packs or acquiring dry ice in advance can help keep the refrigerator colder for an extended period. Placing these cooling aids inside the refrigerator during a power outage can help maintain lower temperatures by absorbing heat and slowing down temperature rise.

refrigerator

Conclusion: Managing Refrigeration During Power Outages

The duration a refrigerator can go without power relies on several interconnected factors such as insulation quality, ambient temperature conditions, refrigerator type and efficiency, stored content, duration and frequency of the power outage, and even our own actions during the outage. While specific timeframes cannot be provided due to the myriad influencing factors, it is essential to prioritize food safety during power outages.

By understanding these factors and considering variables such as insulation quality, external temperature conditions, refrigerator type, load and contents, duration and frequency of the power outage, you can make informed decisions regarding the management of your refrigerator during power disruptions. Minimizing door openings, separating non-perishable items, monitoring internal temperatures, using coolers or alternative storage methods, and promptly discarding perishable items that have been exposed to unsafe temperatures are all recommended practices to mitigate food safety risks during power outages.

Posted in Household appliances, Lifestyle appliance | Tagged , | Leave a comment

Disposing of an Old Refrigerator: A Step-by-Step Guide

Introduction: Making Room for a New Appliance

When it comes time to replace an old refrigerator, proper disposal is essential to ensure safety and environmental responsibility. Refrigerators contain hazardous components that need to be handled correctly. In this article, we will provide a step-by-step guide on how to safely get rid of an old refrigerator and explore various disposal options available.

refrigerator

Disposing of an Old Refrigerator: A Step-by-Step Guide

  1. Plan Ahead for a Smooth Transition

Before disposing of your old refrigerator, it is crucial to plan ahead and make necessary arrangements. Consider the following factors:

a. Replacement timing: Coordinate the removal of your old refrigerator with the delivery or installation of the new one. This allows for a smooth transition and minimizes the time without a functional appliance.

b. Research local regulations: Familiarize yourself with local regulations and guidelines concerning the disposal of refrigerators. Different areas may have specific requirements to ensure safe disposal and environmental compliance.

c. Transportation arrangements: Determine how you will transport the refrigerator to the disposal location. Depending on the size and weight of the appliance, you may need assistance or professional services.

refrigerator

  1. Disconnect and Prepare the Refrigerator

Before moving the refrigerator, take the following steps:

a. Unplug the refrigerator: Safely disconnect the refrigerator from the power source by unplugging it from the electrical outlet. This step ensures safety during the disposal process.

b. Empty the refrigerator: Remove all food, shelves, drawers, and any other items from the refrigerator. Properly dispose of perishable food items following local waste disposal guidelines.

c. Clean the refrigerator: Thoroughly clean the interior and exterior of the refrigerator. Dispose of any loose debris or dirt before moving it.

d. Secure loose parts: Tape or secure any loose parts, such as shelves or drawers, to prevent them from shifting during transportation.

  1. Choose a Disposal Option

There are several disposal options available for old refrigerators. Consider the following:

a. Appliance recycling programs: Many communities offer designated appliance recycling programs. Research local resources to find out if these programs are available in your area. Such programs ensure proper dismantling, recycling, or disposal of the refrigerator’s components in an environmentally friendly manner.

b. Manufacturer pick-up or trade-in: Contact the refrigerator’s manufacturer to inquire about pick-up or trade-in options. Some manufacturers offer programs to assist with appliance disposal, including responsible recycling or repurposing.

c. Local waste management or scrap metal facilities: Check with your local waste management or scrap metal facilities to determine if they accept refrigerators. Some facilities may charge a fee for disposing of appliances to cover the cost of proper disposal or recycling.

d. Donation or resale: If your old refrigerator is still in working condition, consider donating it to a charitable organization or selling it to a second-hand appliance store.

refrigerator

  1. Prepare for Recycling or Disposal

Depending on the disposal option chosen, you may need to take additional steps to prepare the refrigerator:

a. Secure refrigerant removal: If recycling or scrap metal facilities are your chosen disposal option, contact a licensed professional to safely remove the refrigerant. Refrigerant removal is crucial to comply with environmental regulations and prevent the release of harmful substances.

b. Remove and dispose of doors: Some recycling programs or facilities require the removal of doors as a safety measure. Consult the specific requirements of your chosen disposal method and remove the refrigerator doors if necessary.

  1. Arrange for Transportation

Once you have determined the disposal method and prepared the refrigerator, it’s time to arrange for transportation:

a. Seek professional services: If the refrigerator is large or heavy, and you do not have access to a suitable vehicle, consider hiring professional appliance removal services. They have the expertise and equipment needed to safely transport the refrigerator to the designated disposal location.

b. Borrow or rent a truck: If you are able to move the refrigerator yourself, borrow or rent a suitable truck or van to transport the appliance. Ensure that the vehicle has the necessary space and equipment to secure the refrigerator during transportation.

  1. Deliver the Refrigerator for Disposal

On the scheduled day, deliver the refrigerator to the designated disposal location:

a. Follow safety protocols: Use proper lifting techniques, team lifting, or dollies to avoid injury during transportation. Wear appropriate safety gear, such as work gloves, to protect your hands.

b. Secure the refrigerator: Use tie-down straps or bungee cords to secure the refrigerator during transportation. This prevents it from shifting or falling over while in transit.

c. Comply with disposal facility requirements: If delivering the refrigerator to a specific facility, comply with their requirements regarding check-in procedures, paperwork, and any additional safety measures.

  1. Confirm Disposal Completion

After successfully disposing of the refrigerator, confirm the completion of the process:

a. Obtain documentation: If applicable, collect any paperwork or documentation provided by the disposal facility or service. This may include certificates of disposal or recycling confirmation.

b. Record disposal details: Keep a record of important information, such as the disposal date, location, and any fees paid. This documentation may be useful for warranty purposes or future reference.

refrigerator

  1. Considerations for Next Steps

After disposing of your old refrigerator, there are a few additional considerations you may want to keep in mind:

a. Replacement warranty: If you purchased a new refrigerator to replace the old one, review the warranty terms and conditions. Understanding the warranty coverage can be helpful in case any issues arise with the new appliance.

b. Energy-efficient choices: When selecting a new refrigerator, look for energy-efficient models. Energy Star certified refrigerators can help reduce energy consumption and lower utility bills over time.

c. Recycling habits: Reflect on the importance of responsible waste management and recycling. Incorporate recycling practices into your daily life by sorting and separating recyclable materials from regular waste. This proactive approach contributes to a more sustainable future.

d. Maintenance and care: Once your new refrigerator is in place, prioritize proper maintenance and care. Regularly clean the interior, including shelves and drawers, to keep the appliance functioning at its best. Check the door seals regularly to ensure they are intact and provide proper insulation.

e. Energy-saving practices: Implement energy-saving practices to further reduce your environmental footprint and lower energy costs. These practices may include avoiding overstocking the refrigerator, allowing hot food to cool before placing it in the appliance, and setting the temperature at optimal levels.

refrigerator

Conclusion: Responsible and Safe Disposal

Properly disposing of an old refrigerator is crucial to ensure safety and environmental responsibility. By planning ahead, choosing a suitable disposal option, and following established procedures, you can safely get rid of your old refrigerator. Remember to comply with local regulations, arrange for transportation, and confirm completion of the disposal process. Taking these steps ensures that your old refrigerator is handled responsibly, reducing environmental impact and promoting sustainability.

Posted in Household appliances, Lifestyle appliance | Tagged , | Leave a comment

How Long Does It Take for a Refrigerator to Get Cold?

Introduction: Understanding the Refrigeration Process

When setting up a new refrigerator or after defrosting, many people wonder how long it takes for the appliance to reach the desired temperature. The time it takes for a refrigerator to get cold varies depending on various factors. In this article, we will delve into the refrigeration process and provide insight into the factors that influence how long it takes for a refrigerator to reach its optimal cooling temperature.

refrigerator

The Refrigeration Process: How Long Does It Take for a Refrigerator to Get Cold?

  1. Initial Cooling Period

Upon plugging in a new refrigerator or after defrosting an existing one, the initial cooling period begins. During this period, the refrigerator needs time to stabilize its internal temperature and cool down the compartments. It is important to note that different refrigerator models may have varying initial cool-down times.

  1. Size and Model of the Refrigerator

The size and model of the refrigerator are significant determinants of how long it takes to reach the desired cooling temperature. Larger refrigerators generally require a longer period to cool down due to the additional space that needs to be cooled. Additionally, the energy efficiency and insulation of the refrigerator play a role in the cooling process. More energy-efficient models with better insulation tend to cool down faster.

  1. Location and Ambient Temperature

The location of the refrigerator within your home or kitchen can impact the cooling time. If the refrigerator is placed near a heat source or in direct sunlight, it may take longer to cool down. The ambient temperature of the environment also affects the cooling process. In warmer climates or during hot summer months, the refrigerator may take longer to reach the desired temperature compared to cooler environments.

refrigerator

  1. Proper Setup and Pre-cooling Techniques

To optimize the cooling time of a refrigerator, proper setup and pre-cooling techniques can be employed:

a. Temperature adjustment: Before placing food items in the refrigerator, ensure that the temperature settings are adjusted to the manufacturer’s recommended settings. Typically, a temperature setting between 35°F and 38°F (1.7°C and 3.3°C) for the refrigerator compartment is ideal for food preservation.

b. Pre-cooling: To expedite the cooling process, some experts recommend pre-cooling the refrigerator by setting the temperature lower than the desired level for the first few hours. Once the desired cooling temperature is achieved, adjust the temperature settings accordingly.

c. Leaving space: When loading the refrigerator, leave some space between items to allow for proper air circulation. Crowded shelves and compartments can obstruct airflow, impeding the cooling process.

  1. Patiently Waiting for Optimal Cooling

The exact time it takes for a refrigerator to cool down can vary significantly. However, refrigerators typically start to noticeably cool within a few hours. Nonetheless, it may take up to 24 hours for the refrigerator to reach its optimal cooling temperature, especially for larger models or under less favorable conditions.

refrigerator

  1. Monitoring the Temperature

To ensure the refrigerator is cooling properly, it is advised to monitor the temperature using a refrigerator thermometer. A refrigerator thermometer placed in the center of the middle shelf provides an accurate reading of the internal temperature. Checking the thermometer periodically during the initial cooling period allows you to assess the progress and make any necessary adjustments.

  1. Long-term Maintenance and Performance Optimization

Even after the initial cooling period, it is essential to perform regular maintenance to keep the refrigerator running efficiently:

a. Temperature consistency: Check the temperature settings periodically to ensure they remain consistent. Fluctuating temperatures may indicate a potential issue with the refrigerator.

b. Proper ventilation: Ensure that the refrigerator’s vents and coils are clean and unobstructed. Blocked airflow can impact cooling performance and efficiency.

c. Proper food storage: Follow best practices for food storage, such as allowing foods to cool before placing them in the refrigerator, using airtight containers, and avoiding overloading shelves and compartments.

refrigerator

  1. Troubleshooting and Professional Assistance

In some cases, you may notice that your refrigerator is not cooling properly even after waiting for the appropriate amount of time. If this occurs, there are a few troubleshooting steps you can take:

a. Check the temperature settings: Ensure that the temperature settings are correctly adjusted according to the manufacturer’s recommendations. Improper settings may prevent the refrigerator from cooling effectively.

b. Assess the seals and gaskets: Inspect the door seals and gaskets for any signs of damage or wear. Cracked or loose seals can allow warm air to enter the refrigerator, hindering the cooling process. If necessary, replace the seals or contact a professional for assistance.

c. Clean the condenser coils: Over time, dust and debris can accumulate on the condenser coils at the back or bottom of the refrigerator. This buildup can impede the cooling process. Carefully vacuum or brush the coils to remove any obstructions. It is recommended to follow the manufacturer’s instructions or seek professional help for this task.

d. Check the airflow: Ensure that there is proper air circulation around the refrigerator. Confirm that the vents are not obstructed by items or debris. Additionally, avoid placing the refrigerator too close to walls or other appliances that could restrict airflow.

  1. Seeking Professional Assistance

If you have followed all the necessary steps and your refrigerator is still not cooling properly, it may be time to seek professional assistance. Refrigerator cooling issues can be caused by various technical problems, such as malfunctioning components, refrigerant leaks, or compressor failures. Trained technicians have the expertise and tools to diagnose and resolve complex refrigerator issues efficiently and effectively.

refrigerator

Conclusion: Patience and Optimal Conditions for Refrigerator Cooling

The time it takes for a refrigerator to get cold depends on various factors, including its size, model, location, and ambient temperature. While refrigerators generally start cooling within a few hours, reaching the desired temperature may take up to 24 hours. By properly setting up the refrigerator, employing pre-cooling techniques, and allowing for adequate airflow, you can optimize the cooling time. Remember to monitor the temperature regularly, perform necessary maintenance, and follow proper food storage practices to ensure the refrigerator’s long-term performance and efficiency. With patience and optimal conditions, your refrigerator will continue to provide a safe storage environment for your perishable items.

Posted in Household appliances, Lifestyle appliance | Tagged , | Leave a comment