How Long Do Grapes Last in the Refrigerator?

When it comes to fruits, grapes are a favorite for many due to their sweetness, versatility, and ease of snacking. However, one common concern among consumers is the shelf life of grapes, especially when it comes to storing them in the refrigerator. You may find yourself asking, how long do grapes last in the refrigerator? In this article, we’ll delve into various factors affecting the lifespan of grapes, best storage practices, nutritional benefits, and how to tell if they’ve gone bad.

Understanding the Shelf Life of Grapes

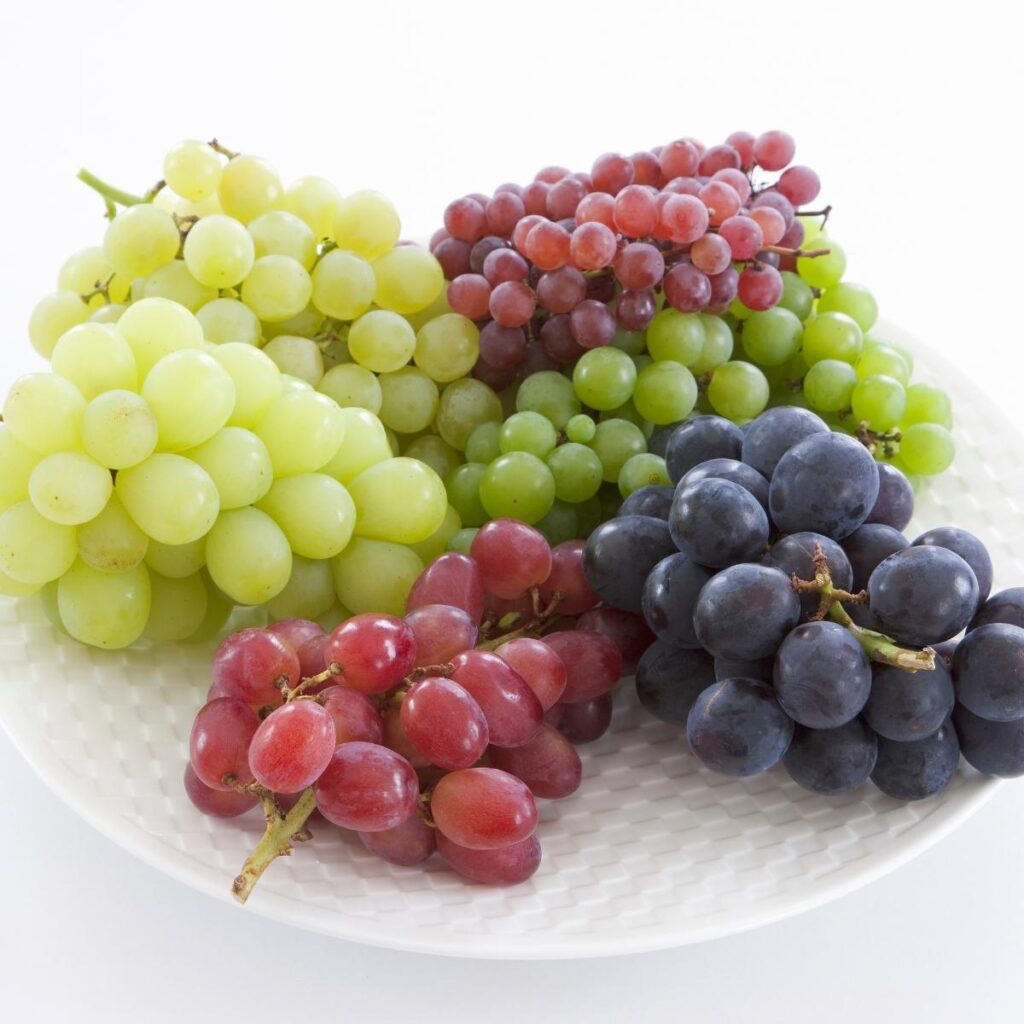
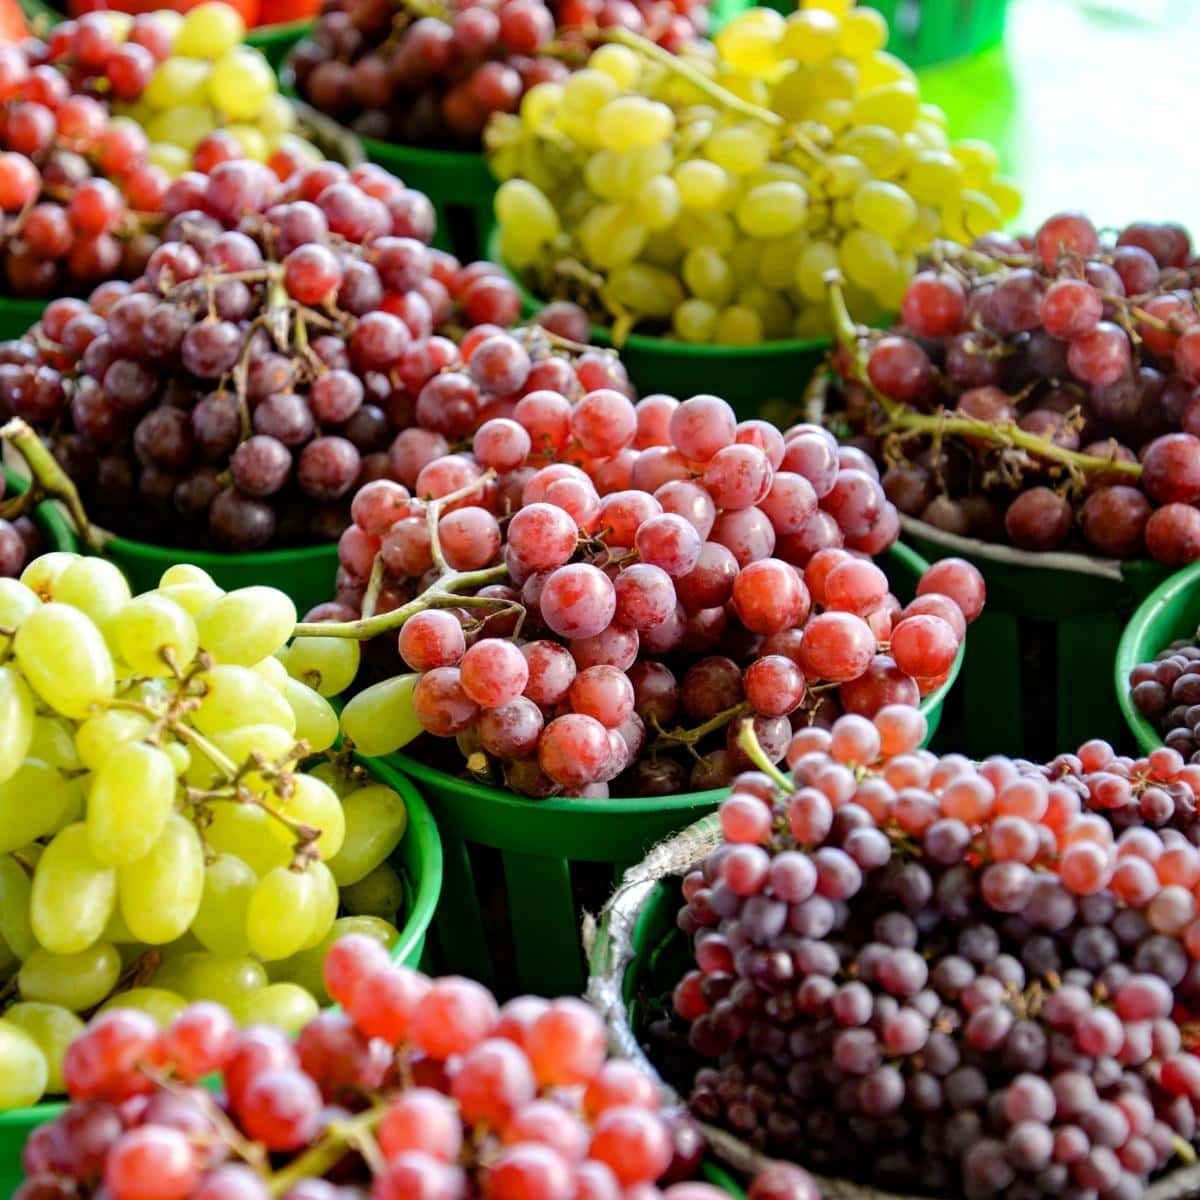
Grapes typically last around 1 to 2 weeks when stored properly in the refrigerator. However, their lifespan can vary based on several factors. The type of grapes (red, green, or black), the ripeness at the time of purchase, and the storage conditions all contribute to how long they will last in your fridge.

Freshness at Purchase

The initial freshness of grapes is a critical factor in determining their shelf life. Grapes that are fresh and recently harvested will typically last longer compared to those that have already begun to show signs of spoilage.

  • Look for Firmness: Always choose grapes that feel firm to the touch. Avoid those that are mushy or wrinkled, as this is an indicator of quality degradation.
  • Color and Appearance: Opt for grapes with vibrant color, whether they are green or red. Additionally, check for signs of mold or decay.

Storage Conditions

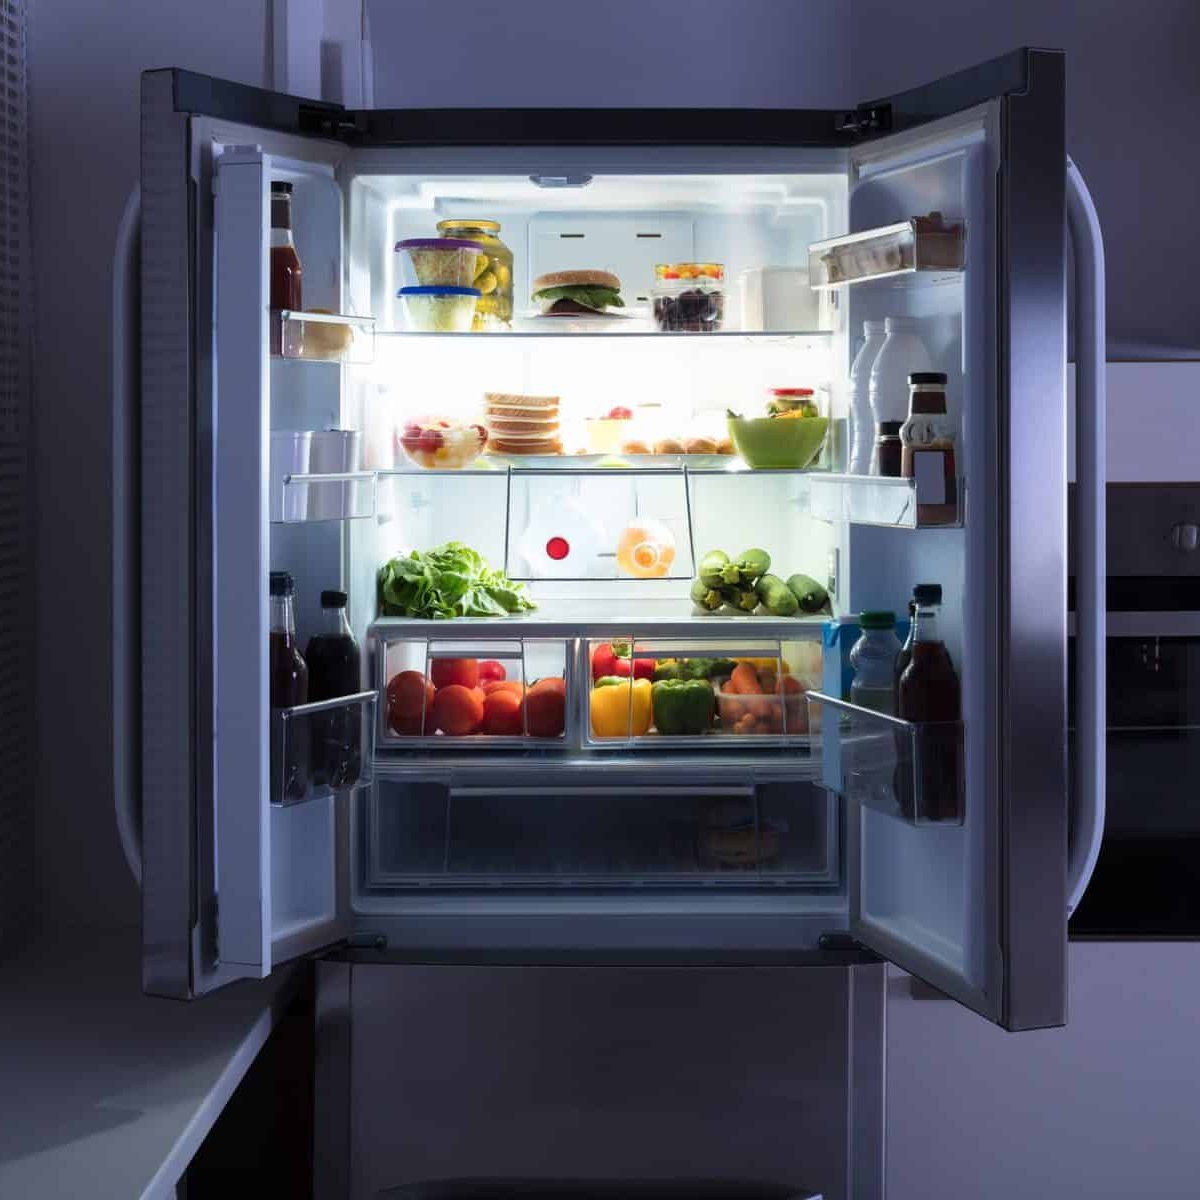
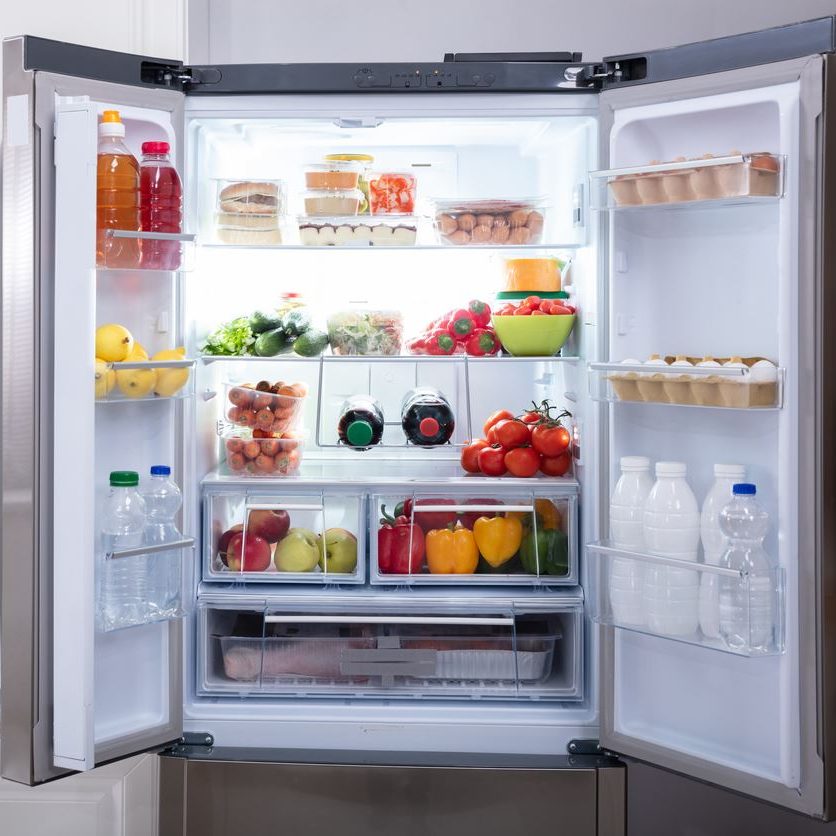
Grapes thrive in a cool, moist environment, making the refrigerator an ideal storage location. Here are some tips for storage:

  • Temperature: Ideally, grapes should be stored at a temperature between 32°F to 34°F (0°C to 1°C).
  • Humidity: Maintaining a moderate level of humidity is essential. Grapes prefer a slightly humid atmosphere, which can help prevent them from drying out.

grapes last in the refrigerator

Proper Storage Techniques

Storing grapes correctly can significantly extend their shelf life. Here are some best practices for storing grapes in your refrigerator:
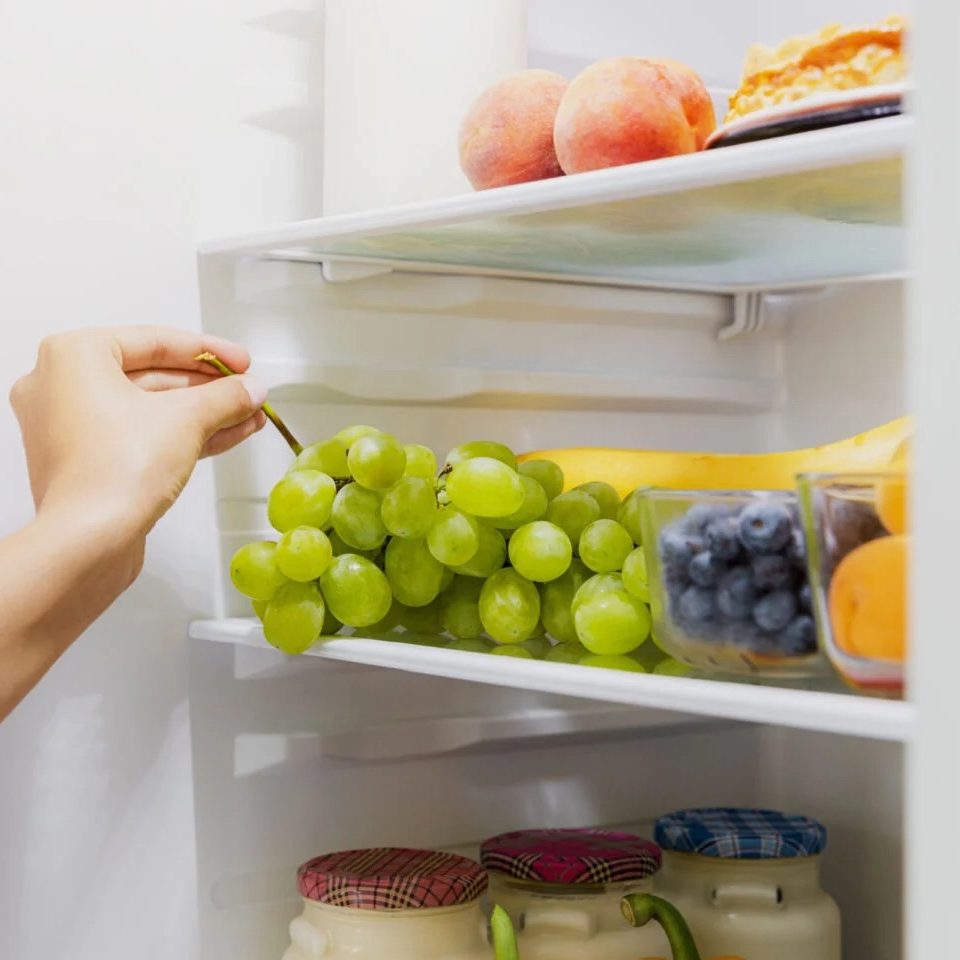
Keep Them Unwashed

One of the most common mistakes people make is washing their grapes before storing them. Moisture can promote mold growth. Instead, keep them unwashed until you are ready to consume them.

Use a Ventilated Container

Use a container that allows air circulation. Mesh bags or containers with holes can help maintain airflow, keeping grapes fresh. Avoid airtight plastic bags, as these trap moisture and lead to spoilage.

Store in the Coldest Part of the Refrigerator

Place your grapes in the coldest section of your refrigerator, usually toward the back. The temperature is more consistent there, ensuring that your grapes stay fresh for a longer duration.

The Nutritional Benefits of Grapes

Aside from their delicious taste, grapes also provide numerous health benefits. Knowing these can make you appreciate why you want to keep them fresh for as long as possible.

Rich in Antioxidants

Grapes are loaded with antioxidants such as resveratrol and flavonoids. These compounds can help combat oxidative stress in the body and reduce the risk of chronic diseases.

High in Nutrients

Grapes provide essential vitamins like Vitamin C and K, as well as minerals such as potassium and copper. They are also low in calories, making them an excellent snack option.

Hydration

Grapes are composed of about 80% water, which can help keep you hydrated. This is particularly beneficial during warmer months or after physical activity.

Signs of Spoilage and How to Handle Them

Regardless of how careful you are in storing your grapes, they can eventually go bad. Recognizing the signs of spoilage can help you avoid consuming bad fruit.

Visual Indicators

  • Mold: If you see mold forming on the grapes, it’s best to discard them immediately.
  • Wrinkling: Grapes that are starting to wrinkle may still be edible, but their quality is declining.

Texture and Smell

  • Softness: Grapes that have become overly soft or mushy are usually past their prime.
  • Odor: A sour or off smell can indicate spoilage, and you should not consume them.

Other Considerations

With the focus on spoilage, it’s important to understand how to deal with grapes that are nearing the end of their shelf life.

  • Freezing Grapes: If you notice that your grapes are becoming overripe, consider freezing them. This is an excellent way to preserve them for later use in smoothies or as a frozen snack. Simply wash and dry them, spread them in a single layer on a baking sheet, and freeze them. Once frozen, transfer them to an airtight container or freezer bag.
  • Cooking or Baking: Overripe grapes can also be used in recipes that call for baked goods or cooked dishes. Consider making a grape compote or adding them into your favorite crumble recipe.

grapes last in the refrigerator

How to Extend the Shelf Life of Grapes

While the natural lifespan of grapes is limited, there are methods you can adopt to maximize their freshness:

Avoid Overcrowding

Don’t overcrowd your storage container. Giving grapes space allows for proper airflow and minimizes bruising, which can lead to spoilage.

Check Regularly

It’s vital to check your grapes every few days. Remove any spoiled or damaged grapes to prevent them from affecting the rest.

Consider Ethylene Gas

Some fruits emit ethylene gas, which can speed up the ripening process and spoilage of nearby produce. Keep grapes away from ethylene-producing fruits like bananas and apples to prolong their freshness.

Differences Between Organic and Conventional Grapes

In today’s market, both organic and conventional grapes are available. Understanding the differences can affect how long you can keep them in the refrigerator.

Pesticide Exposure

Conventional grapes are often treated with pesticides, which might affect their shelf life. However, they are generally washed before distribution. Organic grapes, while free from synthetic pesticides, tend to have a shorter shelf life due to fewer preservatives being used.

Thickness of Skin

Organic grapes may also have thinner skins due to their growth conditions, making them more susceptible to bruising. This could lead to a shorter lifespan compared to conventionally grown grapes.

  grapes last in the refrigeratorFruits That Should Not Be Stored With Grapes

While grapes are versatile and can be stored with various fruits, there are others that they should not be placed alongside. Understanding these interactions is key to extending the freshness of your grapes and the other fruits in your fridge.

Ethylene Gas Production

One of the most important factors when considering which fruits can be stored together is ethylene gas production. Ethylene is a natural plant hormone released by certain fruits during ripening. It can accelerate the ripening of nearby fruits, leading to quicker spoilage.

Fruits That Produce High Levels of Ethylene:

  1. Bananas: When stored with grapes, the ethylene emitted by bananas can cause grapes to ripen faster, leading to spoilage.
  2. Apples: Apples are also high producers of ethylene gas, which can greatly affect surrounding fruits, hastening their decay.
  3. Avocados: While delicious, avocados produce a significant amount of ethylene, making them best kept away from grapes.
  4. Tomatoes: Though technically a fruit, tomatoes also emit ethylene, which can make grapes spoil quickly.

Impact on Flavor and Texture

Storing grapes with such ethylene-producing fruits can not only hasten spoilage but also change the flavor and texture of the grapes. Grapes stored alongside these fruits can become mushy and lose their crispness much sooner than expected.

Final Thoughts on How Long Do Grapes Last in the Refrigerator

In conclusion, how long do grapes last in the refrigerator? Properly stored grapes can remain fresh for up to two weeks, depending on their initial quality and storage conditions. By understanding factors like freshness at purchase, storage techniques, and signs of spoilage, you can make the most out of your grapes. Their numerous health benefits make them a worthy addition to your diet, so follow best practices to keep them fresh longer. Whether you enjoy them straight off the vine or incorporate them into various dishes, maintaining the quality of your grapes can enhance your overall eating experience.

Posted in Household appliances, Lifestyle appliance | Tagged , , | Leave a comment

How to Clean the Outside of a Stainless Steel Refrigerator?

Cleaning the outside of a stainless steel refrigerator may seem daunting due to fingerprints, smudges, and stains that can gather over time. However, with the right approach, you can renew its shine and keep it looking good as new. This comprehensive guide will delve into the various techniques and products you can use, all while providing tips that help you understand how to clean the outside of a stainless steel refrigerator.

Understanding Stainless Steel

Properties of Stainless Steel

Stainless steel is favored for kitchen appliances due to its durability, resistance to corrosion, and sleek appearance. Unlike other materials, stainless steel does not dent easily, which is why many homeowners prefer it for their kitchens. However, it is susceptible to smudges and scratches, necessitating proper care and cleaning methods.

Common Issues

Over time, you might notice specific issues with your stainless steel refrigerator, including:

  • Fingerprints: These are perhaps the most common nuisance, especially in homes with children.
  • Water Spots: These are often left by splashes that dry without being wiped away, leaving mineral deposits.
  • Rust: Though stainless steel is resistant to rust, it can still occur in high-humidity environments or from improper cleaning agents.
  • Scratches: These can happen during regular use or cleaning.

Understanding these issues can guide you in selecting the right cleaning approach.

a stainless steel refrigerator

Supplies You’ll Need

Basic Cleaning Supplies

When learning how to clean the outside of a stainless steel refrigerator, gather the following tools:

  • Microfiber Cloths: These are ideal for applying cleaners without scratching the surface.
  • Water: For rinsing and initial cleaning.
  • Mild Dish Soap: Effective for general cleaning without harsh chemicals.
  • Vinegar: A natural cleaner that can cut through grease and grime.
  • Baking Soda: For tackling tougher stains and deodorizing.
  • Mineral Oil or Baby Oil: Useful for polishing surfaces and providing a protective layer.

Optional Supplies

While the basic supplies will get you started, having a few additional items can be beneficial:

  • Stainless Steel Cleaner: There are commercial cleaners available, specifically formulated for stainless steel.
  • Paper Towels: These can be handy for quick clean-up.
  • Old Toothbrush: For getting into crevices and tight spots.
  • Rubber Gloves: To protect your hands during the cleaning process.

Step-by-Step Cleaning Process

Initial Dusting

Begin by removing any loose dust and dirt. Use a dry microfiber cloth to wipe down the surface. This will help eliminate particles that could scratch the metal during the wet cleaning phase.

Creating a Cleaning Solution

Mild Soap Solution

In a spray bottle, mix a few drops of mild dish soap with warm water. Shake it up and get ready to use it. This solution is excellent for general cleaning.

Vinegar Solution

For a more robust cleaner, use a solution of equal parts vinegar and water. This can effectively cut through grease and grime and leaves a shiny finish.

Applying the Cleaner

Using the Mild Soap Solution

  • Step 1: Spray the soap solution directly onto the stainless steel surface.
  • Step 2: Use a microfiber cloth to wipe gently in the direction of the grain. This will help avoid scratches and evenly distribute the cleaner.
  • Step 3: For tougher areas, allow the solution to sit for a minute before wiping.

Using the Vinegar Solution

  • Step 1: Spray the vinegar solution in the same manner.
  • Step 2: Again, wipe along the grain with a microfiber cloth. You may notice a pleasant shine as the vinegar dries.

Tackling Stains

Despite regular cleaning, some stains might remain. Here’s how to deal with them:

Using Baking Soda

  • Step 1: Make a paste with baking soda and water.
  • Step 2: Apply this paste to the stained area using a microfiber cloth or sponge.
  • Step 3: Let it sit for a few minutes before scrubbing gently and rinsing with water.

Drying and Polishing

Once you have cleaned and rinsed the refrigerator, it’s essential to dry the surface thoroughly. Use a clean, dry microfiber cloth to wipe down the appliance. This prevents water spots and streaks.

Polishing with Oil

For an extra shine and a protective barrier, apply a small amount of mineral oil or baby oil to another microfiber cloth and buff the stainless steel using circular motions. This step is optional but offers long-lasting results.

a stainless steel refrigerator

Preventive Maintenance

Regular Cleaning Schedule

To keep your stainless steel refrigerator looking pristine, establish a regular cleaning routine. Here’s a suggested schedule:

  • Daily: Wipe down the surface with a dry cloth to remove fingerprints.
  • Weekly: Perform a deeper cleaning using the mild soap or vinegar solution.
  • Monthly: Polish the refrigerator with mineral or baby oil to maintain the luster.

Avoiding Scratches and Damage

Being mindful of tools and substances used during cleaning is key to prolonging the life of your stainless steel appliance. Here are some tips:

  • Use Soft Cloths: Always avoid abrasive scrubbers or steel wool as these can create scratches.
  • Avoid Harsh Chemicals: Products containing chlorine, bleach, or ammonia should never be used on stainless steel, as they can damage the finish.
  • Be Cautious with Magnets: Regularly check magnets used for notes or reminders since they can scratch the surface if moved around frequently.

Quick Fixes for Everyday Issues

Dealing with Stains Quickly

Accidents happen, and knowing how to clean the outside of a stainless steel refrigerator when they do can be invaluable. For immediate action on a noticeable stain:

  • Blot, Don’t Wipe: Use a dry cloth to blot excess liquid; this helps prevent spreading the stain.
  • Quick Soap Wash: A quick spray of soap solution followed by wiping with a microfiber cloth can often save the day.

Removing Tough Stains

If you discover a tough stain that regular cleaning doesn’t resolve, don’t panic. Here’s an effective plan:

  • Use Baking Soda Paste: As mentioned earlier, apply the baking soda paste to the stain, let it sit, and then scrub gently.
  • Try a Commercial Cleaner: If the stain persists, a specialized stainless steel cleaner can help with tough spots. Always read the label for specific instructions.

Environmental Considerations

Eco-Friendly Options

When you learn how to clean the outside of a stainless steel refrigerator, it’s worth noting the environmental impact of cleaning products:

  • Natural Cleaners: Both vinegar and baking soda are eco-friendly options that can replace harsh chemicals.
  • Reusable Cloths: Using microfiber cloths instead of paper towels reduces waste over time.

Reducing Waste

In addition to using eco-friendly products, consider how you can minimize waste:

  • Buy in Bulk: When purchasing cleaning supplies, consider options that reduce the amount of packaging waste.
  • Repurpose Cloths: Old t-shirts or towels can serve as excellent cleaning cloths, extending their life before disposal.

  a stainless steel refrigeratorFrequently Asked Questions (FAQs)

Q: How often should I clean my stainless steel refrigerator?

A: Ideally, you should clean it at least once a week to maintain its appearance. However, you can quickly wipe up spills and fingerprints as needed.

Q: Can I use glass cleaner on stainless steel?

A: While some people may use glass cleaners, they can contain harsh chemicals that may harm the finish of stainless steel. Always opt for solutions specifically designed for stainless steel.

Q: Are there any homemade cleaners I should avoid?

A: Avoid using bleach or ammonia-based cleaners, as they can damage the finish and lead to discoloration.

Conclusion

Cleaning the outside of a stainless steel refrigerator doesn’t have to be an overwhelming task. With a few proper tools and techniques, you can restore its shine and keep it looking great. Regular maintenance, combined with attention to specific stains and issues, will extend the life of your appliance and enhance the overall aesthetics of your kitchen. By taking the time to care for your stainless steel refrigerator, you are making an investment in both its appearance and performance. Remember, knowing how to clean the outside of a stainless steel refrigerator effectively is just the beginning—understanding the material and how to maintain it will make every cleaning session easier and more rewarding.

Posted in Household appliances, Lifestyle appliance | Tagged , , | Leave a comment

How Long Will Coleslaw Last in the Refrigerator?

Coleslaw is a beloved staple in many households and at gatherings. This fresh, crunchy salad, often made from cabbage, carrots, and a creamy dressing, is not only delicious but also versatile. Whether you’re serving it as a side dish for barbecues, picnics, or holiday feasts, understanding how long coleslaw will last in the refrigerator is crucial for both food safety and quality.

Understanding Coleslaw

Coleslaw is traditionally made by shredding raw cabbage and mixing it with a dressing, usually made from mayonnaise, vinegar, sugar, salt, and pepper. Variations may include additional ingredients like other vegetables, fruits, nuts, or herbs. The flavor of coleslaw is a pleasing combination of tangy, sweet, and creamy, making it an appealing addition to many meals.

The Types of Coleslaw

There are various styles of coleslaw, which can influence its shelf life:

  1. Traditional Coleslaw: Made with cabbage and carrots, typically dressed with a mayonnaise or vinegar-based dressing.
  2. Vinegar-Based Coleslaw: Lighter than its creamy counterpart, it uses vinegar as the primary dressing, which may extend its shelf life slightly.
  3. Creamy Coleslaw: This version contains a higher amount of mayonnaise, making it richer but also more perishable.
  4. Asian Slaw: Often includes ingredients like sesame oil, soy sauce, and assorted vegetables, introducing new flavors and possibly altering the longevity of the dish.
  5. Fruit-Infused Coleslaw: Incorporating fruits like apples or pineapples can change the way the salad keeps, especially if the dressing is creamy.

Each variation affects how long coleslaw will last in the refrigerator and its overall quality when consumed after a few days.

coleslaw last in the refrigerator

Factors That Affect Shelf Life

The lifespan of coleslaw in the fridge can be influenced by several factors including ingredients, preparation method, and storage conditions.

1. Ingredients

The primary ingredients of your coleslaw will largely determine its longevity. For instance:

  • Mayonnaise: Creamy dressings made from mayonnaise may have a shorter shelf life compared to vinegar-based dressings. Mayonnaise can separate and lose its quality over time, especially when exposed to air.
  • Vegetables: Freshly chopped vegetables will become soggier as they release water. Cabbage generally holds up well, but cut carrots or other vegetables may not fare as well.
  • Additional Ingredients: Adding fruits can introduce sugars and moisture, which may encourage bacterial growth if not consumed quickly.

2. Preparation Method

The way coleslaw is prepared can have a significant impact on its freshness:

  • Pre-Mixing: Salads that are mixed ahead of time may have a shorter lifespan as the vegetables release water into the dressing, resulting in a soggy texture.
  • Dressing: If you serve coleslaw with dressing on the side, it may maintain a crisper texture and last longer than fully dressed coleslaw.

3. Storage Conditions

Proper storage is essential to sustaining freshness:

  • Temperature: Keeping coleslaw below 40°F (4°C) is important to slow bacterial growth.
  • Containers: Airtight containers minimize oxygen exposure, keeping your coleslaw fresher for longer.

Typical Shelf Life of Coleslaw

So, how long will coleslaw last in the refrigerator? Generally, homemade coleslaw can last between 3 to 5 days, while store-bought coleslaw may last slightly longer, about 5 to 7 days, depending on the preservatives used.

Homemade Coleslaw

When you make coleslaw from scratch, it’s essential to consume it within a few days for the best flavor and safety. Here’s a general timeline for homemade coleslaw:

  • Day 1: Fresh and crunchy, it will have the best taste and texture.
  • Days 2-3: Still decent, but the vegetables start to lose some crunchiness. The dressing will meld with the vegetables, creating a different flavor profile.
  • Day 4: The texture becomes more soft, and while it may still taste fine, it’s nearing the end of its freshness.
  • Days 5-7: It’s advisable to proceed with caution. The risk for spoilage increases significantly.

Store-Bought Coleslaw

Store-bought coleslaw may last longer due to preservatives:

  • Unopened: If you purchase a sealed package, it can often last until the expiration date listed on the packaging, as long as it remains refrigerated.
  • Opened: Once opened, treat it similarly to homemade coleslaw. Consume within 5 to 7 days.

coleslaw last in the refrigerator

Signs Coleslaw Has Gone Bad

Being able to detect spoilage is vital for ensuring food safety. Watch for these warning signs:

1. Changes in Texture

If your coleslaw becomes overly watery, mushy, or slimy, it’s a clear indication that the salad has crossed the line into spoilage.

2. Changes in Odor

A sour or off-putting smell is a strong sign that your coleslaw is no longer safe to eat. Fresh coleslaw should have a pleasant, tangy aroma.

3. Color Changes

Discoloration, especially browning of the cabbage or carrots, can indicate that the coleslaw is past its prime. While some browning may happen naturally with exposure to air, significant changes aren’t acceptable.

4. Mold Growth

If you see any signs of mold, even a small amount, discard the entire container. Mold can produce harmful mycotoxins that aren’t safe to consume.

5. Separation

In creamy sauces, separation of the dressing from the vegetables can indicate spoilage, as the mayo or dairy may have started to degrade.

Tips for Storing Coleslaw

To maximize the lifespan of your coleslaw in the refrigerator, consider these storage tips:

1. Use Airtight Containers

When storing, choose airtight containers to minimize exposure to air and moisture. This prevents wilting and helps retain crunchiness.

2. Do Not Overdress

If you plan to eat coleslaw over several days, consider keeping the dressing separate until just before serving. This method keeps the vegetables crisper.

3. Drain Excess Liquid

If your coleslaw has released water, drain it before sealing the container. Excess moisture can lead to bacterial growth.

4. Label Containers

If you’re storing multiple dishes, label each container with the date it was made. This can help you keep track of freshness and avoid any potential food safety issues.

5. Store in the Back of the Fridge

The temperature in the fridge can vary, with the back being the coldest. Store your coleslaw toward the back to maintain a more stable temperature.

  coleslaw last in the refrigeratorCreative Ways to Use Leftover Coleslaw

If you find yourself with leftover coleslaw that’s approaching its shelf life, consider these creative methods:

1. Incorporate into Sandwiches

Coleslaw makes a delightful topping for sandwiches, burgers, or pulled pork. It adds a crunchy texture and lively flavor that elevates a simple meal.

2. Use as a Topping

Consider using coleslaw as a topping for tacos or nachos, where it can lend a refreshing contrast to rich flavors.

3. Stir into Soup

Coleslaw can add crunch and flavor to a broth-based soup. Simply stir it in just before serving, allowing it to warm up while retaining its texture.

4. Incorporate into Pasta Dishes

Mix coleslaw into cold pasta salads for added crunch and flavors. This can be a great way to refresh leftover coleslaw while creating a new dish.

5. Wrap It Up

Utilize coleslaw in wraps or burritos. Combine it with protein and sauces for a balanced meal.

Conclusion

In summary, how long will coleslaw last in the refrigerator largely depends on the ingredients, preparation, and storage methods you employ. Homemade coleslaw typically lasts 3 to 5 days, while store-bought may stretch to 5 to 7 days. However, always be on the lookout for signs of spoilage, such as changes in texture, odor, or color. By understanding these factors and taking proper precautions, you’ll ensure that your coleslaw remains safe and tasty throughout its life in the refrigerator. Enjoy your crunchy delights, and remember to savor them before they reach the end of their shelf life!

Posted in Household appliances, Lifestyle appliance | Tagged , , | Leave a comment

What Kind of Current Makes a Refrigerator Run?

Introduction: what kind of current makes a refrigerator run

Refrigerators play a vital role in modern households by ensuring food items remain preserved and fresh. To achieve this, they rely on a specific type of electrical current—one that governs their internal components and overall operation. In this article, we will explore what kind of current makes a refrigerator run, including the components involved, how these currents are generated, and the impact of electrical characteristics on refrigerator run.

Understanding Electrical Current

Before diving deeper into how different currents affect the operation of refrigerators, it’s crucial to understand what electrical current is and how it functions.

Definition of Electrical Current

Electrical current is the flow of electric charge through a conductor, typically measured in amperes (A). This flow can be caused by an electric potential difference, which propels the charges. In household appliances like refrigerators, the type of electrical current used can greatly affect performance and efficiency.

Types of Electrical Current

There are two primary types of electrical current:

  1. Alternating Current (AC)
  2. Direct Current (DC)

Let’s discuss these two types further to understand which one a refrigerator uses.

a refrigerator

The Role of Alternating Current in Refrigerators

What is Alternating Current (AC)?

Alternating Current is an electric current that reverses direction periodically, as opposed to Direct Current, which flows in one direction only. AC is the predominant form of electricity used in homes and commercial buildings because it can be easily transmitted over long distances.

Features of AC

  1. Voltage Fluctuation: AC voltage changes from positive to negative, typically at a frequency of 50 or 60 Hz, depending on the country.
  2. Transformability: AC voltage can be easily transformed to different levels using transformers, making it versatile for various applications, including household appliances.
  3. Sine Wave Form: The most common form of AC is sinusoidal, depicted in waveforms that follow a smooth sinusoidal pattern.

Usage in Refrigerators

Most refrigerators use AC electricity from household outlets. This efficiency stems from the following reasons:

  • Motor Operation: The compressor motor in a refrigerator operates using AC, making it suitable for the varying demands of cooling cycles.
  • Cooling Efficiency: The alternating nature of AC allows for efficient induction heating in compressors, enabling better thermal management.

Advantages of AC in Refrigerators

  1. Efficiency: AC-powered refrigerators tend to be more energy-efficient, as they can adapt to variations in electrical supply.
  2. Cost-Effectiveness: The widespread availability of AC makes appliances cheaper to manufacture and maintain.
  3. Reduced Component Size: AC motors are often smaller and lighter than their DC counterparts, allowing for more streamlined appliance designs.

Harnessing Direct Current in Refrigerators

What is Direct Current (DC)?

Direct Current is a flow of electric charge that moves in one constant direction. It is typically stored in batteries and used in various low-voltage applications, including electronics and smaller appliances.

Features of DC

  1. Constant Voltage: Unlike AC, DC maintains a constant voltage level, making it simpler but limited in capability for long-distance transmission.
  2. Rechargeable Batteries: Many modern appliances incorporate rechargeable battery systems that operate on DC power.

Usage in Refrigerators

While traditional refrigerators primarily use AC, the incorporation of DC components is appearing in various advanced models. This is most evident in:

  • Inverter Technology: Modern refrigerators often feature inverter compressors that can run on DC, enabling more precise temperature control and efficiency.
  • Smart Refrigerators: Appliances equipped with smart technology often require DC for their computational and operational processes, such as integrating sensors and user interfaces.

Benefits of DC in Refrigerators

  1. Energy Savings: DC motors in inverter refrigerators can lead to significant energy savings over time due to their efficiency and ability to adapt to cooling demands.
  2. Quieter Operation: Generally, DC-powered compressors operate more quietly than standard AC motors.
  3. Longevity: DC compressors are typically designed to last longer due to advanced technology.

a refrigerator

The Internal Components and Their Relationship with Current

Compressor Mechanism

The compressor is the heart of a refrigerator, where the cooling cycle nearly starts. It compresses refrigerant gas and circulates it through the system. Here’s how the compressor interacts with electrical current:

  • Induction Motors: Most compressors employ AC induction motors. The oscillating current causes the motor to rotate and compress the refrigerant gas.
  • Efficiency Ratings: The compressor’s efficiency is rated by its coefficient of performance (COP), benefiting from AC’s ability to adapt.

Condenser and Evaporator

The condenser and evaporator play crucial roles in heat exchange:

  1. Condenser: In the condenser, refrigerant releases heat to the environment and transforms from gas to liquid. The functionality here is mostly dependent on the compressor’s operation, which relies on AC.
  2. Evaporator: In the evaporator, the refrigerant absorbs heat from the space inside the refrigerator, making it cold. This process also requires efficient compressor function.

Thermostat Control

The thermostat regulates refrigerator temperature and turns the compressor on and off as needed:

  • AC Power for Controls: Traditional controls use AC power to initiate action within the compressor based on temperature readings.
  • Innovative Control Systems: More sophisticated models may incorporate DC power for responsive, nuanced control features.

The Importance of Voltage Regulation

What is Voltage Regulation?

Voltage regulation involves maintaining the voltage of an electrical system within a specified range to protect devices from power variations that could affect their functionality.

Significance in Refrigerators

Voltage fluctuations can significantly damage a refrigerator. Here are some elements related to voltage regulation:

  1. Surge Protectors: These devices mitigate sudden changes in voltage that could harm internal components, ensuring longevity.
  2. Inverter Systems: Utilizing inverter technology not only enhances energy efficiency but also contributes to sustained voltage levels for consistent operation.

  a refrigeratorThe Effect of Current Type on Energy Efficiency

Energy Consumption

Appliances, including refrigerators, contribute significantly to household energy consumption. The type of current—AC versus DC—can impact efficiency levels and overall running costs.

  1. AC Efficient Design: Many classic refrigerators operate optimally on AC due to their design. However, enhanced features like programmable thermostats may increase energy efficiency.
  2. DC as a Game Changer: Inverter technology utilizing DC can deliver better energy efficiency through continuous motor speed control, resulting in lower overall energy consumption.

Comparative Analysis of AC and DC Efficiency

  • Over Time Savings: DC refrigerators may demonstrate significant savings over time, resulting from efficient cooling cycles and lower power requirements.
  • Cost Considerations: The initial cost of a DC refrigerator may be higher; however, energy savings could offset this over time.

The Future of Refrigerator Technology and Electrical Current

Innovative Designs

Advancements in refrigerator technology continually evolve. Some trends include:

  • Smart Refrigerators: Smart technology integration often relies on DC systems for monitoring, energy management, and user interaction.
  • Eco-Friendly Refrigerators: Innovations targeting reduced environmental impact frequently utilize inverter technology, maximizing energy efficiency while minimizing waste.

Transitioning to DC Technology

Although AC remains the standard in many households, manufacturers are beginning a gradual shift toward more DC applications, driven by efficiency and user demand for smart and sustainable designs.

Conclusion: what kind of current makes a refrigerator run

Understanding what kind of current makes a refrigerator run is critical for appliance choice and home energy management. While traditional refrigerators primarily use alternating current (AC), advancements in technology are leading to more models that incorporate direct current (DC) solutions for enhanced efficiency. The interplay of these currents within vital components like the compressor, evaporator, and condenser ultimately dictates how effectively a refrigerator operates. As technology continues to innovate, shifting toward DC systems will likely reshape how refrigerators are designed and function, promising better energy efficiency and advanced features for future consumers. Ultimately, whether it be AC or DC, the electricity powering these essential appliances keeps them running smoothly, ensuring our food stays fresh.

Posted in Household appliances, Lifestyle appliance | Tagged , , | Leave a comment

How Long Can Mounjaro Stay Out of the Refrigerator?

Mounjaro, known generically as tirzepatide, is a novel medication designed primarily for adults with Type 2 diabetes. While its efficacy in controlling blood sugar levels is impressive, understanding its storage requirements and the conditions under which it can be safely transported is equally vital for anyone using this medication. One common question that arises in patient discussions is: “How long can Mounjaro stay out of the refrigerator?” In this comprehensive guide, we will address this question in depth, providing crucial insights into the medication’s stability, proper handling, and storage methods.

Mounjaro storage

Understanding Mounjaro

The Therapeutic Use of Mounjaro

Mounjaro is an injectable medication that functions as a dual GLP-1 and GIP receptor agonist. This unique mechanism helps stimulate insulin secretion, suppress glucagon secretion, and slow gastric emptying, all contributing to better blood glucose control. It also provides the added benefit of weight loss, making it an appealing option for many individuals battling diabetes.

Importance of Proper Storage

The pharmacological stability of Mounjaro, like many medications, is crucial for its effectiveness. Medications that are not stored correctly can degrade over time, potentially reducing their efficacy and posing health risks. As a patient or caregiver, knowing the recommended storage conditions for Mounjaro ensures that the medication remains functional throughout its use.

Recommended Storage Conditions for Mounjaro

In the Refrigerator

According to the manufacturer, Mounjaro should be stored in the refrigerator at a temperature of 36°F to 46°F (2°C to 8°C). Under these conditions, the medication will remain stable and effective until its expiration date. It’s important to avoid exposing the medication to freezing temperatures, which can render it unusable.

Room Temperature Guidelines

After initial storage in the refrigerator, Mounjaro can be taken out for use. The medication can be safely kept at room temperature (up to 86°F or 30°C) for up to 21 days. This guideline provides some flexibility for patients who need to carry their medication while traveling or when refrigeration isn’t readily available.

How Long Can Mounjaro Stay Out of the Refrigerator?

Key Determinants of Stability

So, how long can Mounjaro stay out of the refrigerator? When taken out of refrigeration, the stability of Mounjaro is determined by a variety of factors:

  • Duration: As mentioned, it is safe to keep Mounjaro at room temperature for up to 21 days.
  • Temperature: Avoid exposure to excessive heat or direct sunlight, which may compromise the integrity of the medication.
  • Storage Environment: A cool, dry place is ideal for housing Mounjaro when it is outside of refrigeration. Your medication should be kept in its original packaging, protecting it from light and contamination.

Post-Exposure Precautions

If Mounjaro has been left out of the refrigerator beyond the recommended 21 days, it is essential to evaluate whether or not it should still be used:

  1. Checking Visual Quality: Always inspect the medication for any changes in color, clarity, or consistency before use.
  2. Considering Time and Conditions: If the medication has been left out for longer than 21 days or if it has been exposed to high temperatures, it is best to discard it and obtain a replacement.

Mounjaro storage

Handling Mounjaro Outside the Refrigerator

Transportation Tips

When traveling, you may need to transport your Mounjaro medication. Here are some tips to ensure it remains effective during transit:

  1. Use Insulated Bags: Invest in an insulated travel bag designed for medications to maintain a stable temperature.
  2. Temperature Monitoring: Carry a thermometer with you to monitor the temperature inside your travel bag, ensuring it remains within safe limits.
  3. Limit Exposure: Try to limit the time that Mounjaro is out of refrigeration while traveling. Plan your route and schedule to minimize exposure to heat.

Precautions When Administering

When it’s time to administer Mounjaro, ensure you follow the recommended procedures:

  1. Cleanliness: Always wash your hands thoroughly before handling the injection.
  2. Pre-Injection Preparation: If the medication has been stored at room temperature for some time, gently roll the pen or vial to mix the medication lightly. Do not shake it vigorously, as this may cause bubbles to form.
  3. Injection Site: Rotate your injection sites according to the guidelines provided by your healthcare provider to avoid irritation.

What to Do If Mounjaro Has Been Compromised

Identifying Signs of Degradation

If there’s doubt about whether your Mounjaro has remained stable, it’s critical to be able to identify signs of degradation. Look for:

  • Discoloration: Any unusual changes in color.
  • Cloudiness: A clear solution should remain clear; cloudiness may indicate contamination.
  • Particles: Any floating particles which weren’t previously present can be telltale signs of degradation.

Disposing of Compromised Medication

If you suspect that your medication has gone bad, do not attempt to use it. Here are steps for proper disposal:

  1. Local Guidelines: Follow your locality’s medication disposal guidelines, as they vary by region.
  2. Sharps Container: If you have used needles or syringes, ensure that you dispose of them in a designated sharps container.

Common Misconceptions About Mounjaro Storage

Myth: Room Temperature Equals Refrigeration

One significant misconception is that medications can be stored at room temperature indefinitely. While Mounjaro can indeed be stored at room temperature for up to 21 days, it is not intended for prolonged storage outside the refrigerator.

Myth: Direct Sunlight is Harmless

Another myth is that keeping Mounjaro in normal indoor conditions, even in direct sunlight, is safe. In fact, exposure to light and heat can greatly shorten the medication’s lifespan.

  Mounjaro storageMedications Commonly Stored in Refrigerators

While not all medications require refrigeration, several specific categories do. It’s essential to be familiar with these to ensure their effectiveness and safety.

Insulin and Other Diabetes Medications

Insulin is perhaps the most commonly recognized medication that requires refrigeration. It must be stored between 36°F to 46°F (2°C to 8°C) to remain effective. When improperly stored, insulin can degrade, leading to inadequate blood sugar control, which can have severe consequences for patients with diabetes.

Other diabetes medications, such as GLP-1 receptor agonists, also require refrigeration. These medications, which help regulate blood sugar levels, are often sensitive to temperature fluctuations as well.

Biologic Medications

Biologic medications, which include a range of therapies derived from living organisms, often require refrigeration. These medications can include monoclonal antibodies and certain gene therapies that are used to treat conditions like autoimmune disorders and cancers. The stability of these medications is highly temperature-sensitive, and improper storage can lead to loss of efficacy.

Hormonal Therapies

Hormonal medications, such as certain contraceptives and thyroid medications, may also require refrigeration. For example, some injectable contraceptives need to be stored in the refrigerator until their expiration date. Similarly, certain formulations of thyroid medications, like thyroxine, can benefit from refrigeration to maintain their potency.

Injectable Medications

Various injectable medications must be refrigerated to maintain their efficacy. This category includes medications for pain management, allergy treatments, and several others. For example, the epinephrine auto-injector, used for treating severe allergic reactions, should be stored in a cool place but not necessarily frozen.

Nutritional Supplements and Parenteral Nutrition

Nutritional supplements, especially those used in parenteral nutrition (nutrition delivered via IV), often require refrigeration. These products can include amino acids, lipids, and other essential nutrients that must be maintained within specific temperature ranges to ensure their safety and effectiveness.

Conclusion

In summary, understanding how long Mounjaro can stay out of the refrigerator is essential for anyone using this medication. When stored properly, Mounjaro can remain effective for up to 21 days at room temperature after being taken out of refrigeration. However, it is crucial to monitor environmental conditions and visual quality to ensure the medication’s integrity remains intact.

By following the manufacturer’s recommendations and adhering strictly to proper storage and handling procedures, patients can ensure they receive the full benefits of Mounjaro without compromising their health. Always consult your healthcare provider with any questions or concerns about storage and usage to maintain the effectiveness of your diabetes management plan.

Posted in Household appliances, Lifestyle appliance | Tagged , , | Leave a comment

Hair Clipper Oil: Why It’s Important and How to Use It

Hair clippers are an essential tool for both professional barbers and individuals who prefer to maintain their own hairstyles at home. One crucial aspect often overlooked in the maintenance of clippers is the application of hair clipper oil. This oil plays a significant role in ensuring the longevity and efficiency of your clippers. In this article, we’ll explore what hair clipper oil is, why it’s essential, how to apply it properly, and the best products available on the market.

hair clipper oil

Understanding Hair Clipper Oil

What is Hair Clipper Oil?

Hair clipper oil is specifically formulated to lubricate the blades of hair clippers. It’s typically lightweight and made from mineral oil or synthetic oil that reduces friction when the blades move against each other. This oil helps prevent overheating, wear and tear, and keeps the clippers functioning smoothly.

Components of Hair Clipper Oil

Most hair clipper oil contains a combination of the following components:

  • Mineral Oil: Provides a smooth surface for the blades, reducing heat generated during use.
  • Silicone: Often included for its ability to create a barrier that repels moisture and helps keep blades clean.
  • Additives: Some oils include additives for oxidization resistance, meaning they can help prevent rust and corrosion.

The Importance of Using Hair Clipper Oil

Extending the Lifespan of Your Clippers

Proper maintenance is key to ensuring your clippers last for years. Hair clipper oil creates a thin protective layer between the blades, diminishing friction. When clippers are used without oil, the blades can heat up significantly faster, leading to accelerated wear. By regularly applying oil, you extend the operational life of your device.

Enhancing Performance

Clippers that are well-lubricated operate more efficiently. The seamless movement of the blades leads to a smoother cutting experience, which is especially important for achieving precise hairstyles. Dull clippers can cause hair pulling or snagging, which is uncomfortable for the person receiving the cut.

Preventing Rust and Corrosion

Moisture from humidity and the natural oils from hair can lead to rust. Hair clipper oil forms a barrier that helps protect the blades from rust and corrosion, thus maintaining their sharpness and performance over time.

Reducing Noise

Another often-overlooked benefit of hair clipper oil is that it can dampen the noise produced by the operating clippers. When blades are well-lubricated, they create less friction and, consequently, less sound while in operation.

hair clipper oil

How to Apply Hair Clipper Oil

Preparing Your Clippers

Before applying hair clipper oil, it’s essential to ensure the clippers are clean. Start by removing hair clippings and any other debris from the blades. You can use a small brush (often included with clippers) to gently clean the area around the blades. Make sure to unplug the clippers to avoid any accidents during this cleaning process.

Steps for Application

  1. Shake the Bottle: If using a new bottle of hair clipper oil, shake it gently to mix the contents.
  2. Apply Oil Sparingly: Place just a few drops of hair clipper oil on each blade. There’s no need to soak the blades; a small amount will suffice.
  3. Run the Clippers: Turn on the clippers for a few seconds after applying the oil. This action helps distribute the oil evenly across the blades.
  4. Wipe Off Excess Oil: If you notice any excess oil, gently wipe it off with a clean cloth to prevent it from attracting dust and debris.

Frequency of Application

The frequency of oiling your clippers will depend on usage. For daily or professional barbershop use, it’s recommended to oil after every use. If you’re using your clippers less frequently, aim to lubricate them at least once for every five uses or before long-term storage.

hair clipper oilTypes of Hair Clipper Oils

Mineral vs. Synthetic Oils

When considering hair clipper oil, two main types dominate the market: mineral and synthetic oils.

Mineral Oil

Mineral oil is a more traditional option, often derived from petroleum. It’s inexpensive and effective for most home users. However, it might not provide as strong a protective barrier as synthetic oil.

Synthetic Oil

Synthetic hair clipper oils are designed to be long-lasting and provide superior lubrication. They can withstand higher temperatures, making them suitable for professional environments. Synthetic oils can also be less prone to forming sludge over time.

Specialized Oils

Some brands produce specialized oils infused with additives for increased performance. These oils might offer additional benefits such as anti-friction properties or rust inhibitors to ensure your clipper blades stay sharper longer.

Common Mistakes When Using Hair Clipper Oil

Over-Oiling

While it’s essential to keep the blades lubricated, adding too much oil can lead to residue buildup, which attracts hair and dust. This can negatively impact the performance of your clippers. Always remember that less is often more when it comes to hair clipper oil.

Skipping Regular Maintenance

Many users forget to regularly clean and oil their clippers, leading to diminished performance over time. Establishing a maintenance routine can help you avoid this issue and keep your clippers in prime condition.

Ignoring Blade Inspection

Every time you oil your clippers is a good opportunity to inspect the blades for any signs of damage or dullness. Recognizing these signs early allows you to take appropriate action before they lead to hair clipping problems.

When to Replace Your Hair Clippers

Signs of Wear and Tear

Even with regular oiling and maintenance, hair clippers will eventually wear out. Here are some indicators that it may be time to replace your clippers:

  • Dull Blades: If you find that your clippers are pulling hair or not cutting as effectively, the blades may have dulled and need replacing.
  • Increased Noise: If your clippers start to operate much noisier than usual, it may indicate that they lack adequate lubrication or that the blades are worn out.
  • ** overheating**: If your clippers are overheating during use, this could be a sign that they’re not functioning as they should or that they need oiling.

Brand and Model Limitations

The lifespan of clippers can vary significantly based on the brand and model. Professional-grade clippers tend to last longer than budget options due to sturdier construction and better quality parts. Always consult the manufacturer’s guide for specifics about your clippers.

hair clipper

Popular Brands of Hair Clipper Oil

1. Wahl Clipper Oil

Wahl is an industry leader when it comes to hair clippers and hair clipper oil. The Wahl Clipper Oil is specially formulated for their clippers, but it works excellently on other brands as well.

Advantages of Wahl Clipper Oil

  • High-quality Formula: The oil is designed to prevent wear and prolong the life of your clippers.
  • Easy Application: The bottle features a convenient nozzle for precise application.
  • Compatibility: It works well with various types of clippers and is safe for all blades.

2. Andis Clipper Oil

Andis offers a specifically developed oil that not only lubricates but also cleans the clipper blades. This product is a favorite among many barbers for its effectiveness.

Reasons to Choose Andis Clipper Oil

  • Dual Functionality: It not only lubricates but also helps in cleaning debris and hair.
  • Lightweight and Non-Greasy: The formula ensures it doesn’t leave a sticky residue, making it ideal for regular use.
  • Versatility: Works on clippers, trimmers, and blades, making it a multifunctional product.

3. Oster Clipper Oil

Oster is another well-known name in the hair care industry, especially for its heavy-duty clippers. Oster Clipper Oil is tailored to meet the demands of high-performance clippers.

Benefits of Oster Clipper Oil

  • Specialized Formula: The oil is designed to prevent rust and provide excellent lubrication for continuous high-speed cutting.
  • Long-lasting: A little goes a long way, meaning you won’t need to frequently reapply.
  • Prevents Overheating: The oil helps keep the blades cooler during use, preventing overheating and ensuring efficiency.

4. BaBylissPRO Clipper Oil

BaBylissPRO is renowned for professional-grade grooming tools, and their clipper oil is no exception.

Unique Features of BaBylissPRO Clipper Oil

  • Non-toxic Formula: Ideal for salon environments, where safety is a priority.
  • Effective Lubrication: Provides superior lubrication to ensure a smooth cutting experience without pulling hair.
  • Quick-drying: The fast-absorbing formula minimizes the time you need to wait before you can start using your clippers again.

5. Libman Clipper Oil

While perhaps less known than some other brands, Libman offers a clipper oil that garners positive reviews from users who appreciate its effectiveness. hair clipper oilConclusion

In conclusion, hair clipper oil is an essential product for anyone who uses clippers, whether at home or in a professional setting. Regular application not only extends the lifespan and performance of your clippers but also enhances your overall cutting experience. By choosing the right oil, maintaining a consistent maintenance routine, and being aware of the signs of wear and tear, you can ensure your hair clippers remain in optimal condition. Don’t neglect the importance of hair clipper oil; it truly is a small investment in the longevity and efficiency of your grooming tools.

Posted in Household appliances, Self-care | Tagged , , | Leave a comment

How Long Can You Keep Cooked Crabs in the Refrigerator?

Crabs are a delightful seafood option that can elevate any meal, whether it’s a family gathering, a special occasion, or a simple dinner at home. Once you’ve tasted the sweet, succulent meat of cooked crabs, it’s understandable to want to preserve that flavor for as long as possible. However, knowing how long you can keep cooked crabs in the refrigerator is crucial for both safety and taste. In this article, we’ll delve into the preservation of cooked crabs, exploring factors like storage, safety, and optimal methods for keeping them fresh.

Understanding Cooked Crabs and Food Safety

When it comes to food safety, especially with seafood, the guidelines set by health organizations are paramount. Cooked crabs can harbor bacteria if not stored properly. This can lead to foodborne illnesses, which can be serious. Hence, understanding the parameters for storing cooked crabs will help maintain their quality and safety.

The Importance of Refrigeration

Refrigeration slows down the growth of bacteria, allowing food to remain safe for consumption longer than it would at room temperature. For cooked crabs, the refrigerator serves as a protective barrier against potential microbial hazards. The recommended refrigeration temperature is below 40°F (4°C), which is why it’s crucial to have a thermometer handy to monitor the temperature of your fridge.

The Shelf Life of Cooked Crabs

So, how long can you keep cooked crabs in the refrigerator? Generally, cooked crabs can be stored safely in the fridge for 3 to 5 days. However, this timeframe is greatly influenced by several factors, including how the crabs were cooked, how they were stored, and whether they were handled properly during preparation.

cooked crabs in the refrigerator

Factors Affecting the Shelf Life of Cooked Crabs

While the general rule of thumb is to consume cooked crabs within 3 to 5 days, various factors can influence this guideline.

Cooking Method

The method used to cook the crabs plays a significant role in preservation. Steamed or boiled crabs are generally safer to store than crabs that were grilled or sautéed with rich sauces or seasonings. The simpler the preparation, the less likely it is for harmful bacteria to thrive.

Storage Containers

The type of container used to store the crabs can also determine how long they can last in the refrigerator. Airtight containers or resealable plastic bags minimize the exposure to air and moisture, which can accelerate spoilage. If crabs are left uncovered or stored in a container that isn’t airtight, they can absorb odors from other foods and may spoil faster.

Initial Temperature and Time

How long the cooked crabs have been sitting out before being refrigerated is a crucial factor. Cooked crabs should ideally be refrigerated within two hours of cooking. Leaving them out longer than this can provide the perfect environment for bacteria to multiply, drastically reducing their shelf life.

Signs of Spoilage

Even within the 3 to 5-day window, you should always check for signs of spoilage before consuming cooked crabs stored in the refrigerator.

Visual Cues

Spoiled crabs may change color, becoming dull or gray instead of their usual vibrant hue. Discoloration can often be an early indicator that the quality has deteriorated. Additionally, if there’s any visible mold, even in small amounts, it’s best to discard the crabs immediately.

Odor Indicators

Cooked crabs should have a pleasant, ocean-like aroma. A strong, unpleasant smell or a sour stench can indicate spoilage. Seafood is particularly sensitive to changes in odor; a change usually means it’s no longer safe to eat.

Texture Changes

Another important factor to consider is the texture of the crab meat. Fresh meat tends to be firm and moist. If you notice that the meat has become slimy or excessively dry, it’s highly advisable to avoid consumption.

cooked crabs in the refrigerator

Best Storage Practices for Cooked Crabs

To maximize the shelf life of your cooked crabs, follow these best storage practices:

Allow to Cool

After cooking, it’s essential to let the crabs cool down to room temperature before refrigerating. Rapid cooling can help prevent condensation, which can create a moist environment conducive to bacterial growth.

Utilizing Airtight Containers

One of the best practices is to store cooked crabs in airtight containers. These containers prevent moisture loss and shield the crabs from air exposure.

Label and Date

Whenever you store cooked crabs, it’s useful to label and date the container. This will allow you to keep track of how long the cooked crabs have been stored and help you make informed decisions regarding their safety.

Avoid Overcrowding

When placing cooked crabs in the refrigerator, avoid clustering them together. Overcrowding can hinder airflow and cause uneven cooling, which may further contribute to spoilage.

Reheating Cooked Crabs Safely

If you’ve stored your cooked crabs in the refrigerator and want to enjoy them later, reheating them properly is crucial for both flavor and safety.

Methods for Reheating Crabs

There are several methods to reheat cooked crabs, each preserving their delicious flavor when done correctly:

Steaming

Steaming is one of the best methods to reheat crabs without sacrificing moisture. Place the crabs in a steaming basket over boiling water, cover, and steam for about 5 to 10 minutes. This method ensures that the meat retains its natural flavors and textures.

Baking

Another effective way is to bake them in an oven. Wrap the crabs in aluminum foil to retain moisture and place them in a preheated oven at around 350°F (175°C) for 8 to 10 minutes.

Microwaving

For a quicker option, you can microwave cooked crabs. Place them in a microwave-safe dish, cover, and heat at medium power for 2 to 3 minutes. However, this method can sometimes make the meat rubbery if overheated, so be cautious.

  cooked crabs in the refrigerator
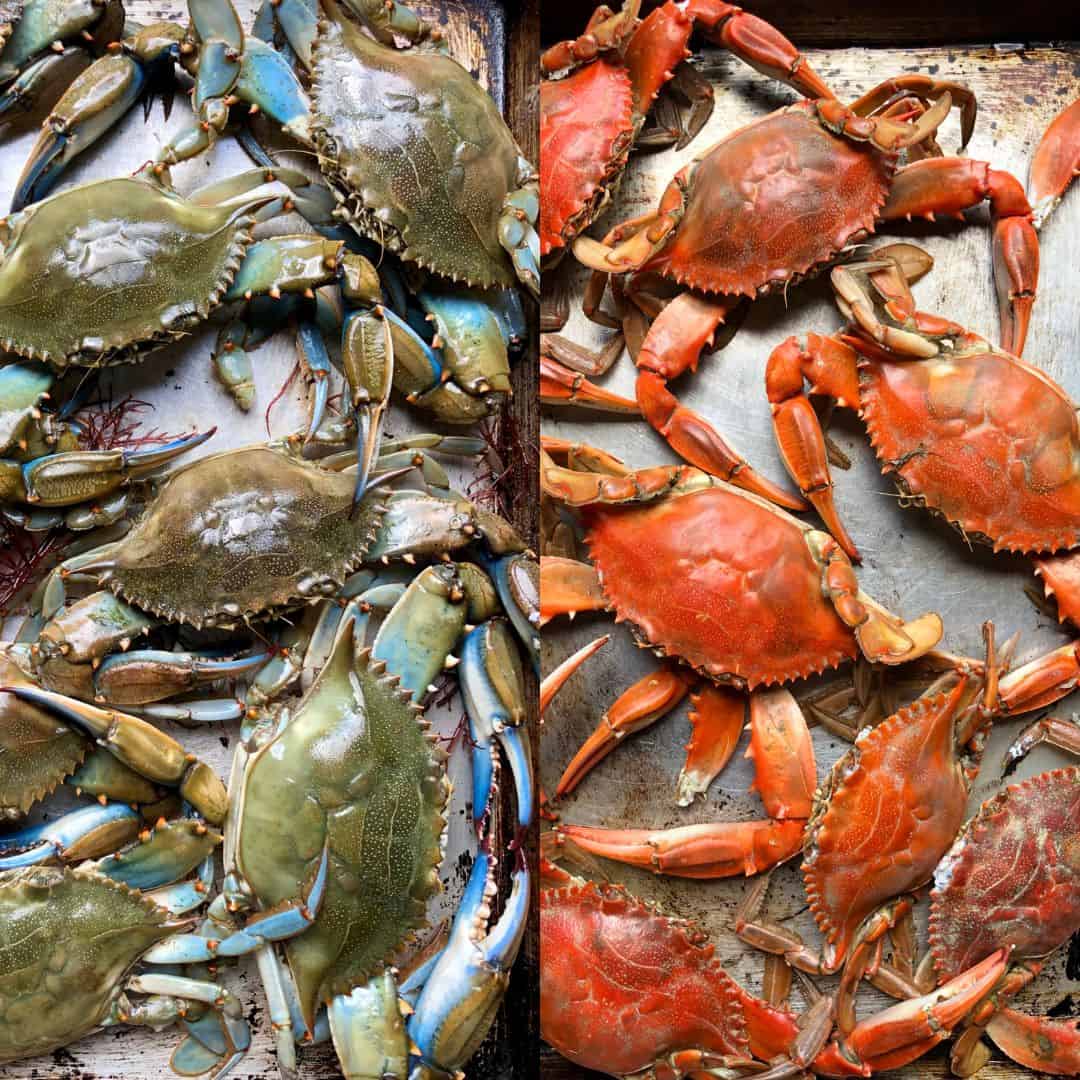
Creative Ways to Use Leftover Cooked Crabs

If you find yourself with leftover cooked crabs and are unsure how long they will last, consider getting creative with your meals. Here are some ways to incorporate leftover crab meat:

Crab Cakes

One of the most popular ways to use leftover crabs is to make crab cakes. Mix cooked crab meat with breadcrumbs, mayonnaise, and a few spices, and then fry or bake them for a delicious dish that might just be better than the original.

Crab Salad

Leftover crab meat can be a fantastic addition to salads. Toss it with lettuce, vegetables, and a dressing of your choice for a refreshing meal.

Crab Pasta

Integrating crab meat into pasta can turn a simple dish into a gourmet experience. It’s as easy as sautéing garlic in olive oil, adding crab meat, and combining it with your favorite pasta.

Conclusion: how long can you keep cooked crabs in the refrigerator?

Knowing how long you can keep cooked crabs in the refrigerator is essential for enjoying this delightful seafood without compromising your health. Generally, cooked crabs will last 3 to 5 days in the fridge, but various factors can influence this timeframe, such as cooking methods, storage practices, and initial cooling time. By following the tips outlined in this article, you can ensure that your cooked crabs remain fresh and safe to enjoy. So, whether you’re planning a feast or simply saving some for later, keeping these guidelines in mind will enhance your culinary experience with crabs. Ultimately, the key to enjoying cooked crabs lies in appropriate storage and consumption within the recommended timeframe, ensuring that each bite is as delectable as the first.

Posted in Household appliances, Lifestyle appliance | Tagged , , | Leave a comment

How Long Will Sauerkraut Last in the Refrigerator?

Introduction

Sauerkraut, a beloved fermented dish made from finely shredded cabbage and seasoned with salt, boasts a delightful tangy flavor and numerous health benefits. With its crunchy texture and probiotic qualities, sauerkraut has found its way into many diets around the world. However, when it comes to food safety and storage, many people wonder: how long will sauerkraut last in the refrigerator? This article aims to provide a comprehensive exploration of the factors affecting the shelf life of sauerkraut in your fridge, optimal storage methods, and signs of spoilage, while delivering well-researched insights.

sauerkraut in the refrigerator

Understanding Sauerkraut and Its Fermentation Process

The Fermentation Process

Sauerkraut is created through a process called lacto-fermentation, where naturally occurring bacteria (lactobacillus) convert sugars in the cabbage into lactic acid. This not only preserves the cabbage but also gives sauerkraut its distinct sour flavor. During fermentation, beneficial enzymes and probiotics are produced, enhancing its nutritional profile. To produce quality sauerkraut, raw cabbage, and salt are the primary ingredients; various spices and herbs may also be added for flavor.

Health Benefits of Sauerkraut

Apart from its taste, sauerkraut is packed with health benefits. It’s rich in vitamins C and K, and probiotics that support gut health. Studies have suggested that fermented foods like sauerkraut can enhance digestion and may contribute to a healthier immune system. The presence of fiber also makes it a good option for maintaining digestive health.

Types of Sauerkraut

Sauerkraut can vary in its texture and flavor depending on the ingredients and fermentation techniques used. There are traditional varieties, which emphasize the basic fermentation of cabbage and salt, as well as some modern takes that incorporate other vegetables and flavors such as carrots, beets, or spices. Each type may have different shelf lives based on both its ingredients and the fermentation process.

How Long Will Sauerkraut Last in the Refrigerator?

Once opened, the shelf life of sauerkraut in the refrigerator will vary. Generally speaking, if properly stored, sauerkraut can last about 4 to 6 months in the fridge. This can seem like a considerable length of time, but various factors can influence how long it stays fresh.

Proper Storage Methods

Unopened Sauerkraut

Unopened jars of commercially prepared sauerkraut can usually last up to 1 year in the refrigerator, as they are usually pasteurized and preserved. For homemade sauerkraut, it should be kept in an airtight container and will also maintain its quality for about 2 to 3 months in the refrigerator.

Opened Sauerkraut

After opening, sauerkraut should be stored in an airtight container and placed in the coldest part of your refrigerator. The goal is to minimize exposure to air, which can accelerate spoilage. When properly stored, it can last 4 to 6 months after opening, though it’s essential to monitor its state.

Factors Influencing the Shelf Life of Sauerkraut

Temperature and Environment

The temperature of your refrigerator plays a significant role in how long sauerkraut lasts. Ideally, your refrigerator should be set at or below 40°F (4°C). At this temperature, the growth of spoilage bacteria is slowed. If your refrigerator fluctuates in temperature or is kept above this mark, the shelf life of the sauerkraut can decrease significantly.

Packaging and Exposure to Air

When sauerkraut is exposed to air, it can undergo oxidation. This process affects both the flavor and texture, leading to an off taste. Always ensure the container is sealed tightly and try to use a spatula or spoon that is clean and dry to scoop out servings.

Type of Sauerkraut

As mentioned earlier, the type of sauerkraut can influence its shelf life. Store-bought varieties often contain preservatives and are pasteurized, helping them last longer, while homemade versions are typically more susceptible to spoilage.

sauerkraut in the refrigerator

Signs of Spoilage in Sauerkraut

Visual Indicators

Before consuming sauerkraut that has been in your refrigerator for a while, always check for any visual signs of spoilage. Fresh sauerkraut should maintain a vibrant color. If you notice any discoloration, fuzzy mold, or an overall slimy texture, it’s best to discard it.

Smell

The aroma of sauerkraut is typically strong and pungent, which can be off-putting to some. However, if it begins to emit a foul or rancid odor, it’s a definite sign that the sauerkraut has gone bad. Fresh sauerkraut should have a fermented smell that is sour but not unpleasant.

Taste Test

If visual and olfactory checks don’t provide clear answers, you can conduct a taste test. If you find that your sauerkraut tastes off or has an unexpected texture, it’s best to err on the side of caution and not consume it.

Ideal Storage Conditions

Storing Store-Bought Sauerkraut

Store-bought sauerkraut can typically be found in the refrigerator section of grocery stores. For optimal storage:

  1. Keep It Refrigerated: Once you bring it home, place the container in the refrigerator promptly. Aim for a consistent temperature, ideally 32°F to 40°F (0°C to 4°C).
  2. Seal Properly: Make sure the container is well-sealed. If it’s in a jar, ensure the lid is tight to prevent exposure to air, which can lead to spoilage.
  3. Avoid Contamination: Always use clean utensils to scoop out sauerkraut. This practice helps prevent introducing bacteria that could spoil the remainder.

Storing Homemade Sauerkraut

For homemade sauerkraut, the storage method is crucial to extend its shelf life.

  1. Fermentation Completion: Ensure that the fermentation is complete before moving the sauerkraut to the refrigerator. The tangy flavor indicates readiness.
  2. Use Glass Jars: Store homemade sauerkraut in glass jars with tight-fitting lids. Mason jars are excellent options as they can handle the pressure created during fermentation.
  3. Submerge in Brine: Ensure the sauerkraut is submerged in its brine. This method helps to prevent exposure to air, thus prolonging freshness.
  4. Keep Refrigerated: Immediately transfer the jars to the refrigerator after fermentation. Store at the back of the fridge where the temperature is the most stable.

Tips for Extending the Life of Sauerkraut

Store in Smaller Portions

If you tend to use sauerkraut infrequently, consider dividing it into smaller portions and freezing one or more of those portions. While freezing may alter the texture somewhat, it can be a great way to maintain the sauerkraut’s quality long-term.

Keep the Brine

The brine in which sauerkraut is stored is vital for its longevity. This salty liquid not only adds flavor but acts as a natural preservative. Always ensure that the cabbage is submerged in the brine to ward off exposure to air and bacteria.

Use Clean Utensils

To avoid introducing unwanted bacteria into the jar, use clean utensils each time you scoop out sauerkraut. Even a small amount of contamination can lead to quicker spoilage.

  sauerkraut in the refrigerator
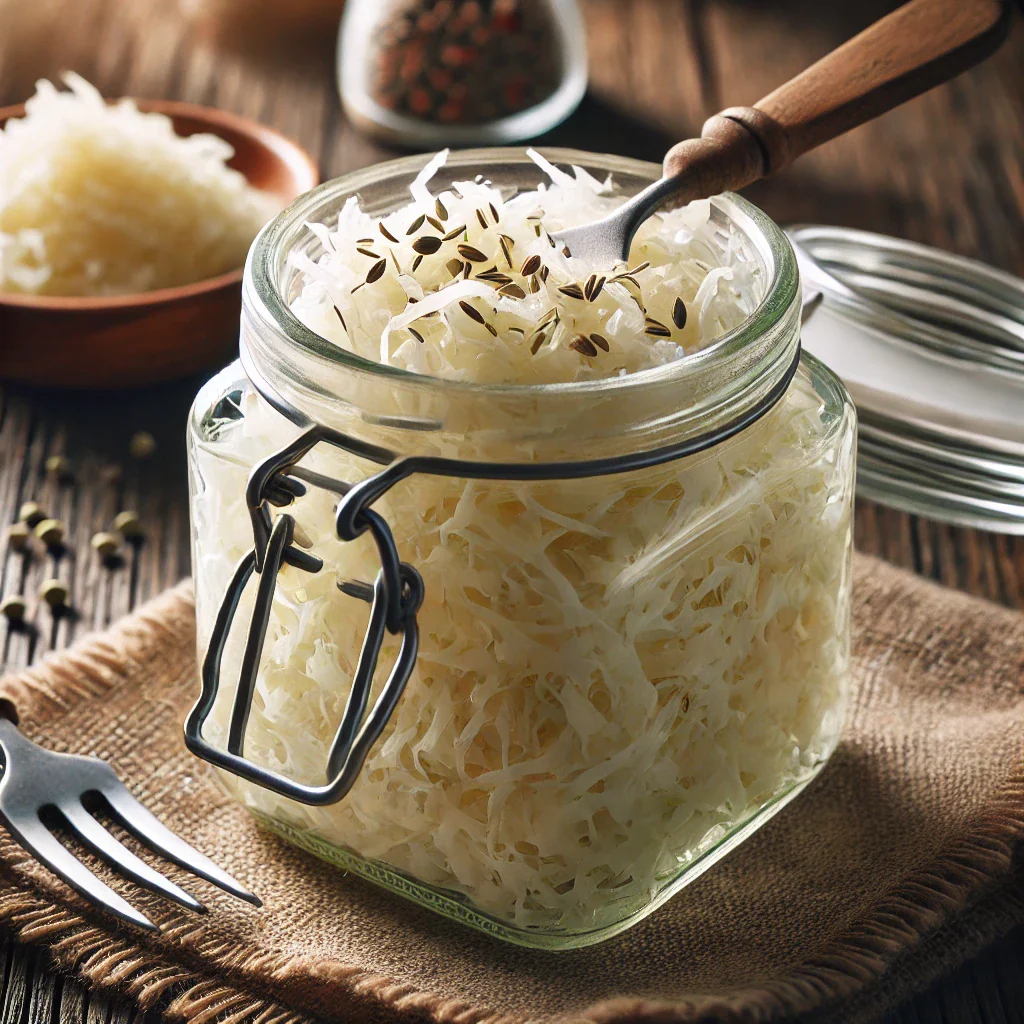
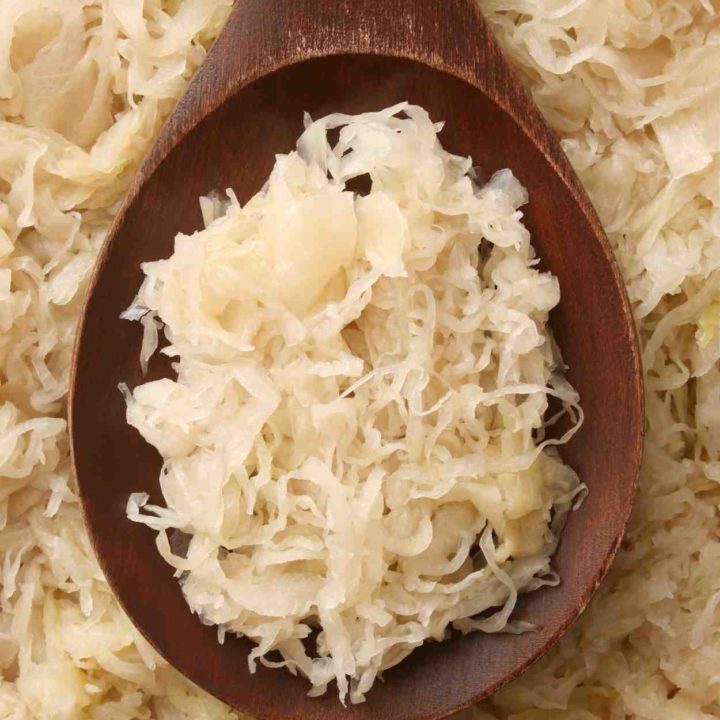
Creative Ways to Use Leftover Sauerkraut

If you find you have an abundance of sauerkraut, there are countless ways to incorporate it into delicious dishes.

Sauerkraut in Salads

Add sauerkraut to salads for a tangy twist. It can improve the flavor profile and increase the nutritional content. Consider combining it with greens, nuts, and a light vinaigrette.

Sauerkraut in Sandwiches

Sauerkraut is an excellent addition to sandwiches, particularly with meats like pastrami or corned beef. The contrast of flavors intensifies the overall taste and also offers a satisfying crunch.

Sauerkraut as a Topping

Use sauerkraut as a topping for burgers, hot dogs, or even baked potatoes. It adds a savory and zesty element to these comfort foods.

Sauerkraut Soups

Incorporate sauerkraut into soups, particularly those with a base of meats or broths. It can add depth and a unique flavor that enhances the overall dish.

Casseroles and Bakes

Mix sauerkraut into casseroles or bakes. It pairs beautifully with potatoes and cheeses, producing a comforting dish that showcases fermented flavors.

Conclusion

So, how long will sauerkraut last in the refrigerator? If properly stored, opened sauerkraut can typically last between 4 and 6 months, while unopened jars can endure for much longer. Understanding the proper storage methods, the indicators of spoilage, and ways to extend the sauerkraut’s life will allow you to enjoy this fermented delight to its fullest. Incorporating sauerkraut into your meals not only enhances flavors but also offers numerous health benefits, making it a worthy addition to any diet. Stay mindful of storage practices, and you can relish the unique taste and nutrition of sauerkraut for months to come.

Posted in Household appliances, Lifestyle appliance | Tagged , , | Leave a comment

How to Remove Maytag Refrigerator Light Bulb Cover?

Removing the light bulb cover from your Maytag refrigerator is a simple yet important task that every homeowner should know how to do. Whether you’re replacing a burnt-out bulb or cleaning the interior of your fridge, understanding the process can save you time and hassle. In this comprehensive guide, we’ll walk you through the steps required to successfully remove the light bulb cover from your Maytag refrigerator, as well as important tips and safety precautions to consider.

Understanding the Importance of Your Refrigerator Light Bulb

Before we delve into the specifics of how to remove the Maytag refrigerator light bulb cover, it’s vital to understand why the light bulb is important for your appliance. The refrigerator light serves several crucial functions:

  • Visibility: It makes it easier to locate food items, especially in low-light conditions. This is particularly beneficial for refrigerators that have limited natural light exposure or are located in darker areas.
  • Energy Efficiency: A functional light bulb can help you avoid opening the refrigerator doors unnecessarily, thereby maintaining the temperature inside and saving on energy costs.
  • Safety: When you can easily see the contents of your refrigerator, you reduce the risk of food spoilage and ensure that you’re not consuming expired items.

After appreciating its importance, let’s move on to the specific steps for removing the light bulb cover.

maytag refrigerator light bulb cover

Tools You’ll Need

While removing the light bulb cover is a straightforward process, having the right tools at hand will make it much easier. Here’s what you may need:

  • Screwdriver: A flathead or Phillips screwdriver will usually suffice for loosening any screws that keep the cover in place.
  • Pliers: These can be helpful for gripping or applying extra force if the cover is stuck.
  • Clean Cloth or Paper Towels: To clean up any debris or access any bulbs that may have broken.

Make sure you gather these tools before beginning the process to avoid interruptions.

Step-by-Step Guide on How to Remove the Maytag Refrigerator Light Bulb Cover

Step 1: Unplug the Refrigerator

Safety first! It’s crucial to disconnect the refrigerator from its power source before you start any maintenance work. Not only will this protect you from electric shock, but it will also prevent any accidental activation of the light while you’re working.

  1. Locate the outlet: Find where the refrigerator is plugged in. Usually, it’s located behind the appliance or in a nearby wall.
  2. Unplug the refrigerator: Gently pull the plug from the wall. Avoid yanking too hard to prevent damage to the cord.

Step 2: Locate the Light Bulb Cover

In most Maytag refrigerators, the light bulb cover is located at the top of the refrigerator compartment. It may vary in design based on the model, but it is typically a transparent or frosted plastic cover directly over the light bulb.

  1. Open the refrigerator door: Leave the door open while you work to ensure you have full access to the compartment.
  2. Examine the cover: Look for any apparent fasteners or clips that secure the cover in place.

Step 3: Remove Any Fasteners

Certain models may have screws or other fasteners holding the cover in place.

  1. Use your screwdriver: If you see screws, use the appropriate screwdriver to remove them. Keep them in a safe spot so you won’t lose them.
  2. Check for clips: In case your model employs clips, gently pry these open with your fingers or pliers without applying too much pressure, as they can break easily.

maytag refrigerator light bulb cover

Step 4: Gently Remove the Light Bulb Cover

Now that any fasteners are taken care of, you can proceed to remove the light bulb cover carefully.

  1. Grip the cover: Use both hands to grasp the sides of the cover. Ensure you are being gentle to avoid breaking it.
  2. Pull downward or sideways: Depending on your model, you might need to pull it down or slide it sideways. If it feels stuck, double-check for any hidden fasteners that might have been missed.

Step 5: Replace or Clean the Light Bulb

With the cover now removed, you can easily access the light bulb.

  1. Check the bulb: If you need to replace a burnt-out bulb, do so by gently twisting it counterclockwise.
  2. Cleaning: If you’re cleaning, take this opportunity to wipe away any dust or spills on both the light bulb and the area surrounding it.

Step 6: Reattach the Light Bulb Cover

Once you’ve replaced or cleaned the bulb, it’s time to reattach the cover.

  1. Position the cover: Align it correctly above the bulb.
  2. Secure it: Push it back into place and reinsert any screws or clips that you removed in Step 3.

Step 7: Plug in the Refrigerator

Finally, reestablish power to the refrigerator.

  1. Reconnect the power: Plug the refrigerator back into the wall socket.
  2. Test the light: Open the refrigerator door and check if the light bulb is functioning.

Troubleshooting Common Issues

Even with a straightforward task like removing the Maytag refrigerator light bulb cover, you might encounter some roadblocks. Below are common issues and troubleshooting tips.

Issue: Light Bulb Cover Won’t Budge

If the cover refuses to move:

  • Make sure to check all edges for clips or screws that may not have been removed.
  • Try wiggling gently while pulling the cover to see if it can loosen from its position.

Issue: Broken Light Bulb

If you’ve encountered a broken light bulb:

  • Wear gloves: Protect your hands before cleaning up the shards to avoid cuts.
  • Carefully clean up: Use a damp cloth to wipe up pieces and dispose of them properly.

  maytag refrigerator light bulb cover
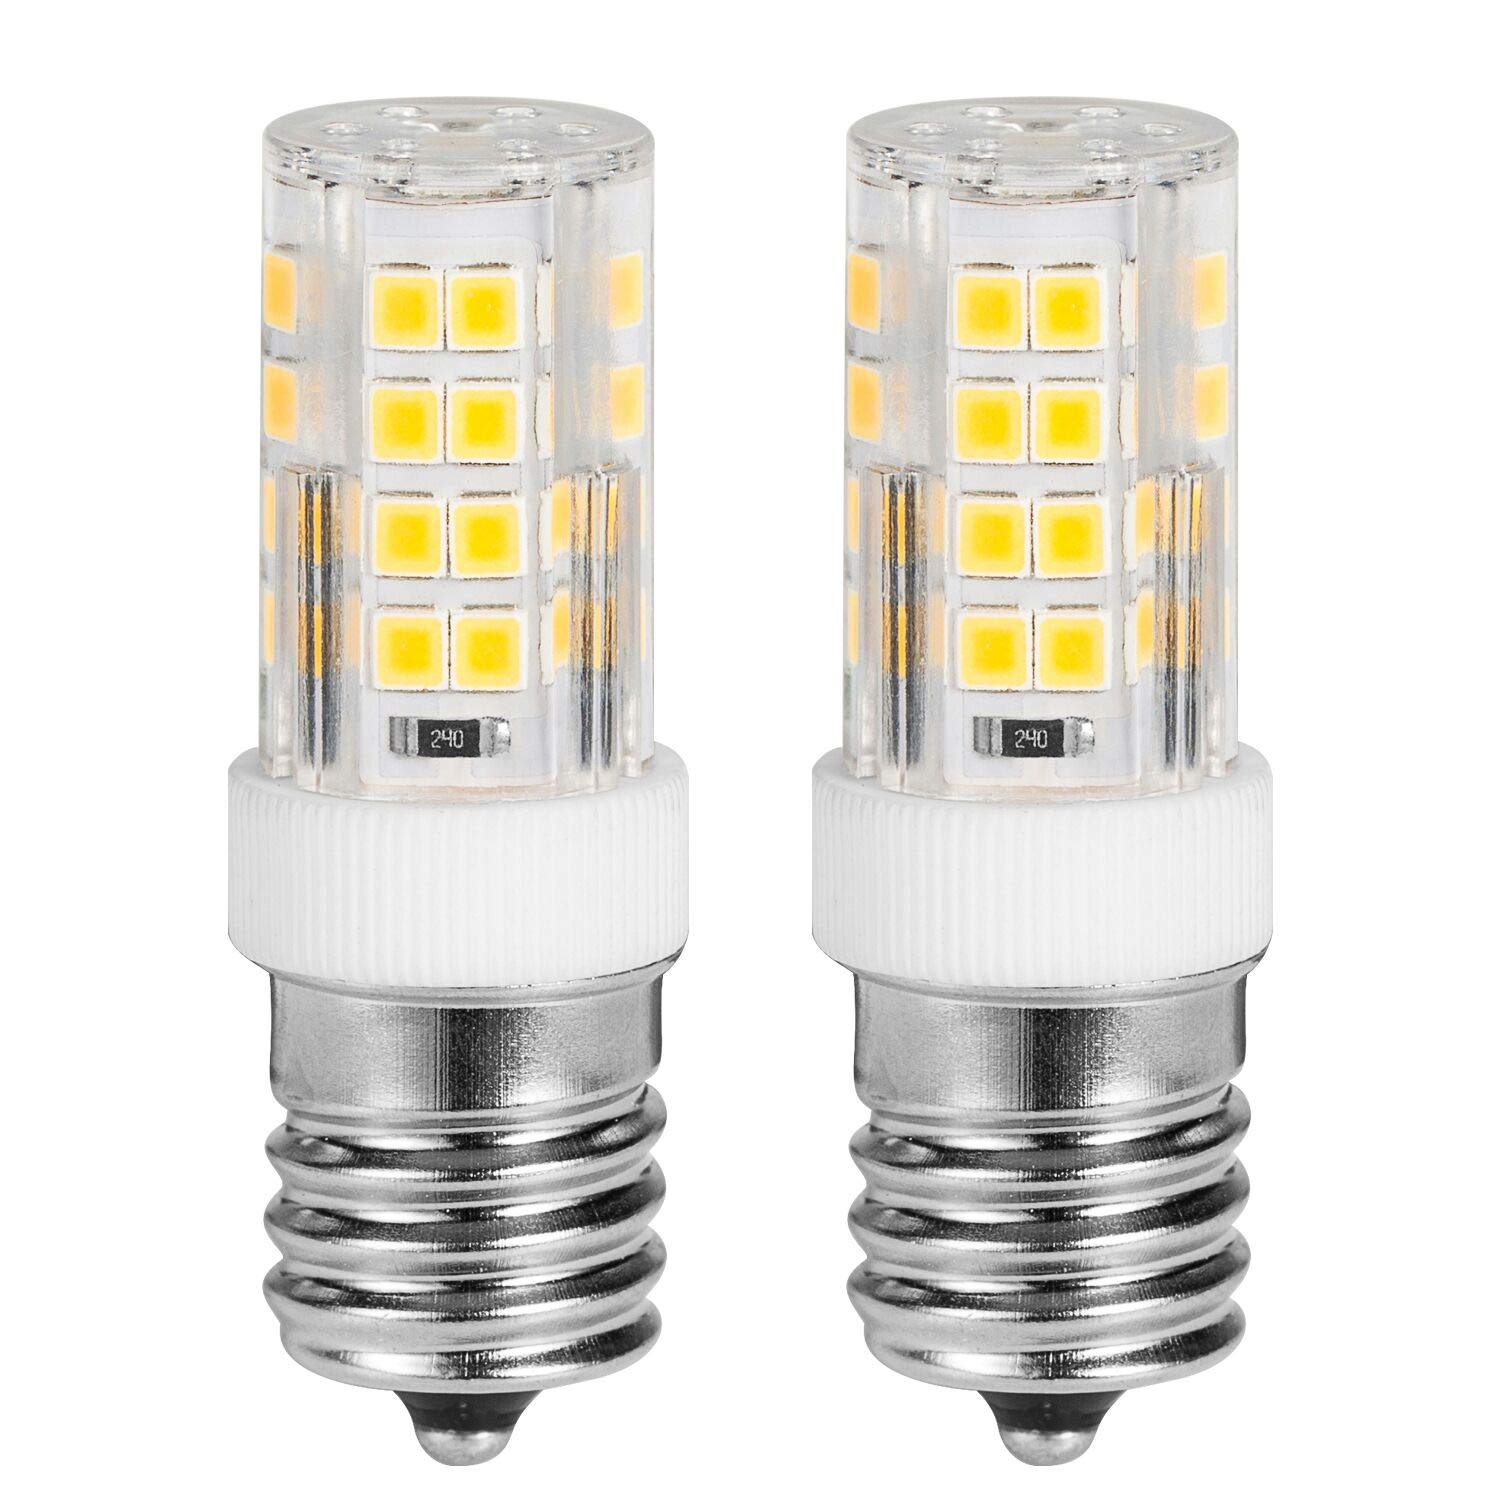
Maintenance Tips for Your Refrigerator Light

Now that you know how to remove the Maytag refrigerator light bulb cover, you may want to take steps to ensure that your light remains in optimal condition. Here are some quick tips:

  1. Regularly check the light bulb: Make it a habit to check whether the light works when the door opens. This can help you avoid sudden outages.
  2. Choose the right bulb: Use bulbs specifically designed for refrigerators. These are built to withstand cold temperatures.
  3. Avoid over-tightening: When replacing the bulb or cover, avoid overtightening screws or clips, as this can cause wear over time.
  4. Clean the cover: Regularly cleaning the light bulb cover can prevent dirt buildup and improve visibility.

Additional Resources

If you’re looking for more information about maintaining or troubleshooting your Maytag refrigerator, here are some helpful resources:

  • User Manual: Always refer to your manual for model-specific instructions.
  • Online forums: Websites like Reddit or appliance repair forums can provide advice from other users.
  • YouTube videos: Video guides often offer visual support that can clarify the steps.

Conclusion

In summary, knowing how to remove the Maytag refrigerator light bulb cover is not just about dealing with a single light bulb; it’s part of a larger understanding of home appliance maintenance. This straightforward process enhances your performance and efficiency, contributes to food safety, and improves your overall refrigerator experience. By following the steps outlined in this guide and adhering to the maintenance tips provided, you can ensure that your refrigerator operates at its best. So the next time you encounter an issue or need to replace a bulb, you’ll be well-equipped with the knowledge necessary to tackle the challenge confidently.

Whether you’re a seasoned handyman or a novice, the information we’ve covered here will enable you to handle the task efficiently. Remember that understanding the components of your appliances can empower you to troubleshoot and maintain your home effectively.

Posted in Household appliances, Lifestyle appliance | Tagged , , | Leave a comment

How to remove glass shelf from samsung refrigerator rf28hmedbsr?

Introduction:

How to remove glass shelf from samsung refrigerator rf28hmedbsr? Removing the glass shelf from your Samsung refrigerator model RF28HMEDBSR can be an essential task for various reasons, such as cleaning, replacing, or adjusting storage capacity. In this comprehensive guide, we will delve into the detailed process of removing the glass shelf, including tips and tricks to ensure you do it safely and efficiently.

Understanding the Structure of Your Refrigerator

Overview of the RF28HMEDBSR

The Samsung RF28HMEDBSR is a modern French-door refrigerator that features spacious storage options and innovative technologies. With adjustable shelving, you can customize your space according to your needs. The glass shelves are designed to provide a clear view of your food items, while also being easy to clean. Understanding the basic structure of your refrigerator will help you in the process of removing the glass shelf effectively.

Benefits of Glass Shelves

Glass shelves are a common choice for modern refrigerators due to their aesthetics and functionality. They offer several benefits, including:

  • Visibility: Glass shelves allow you to see your food items easily, making them more accessible.
  • Ease of Cleaning: Unlike wire shelves, glass shelves can be cleaned quickly and easily, reducing the buildup of grime and bacteria.
  • Weight Distribution: Glass shelves can often handle heavier loads than traditional shelves, giving you more flexibility in arranging your food items.

samsung refrigerator rf28hmedbsr

Preparation for Removing the Glass Shelf

Gather Necessary Tools

Before you start, ensure you have the right tools to facilitate the process. For removing the glass shelf from your Samsung RF28HMEDBSR, you typically won’t need any specialized tools. However, having the following on hand can be helpful:

  • Soft Cloth: For cleaning surfaces after removal.
  • Gloves: Optional, but can provide a better grip and keep your hands clean while handling the shelf.
  • Container: For any small items that might fall while removing the shelf.

Assess the Contents

Before removing the shelf, it’s crucial to assess what’s stored on it. Identify the items you need to remove first, as this will make the process smoother. Empty and organize the contents on the glass shelf to avoid any accidental spills or breakages. It’s advisable to clear the shelf completely as it minimizes the risk of damaging the shelf or other items in your refrigerator.

Step-by-Step Guide to Remove the Glass Shelf

Step 1: Open the Refrigerator Doors

To begin, open both refrigerator doors to gain easy access to all the shelves. Ensure that you have sufficient space to maneuver without obstruction. This will also give you a better view of how the glass shelf is mounted and the surrounding areas. Take a moment to observe how the shelf is positioned to understand the removal procedure better.

Step 2: Remove Items from the Glass Shelf

Carefully remove all items from the glass shelf you intend to take out. Start by lifting and placing food items gently on a countertop or another surface, ensuring that heavy items are removed first, followed by lighter ones to prevent any accidents. Avoid rushing through this step, as doing so may lead to dropping or spilling items.

Step 3: Check for Shelf Supports

Before attempting to remove the shelf, take a closer look at where the shelf is supported within the refrigerator. Most glass shelves in Samsung refrigerators are supported by brackets or clips on both sides. These supports keep the shelf stable and can sometimes be adjusted. Confirm that any supports do not need adjustment prior to removal.

Step 4: Lifting the Glass Shelf

Once all items are cleared and you’ve assessed the support system, it’s time to lift the shelf. Grasp the front edge of the glass shelf gently but firmly. In most cases, you’ll want to lift the shelf slightly upward while simultaneously sliding it toward you. The glass will typically tilt at an angle, which eases the removal from the support brackets.

Step 5: Tilt and Remove

As you begin to tilt the shelf, pay attention to the side brackets. Depending on your refrigerator’s design, some models may have clips that hold the glass in place. If you encounter resistance, stop and reassess. Ensure that you are not forcing the shelf, as this can lead to breaking the glass or damaging the supports.

Step 6: Place the Shelf in a Safe Location

Once the glass shelf is free, place it gently on a soft and stable surface. Avoid placing it on the floor or hard surfaces where it might get scratched or damaged. If you plan to clean it, using a soft cloth or sponge with mild detergent will be effective.

samsung refrigerator rf28hmedbsr

Cleaning the Glass Shelf

Best Practices for Cleaning

Before reinstalling, it’s a great idea to clean the glass shelf. Here are some tips:

  • Use Mild Soap and Water: Mix a few drops of mild dish soap with warm water. Avoid using abrasive cleaners, as they can scratch the glass.
  • Soft Cloths or Sponges: Use these to wipe the surface gently, ensuring you reach the edges and corners where spills may accumulate.
  • Avoid Soaking: While cleaning, be careful not to soak the glass. Be sure to use a damp cloth rather than a dripping wet one.

Drying the Shelf

After cleaning, dry the glass shelf thoroughly with a clean, dry cloth. This will prevent water spots and ensure that the glass is ready for reinstallation. Give it sufficient time to air dry as well, particularly if you’ve cleaned it with abundant water.

Reinstalling the Glass Shelf

Step 1: Align the Shelf with Supports

After cleaning, you can now reinstall the glass shelf once it’s completely dry. Align the back of the shelf with the appropriate support brackets inside your refrigerator. This may require you to tilt the shelf slightly for a proper fit.

Step 2: Lower the Shelf into Place

Once aligned, gently push the glass shelf back into its original position. Ensure that you are equally pressing down on both sides to avoid cracking the glass. Watch for the side clips or brackets to fit into their designated slots.

Step 3: Test Stability

After installing the shelf, give it a slight shake to check its stability. Make sure it’s firmly in place before beginning to place items back on it. If there’s a wobble or instability, remove the shelf again and realign it until it fits securely.

Step 4: Return the Items

Once you verify that the shelf is reinstalled correctly, you can begin placing your items back onto the shelf. Organize them in a manner that optimizes space while ensuring that heavier items are placed on the lower shelves for better weight distribution.

  samsung refrigerator rf28hmedbsrTroubleshooting Common Issues

Broken or Cracked Shelf

If your glass shelf is broken or cracked, it’s crucial to replace it rather than attempt a repair. Contact Samsung customer service or your nearest appliance dealer to find a suitable replacement. Always operate with caution when handling broken glass.

Difficulty Removing Shelf

If you’re having trouble removing the glass shelf, double-check for additional supports or clips that may be holding it in place. Sometimes, a gentle wiggle or light pressure can help free the shelf without damage.

Conclusion

How to remove glass shelf from samsung refrigerator rf28hmedbsr?

Removing a glass shelf from your Samsung refrigerator RF28HMEDBSR may seem daunting, but with the right steps and precautions, it is a manageable task. By following this guide and ensuring you take the necessary steps to assess, remove, clean, and reinstall your shelf, you can maintain a functional and organized refrigerator. Whether you’re cleaning, replacing, or simply rearranging, understanding how to remove the glass shelf from the Samsung refrigerator RF28HMEDBSR will certainly enhance your appliance’s performance. Always prioritize safety and care throughout the process to ensure the longevity of your refrigerator and its components.

Posted in Household appliances, Lifestyle appliance | Tagged , , | Leave a comment